
This Fourth of July, go beyond cherry pie, strawberry shortcake, and those gimmicky red, white, and blue cupcakes. Instead, wow your friends and family with this delicious, patriotic honeycomb cake made of puff pastry, whipped cream, and fresh fruit — no artificial coloring needed!
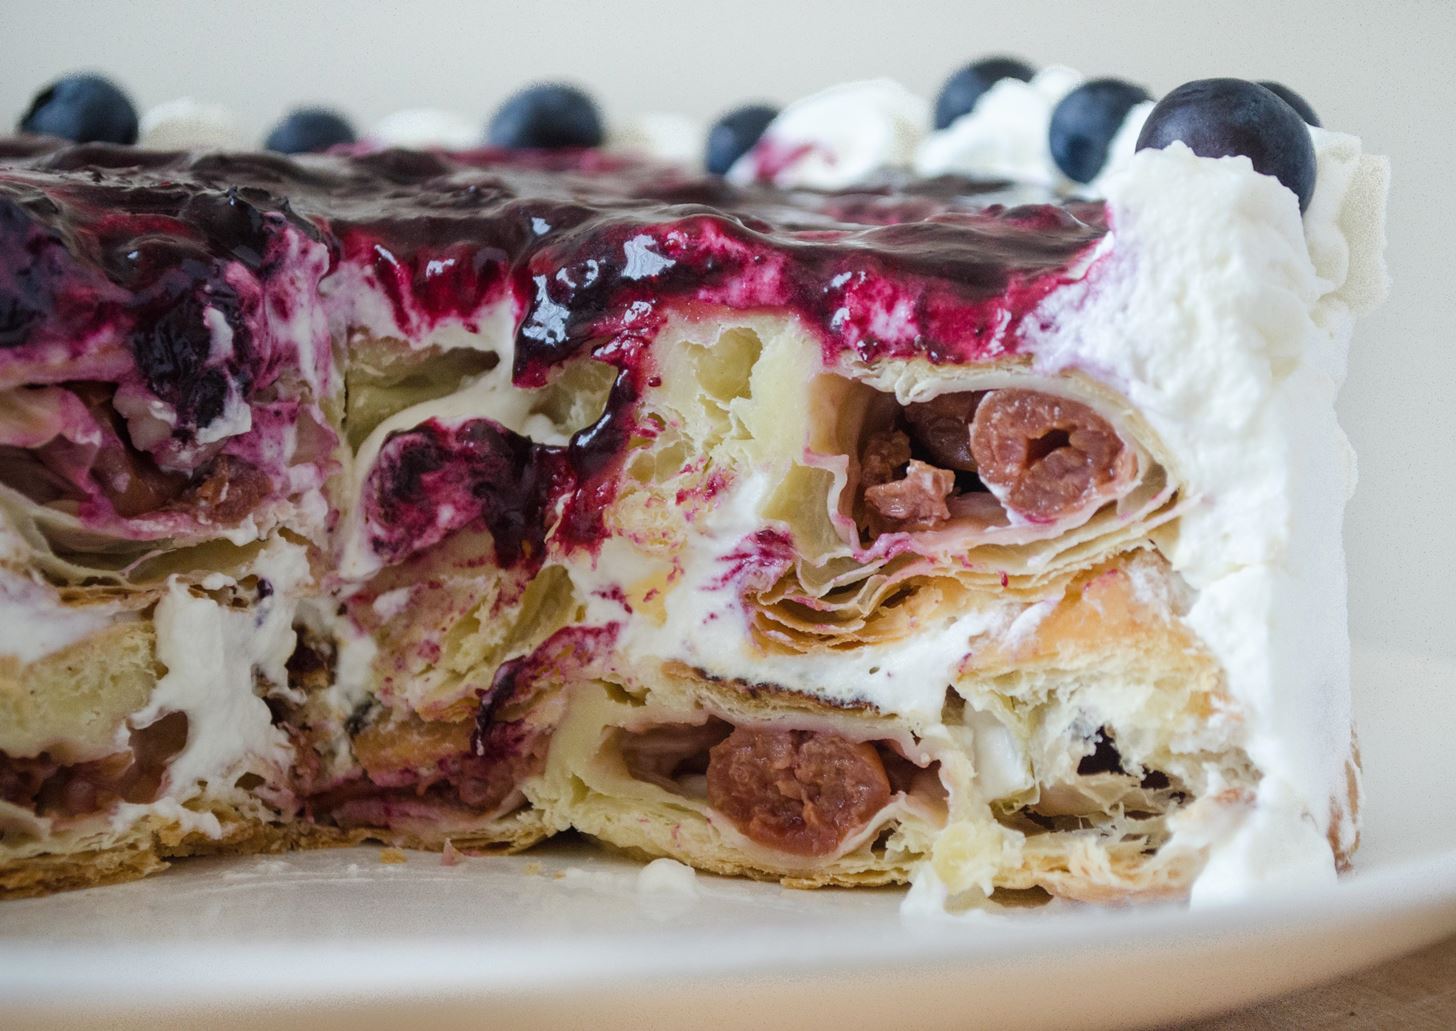
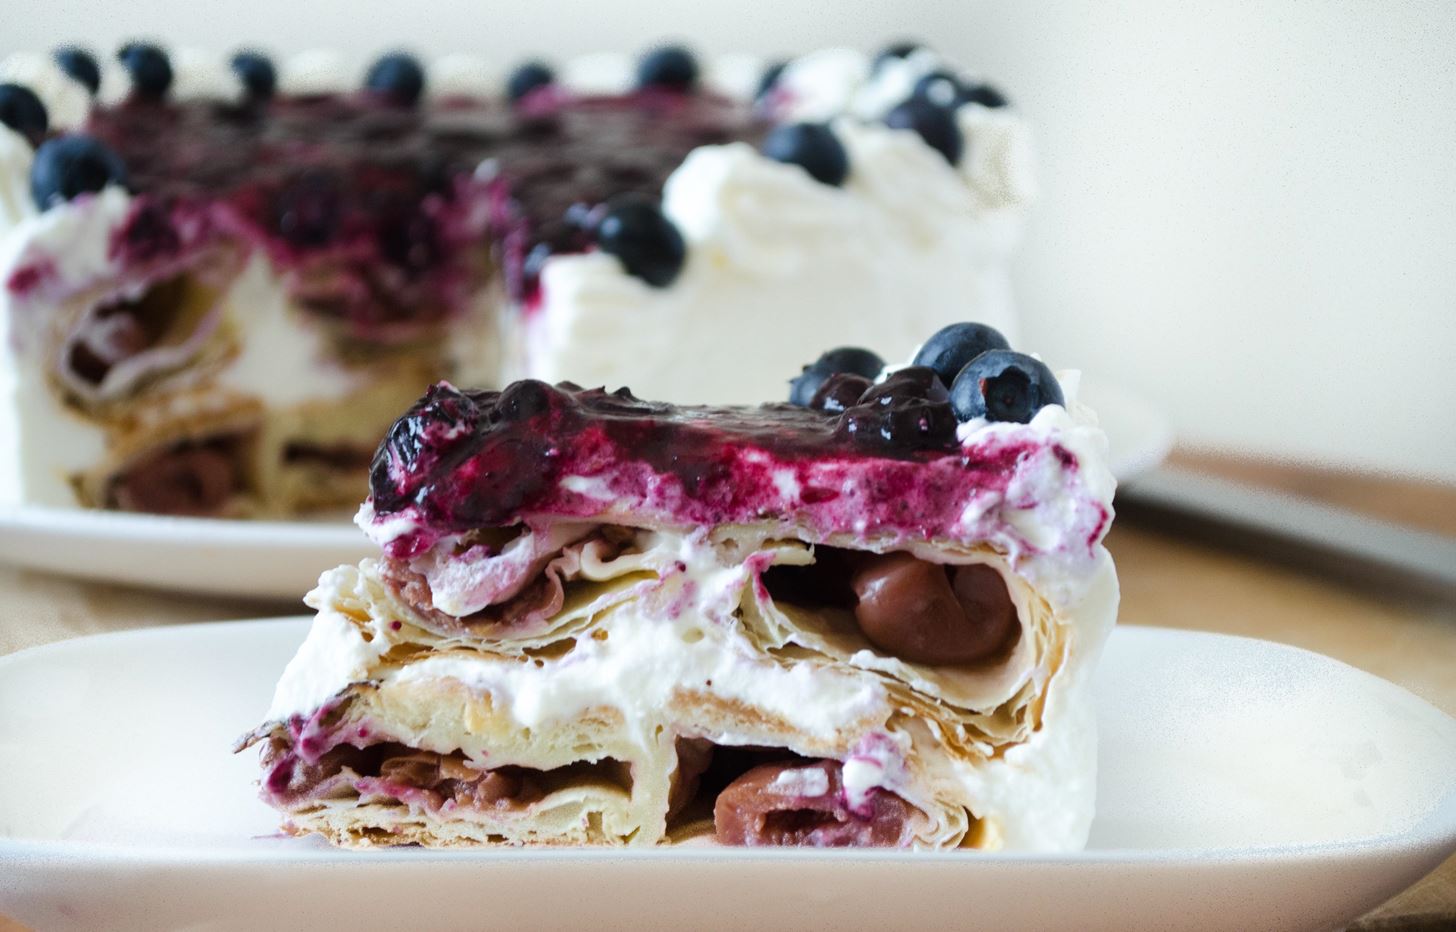
Honeycomb cake is an innovative way to make something different out of puff pastry dough. It's made by encasing red, tart cherries in thawed pre-made pastry dough. When the dough puffs up in the oven, the cherries create pockets in the cake, thus giving it the name "honeycomb" cake.
This dessert is an adapted puff pastry version of a Russian cherry "Monastery Hut" cake. It's easy to make and looks really cool after it's baked, so follow along to see how it's done.
What You'll Need
The original recipe for this cake was created by Marina from Let the Baking Begin Blog. I adapted the recipe to make it celebration-friendly for Independence Day.
Ingredients:
- 2 puff pastry sheets (1 box of Pepperidge Farm Puff Pastry Sheets)
- 1 can tart pitted cherries, drained (you can use fresh cherries instead for a brighter red look)
- 2 c. heavy whipping cream
- 2 Tbsp. sugar
- 2 c. fresh blueberries
Supplies:
- 2 - 8" or 9" cake pans
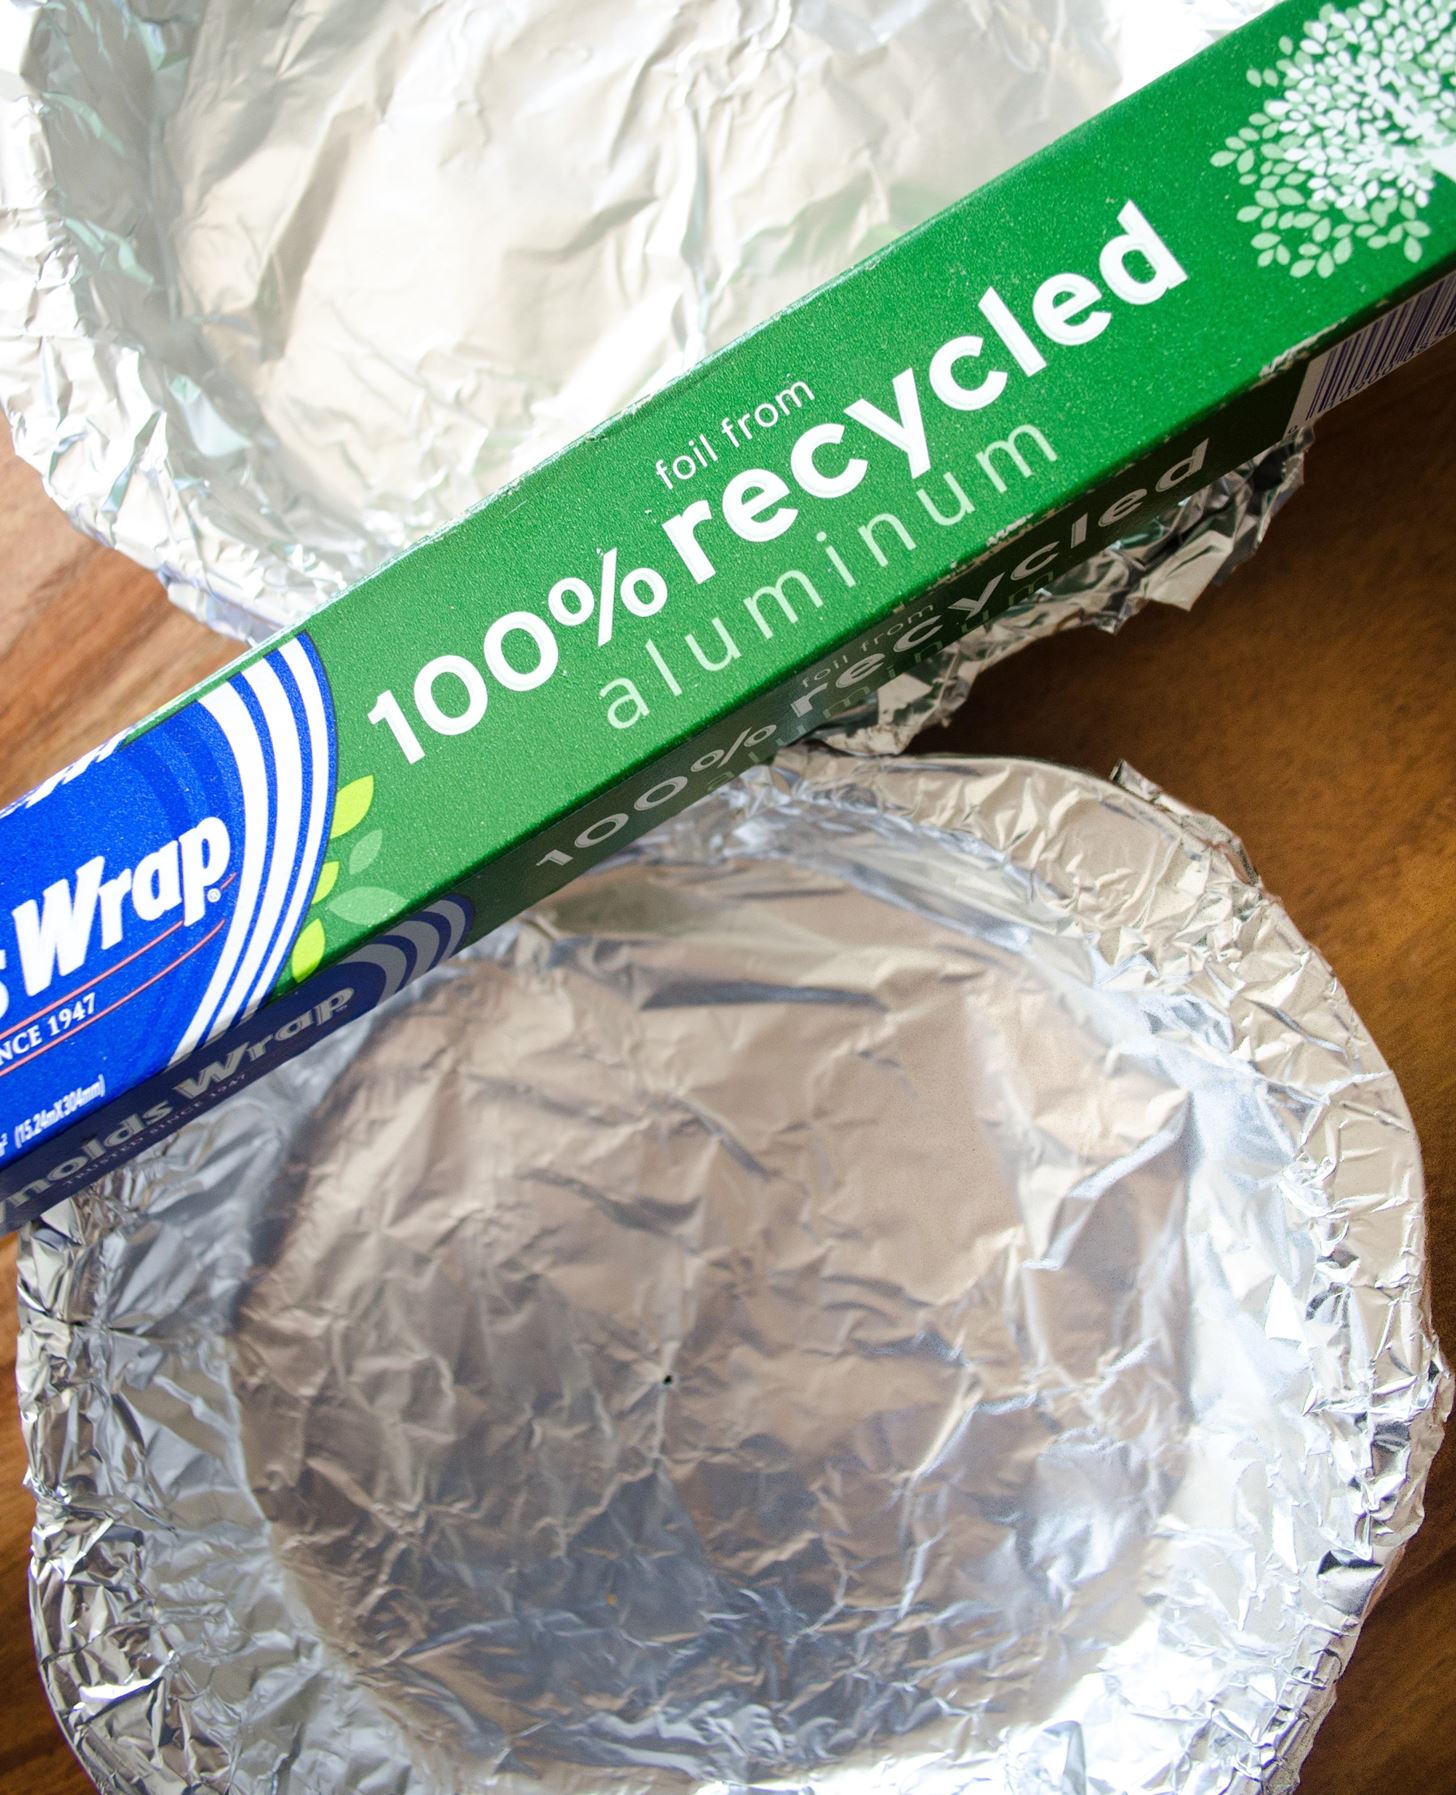
- aluminum foil
- rolling pin
Step 1: Thaw Pastry Sheets
Remove the puff pastry box from the freezer and set it on the counter to thaw. It should take no longer than 30 minutes until the sheets are thawed out enough to unfold.
Step 2: Roll, Cut & Fill the Pastry
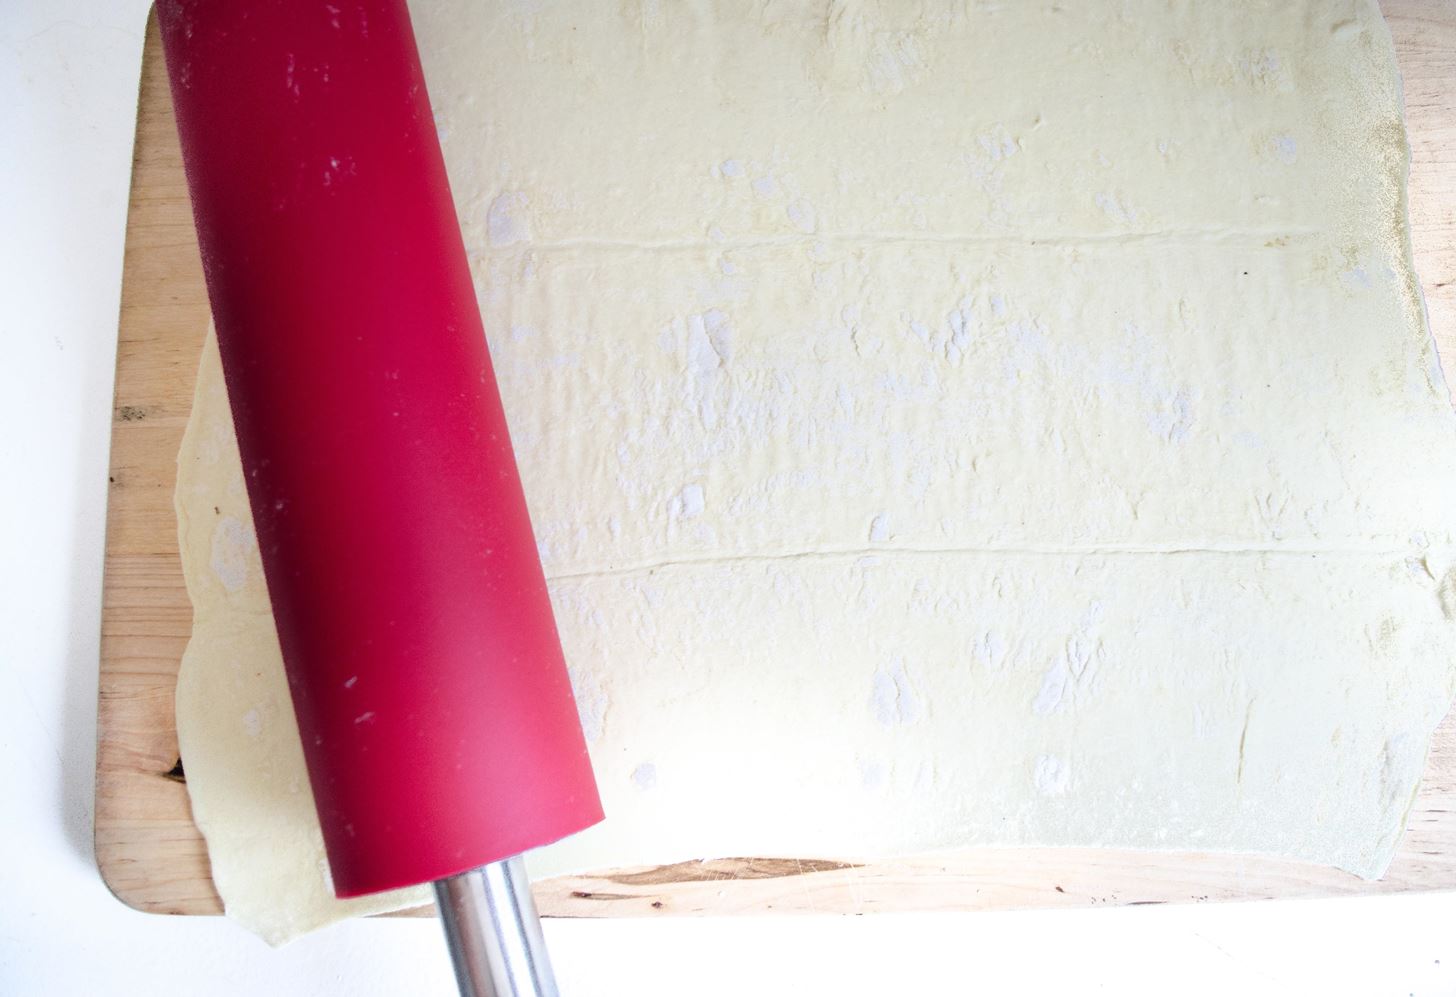
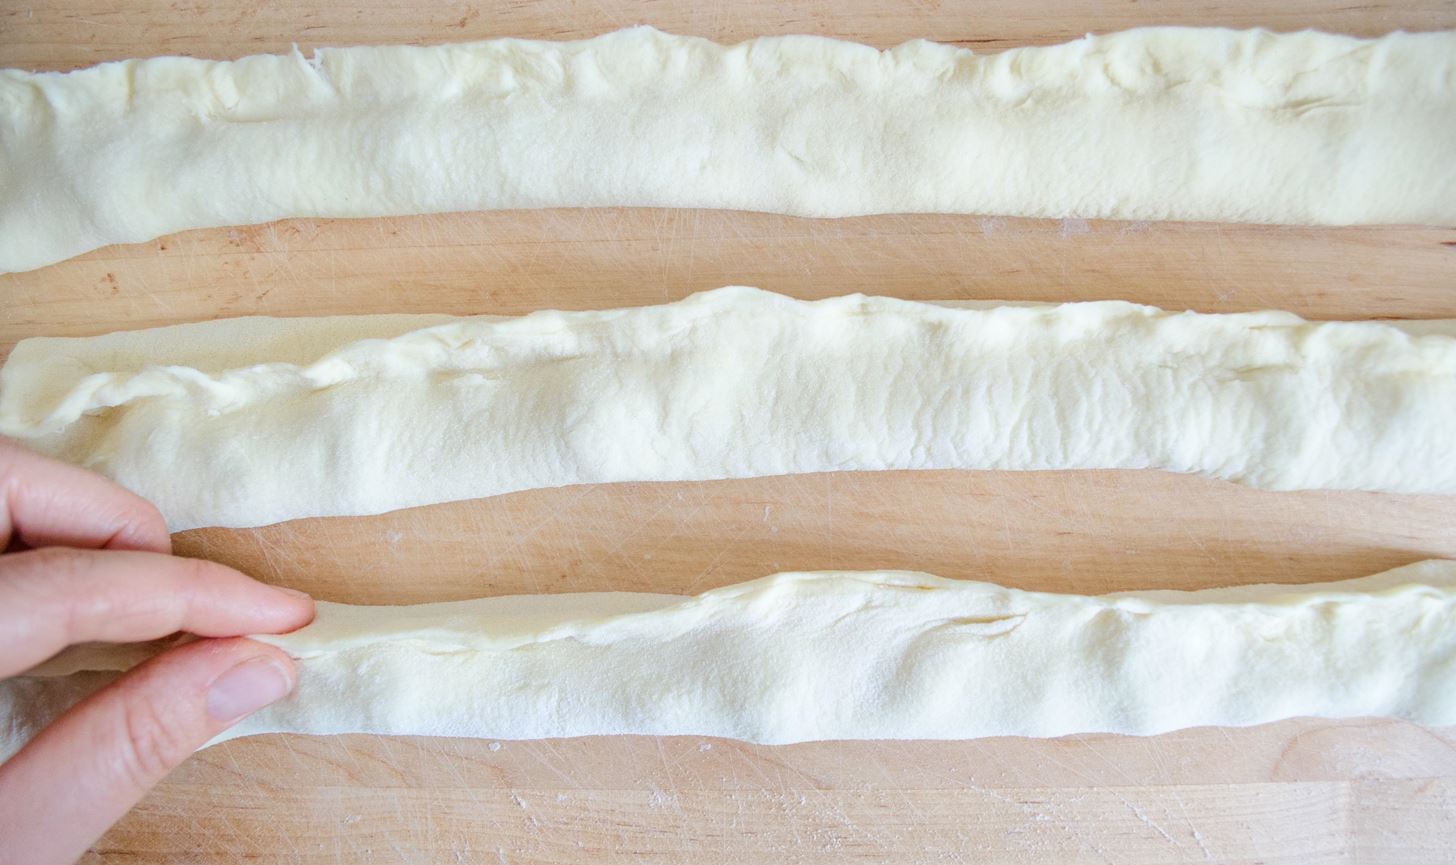
Use a rolling pin to roll each sheet into about 10 x 18 inches.
Once the sheets are rolled, cut each them into three long strips. You should have a total of six strips. Place cherries in a line along the middle of each strip. Again, if you want your cherries to look a brighter red, try using fresh cherries instead of canned — it's totally up to you.
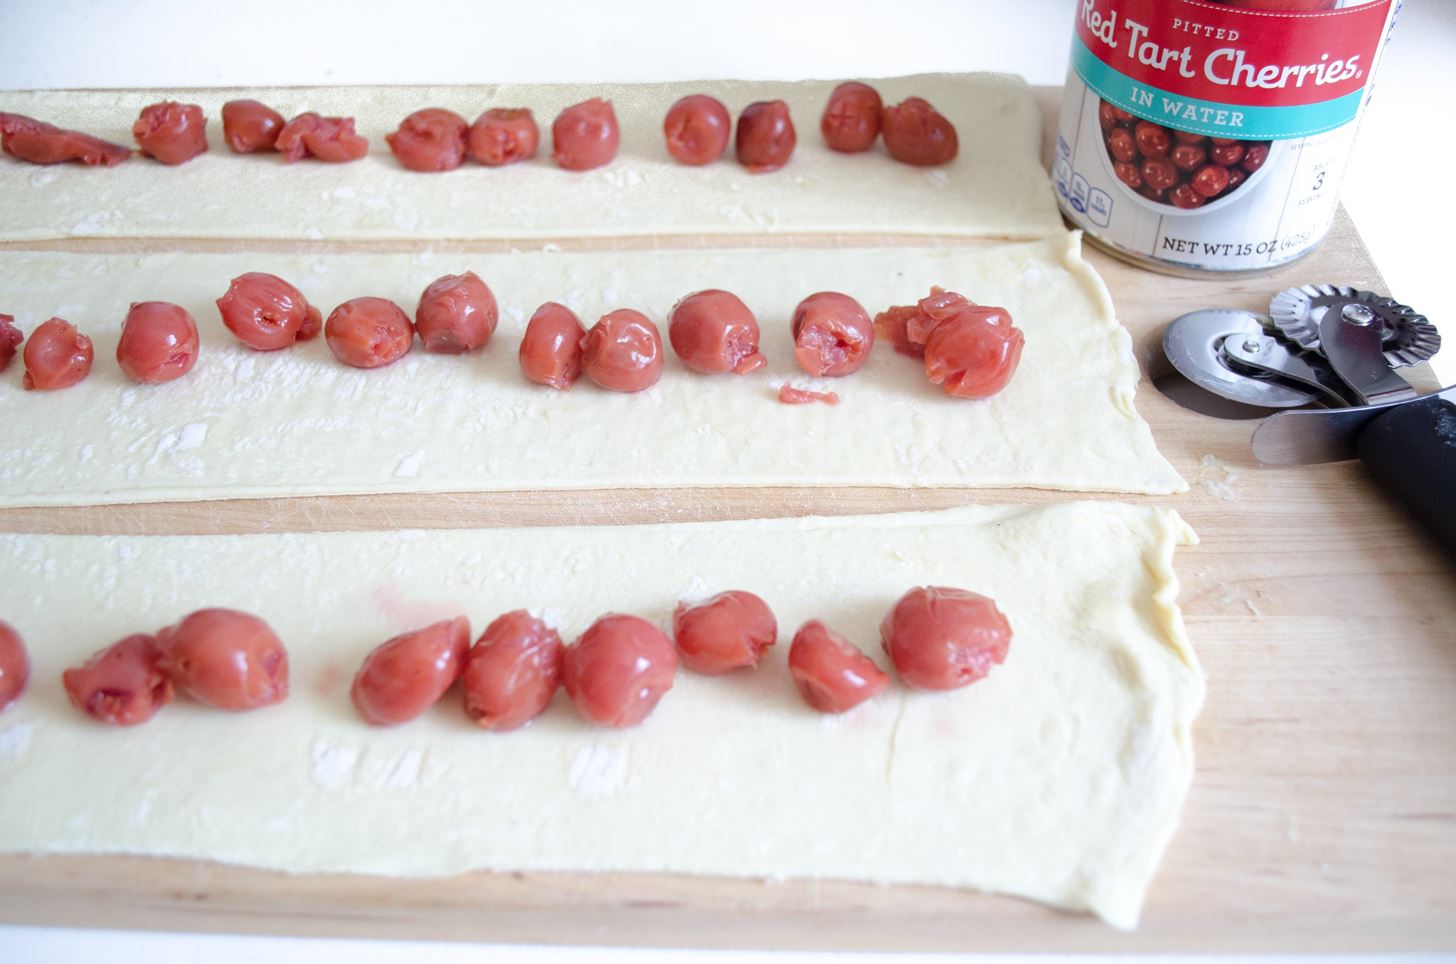
Pinch the edges of the pastry together to enclose the cherries inside the strips.
Step 3: Coil into 2 Cake Pans
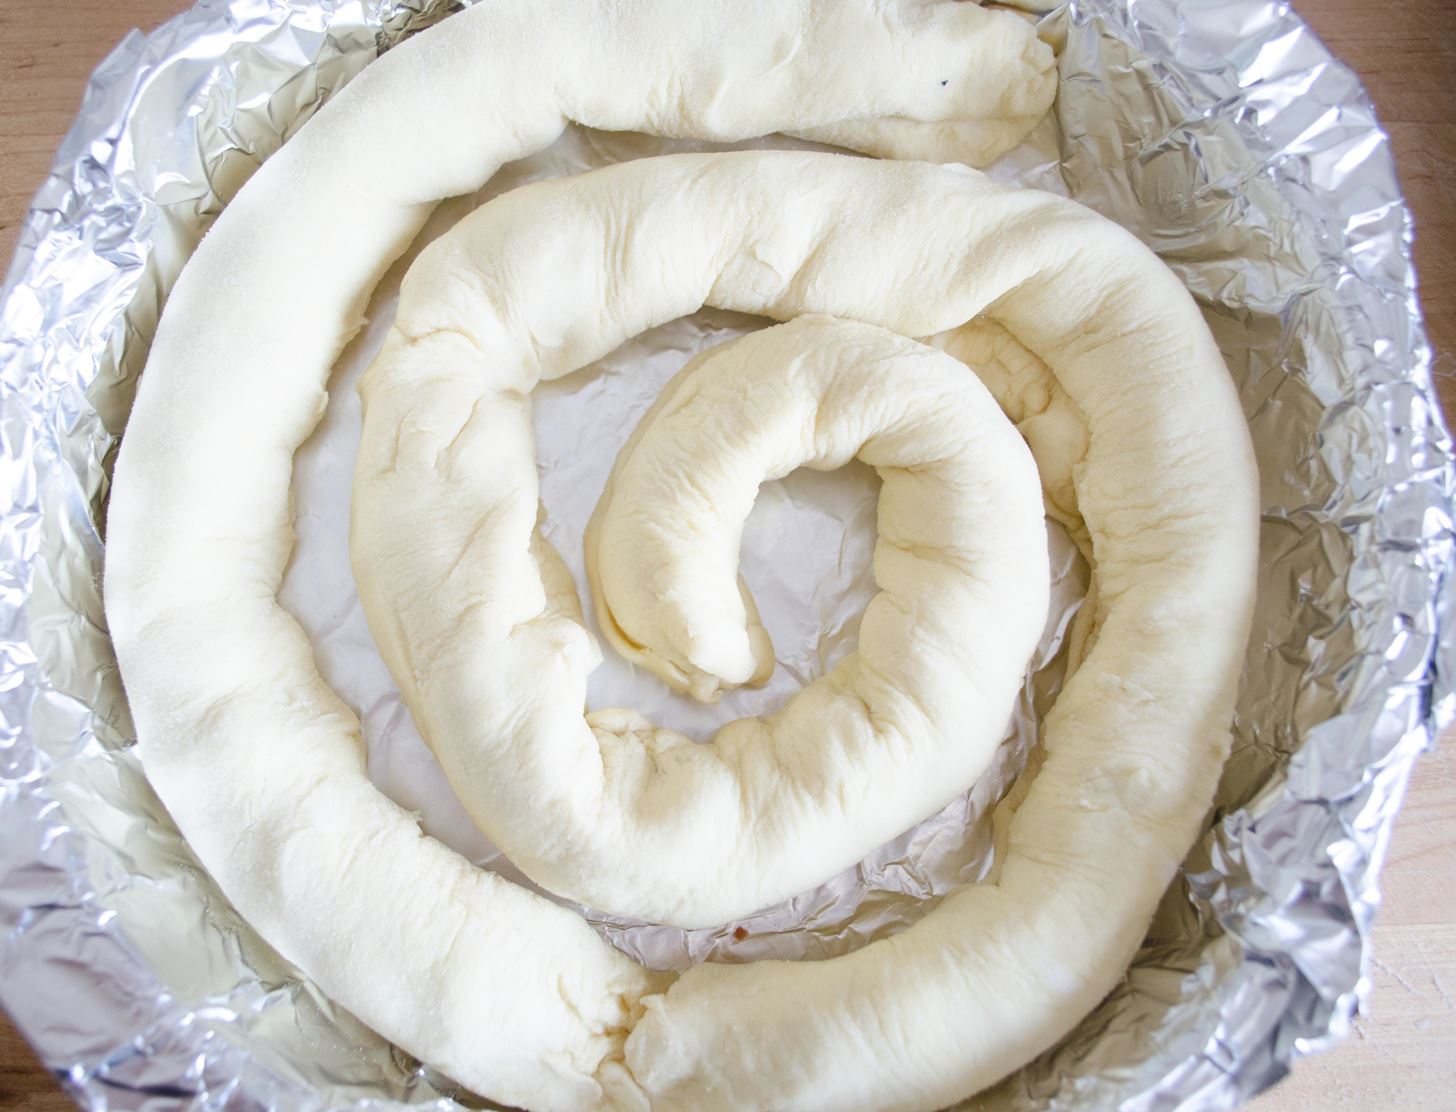
Line two cake pans with foil.
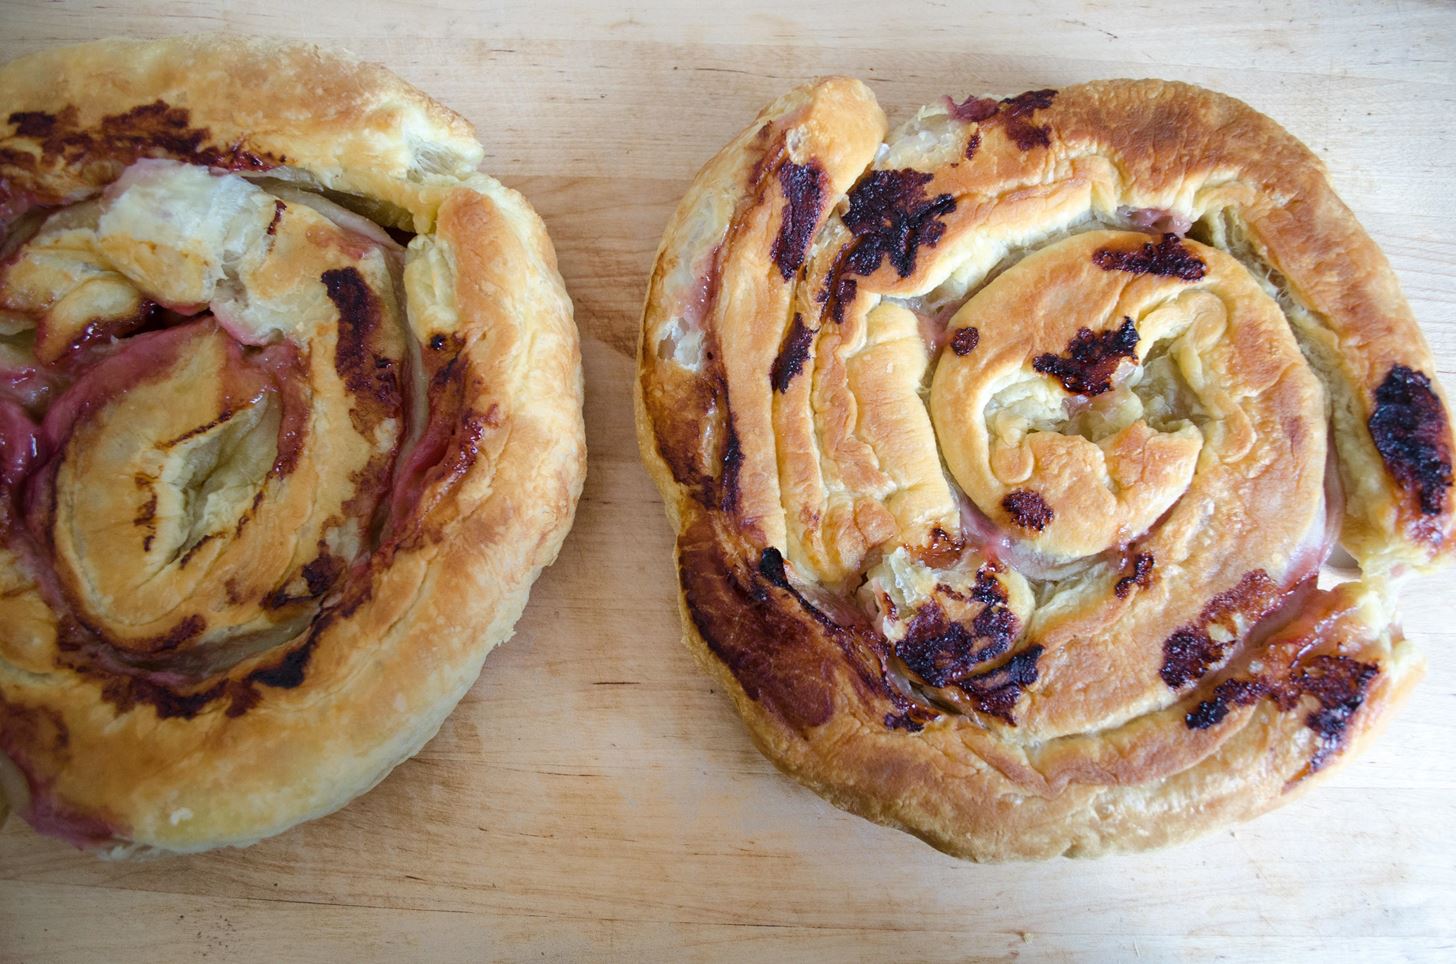
Attach three strips of pastry together. Then, coil the long strip into your round cake pan with the seam side down. Repeat with the remaining three strips and place in the second cake pan.
Step 4: Bake & Cool
Bake the pastry in an oven preheated to 400ºF for 30 minutes or until the dough is puffed up and golden.
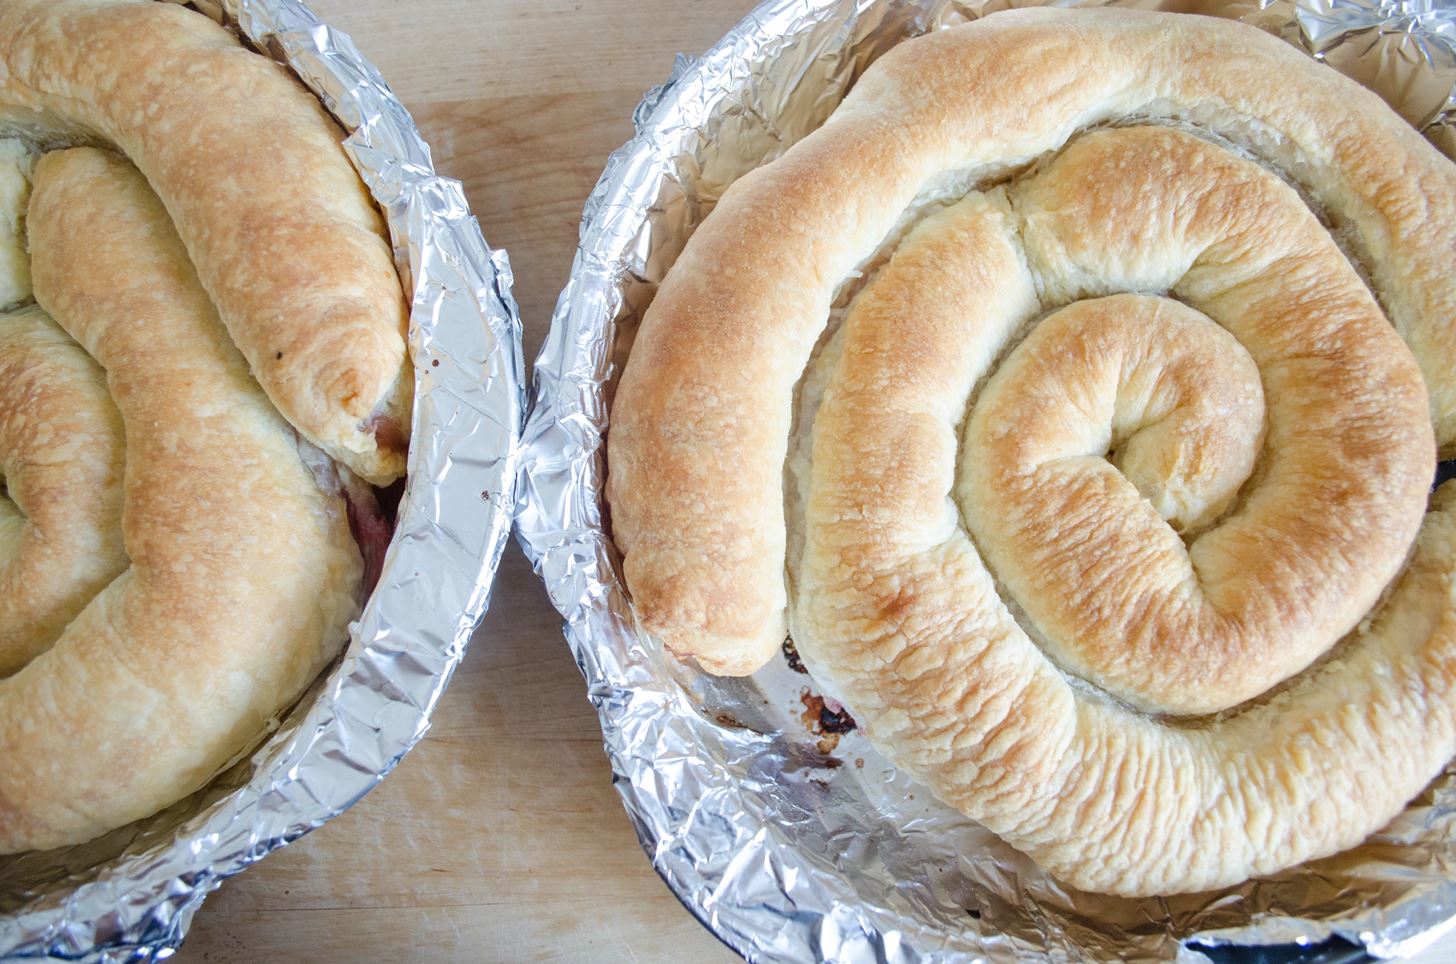
While the pastry is still warm, invert the cake pans upside down and separate the pan from the foil. Then, gently peel the foil off the bottom of the pastry. Allow the "cakes" to cool completely before topping.
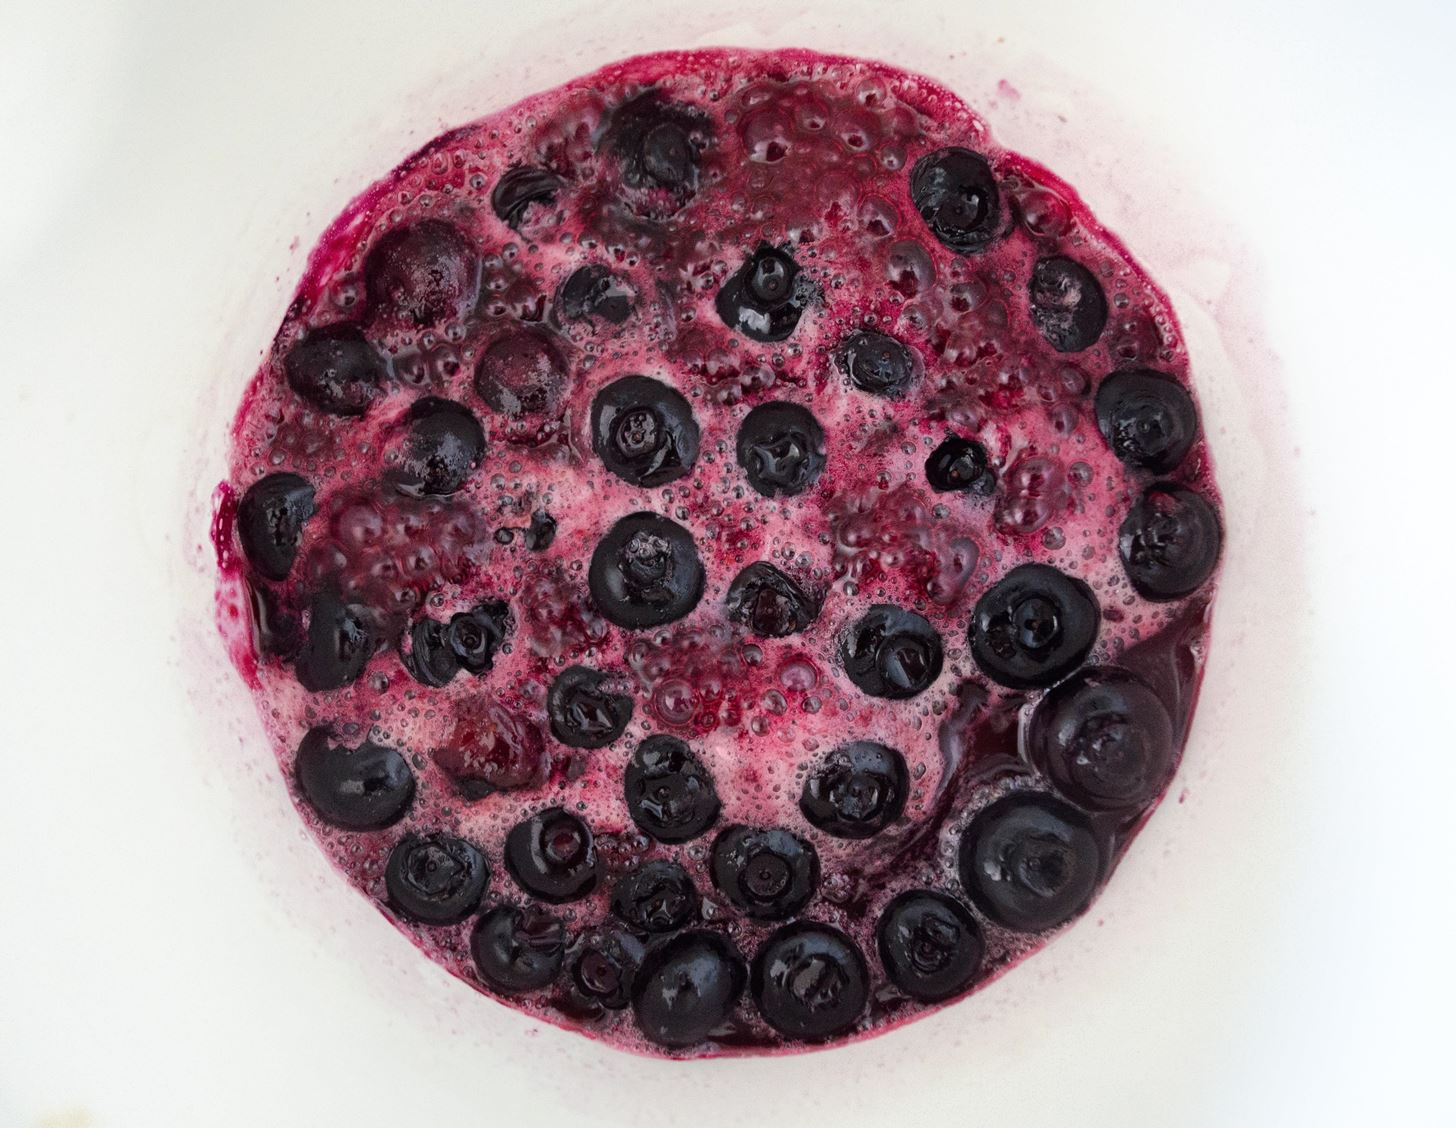
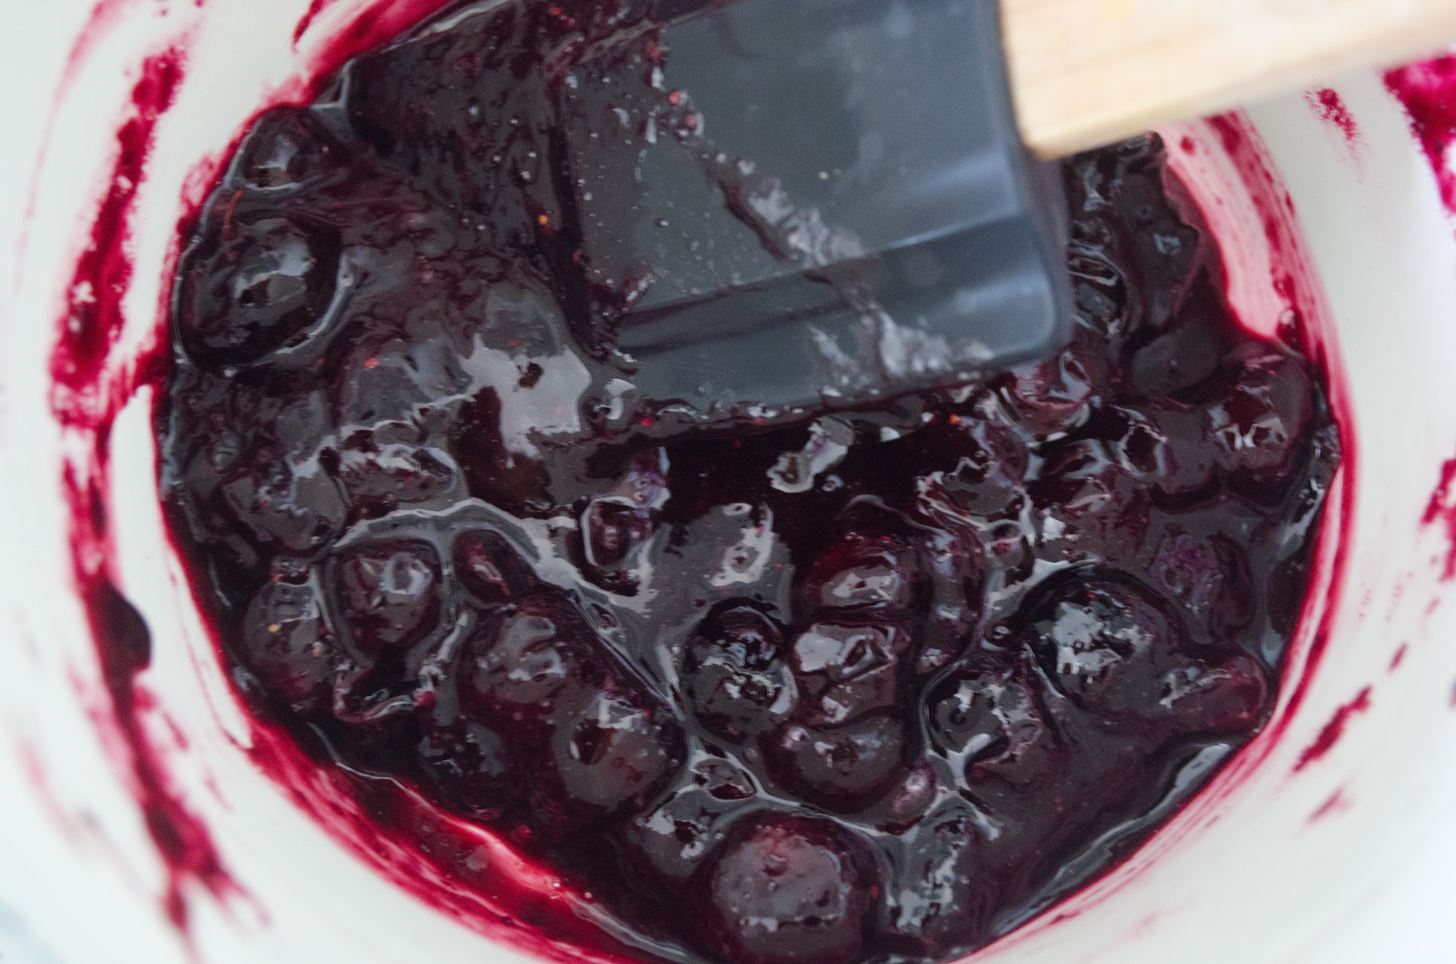
Step 5: Make the Blueberry Topping
Begin by making the blueberry compote. To make the compote, I followed the recipe and directions for A Sweet Pea Chef's easy blueberry compote using fresh blueberries instead of frozen. (Don't forget to save some of those blueberries for the top of the cake.)
Step 6: Then the Whipped Cream
Next, make the whipped cream. In a large mixing bowl, combine the heavy whipping cream, sugar, and vanilla extract. Use a whisk to whip the cream until it reaches stiff peak, then refrigerate the whipped cream until ready to use.
For a more in-depth tutorial on how to make whipped cream, check out The Kitchn's whipped cream cooking lesson. Or, if you're not very good at whisking, you can just use a mason jar to shake some whipped cream into shape.

Step 7: Assemble the Honeycomb Cake
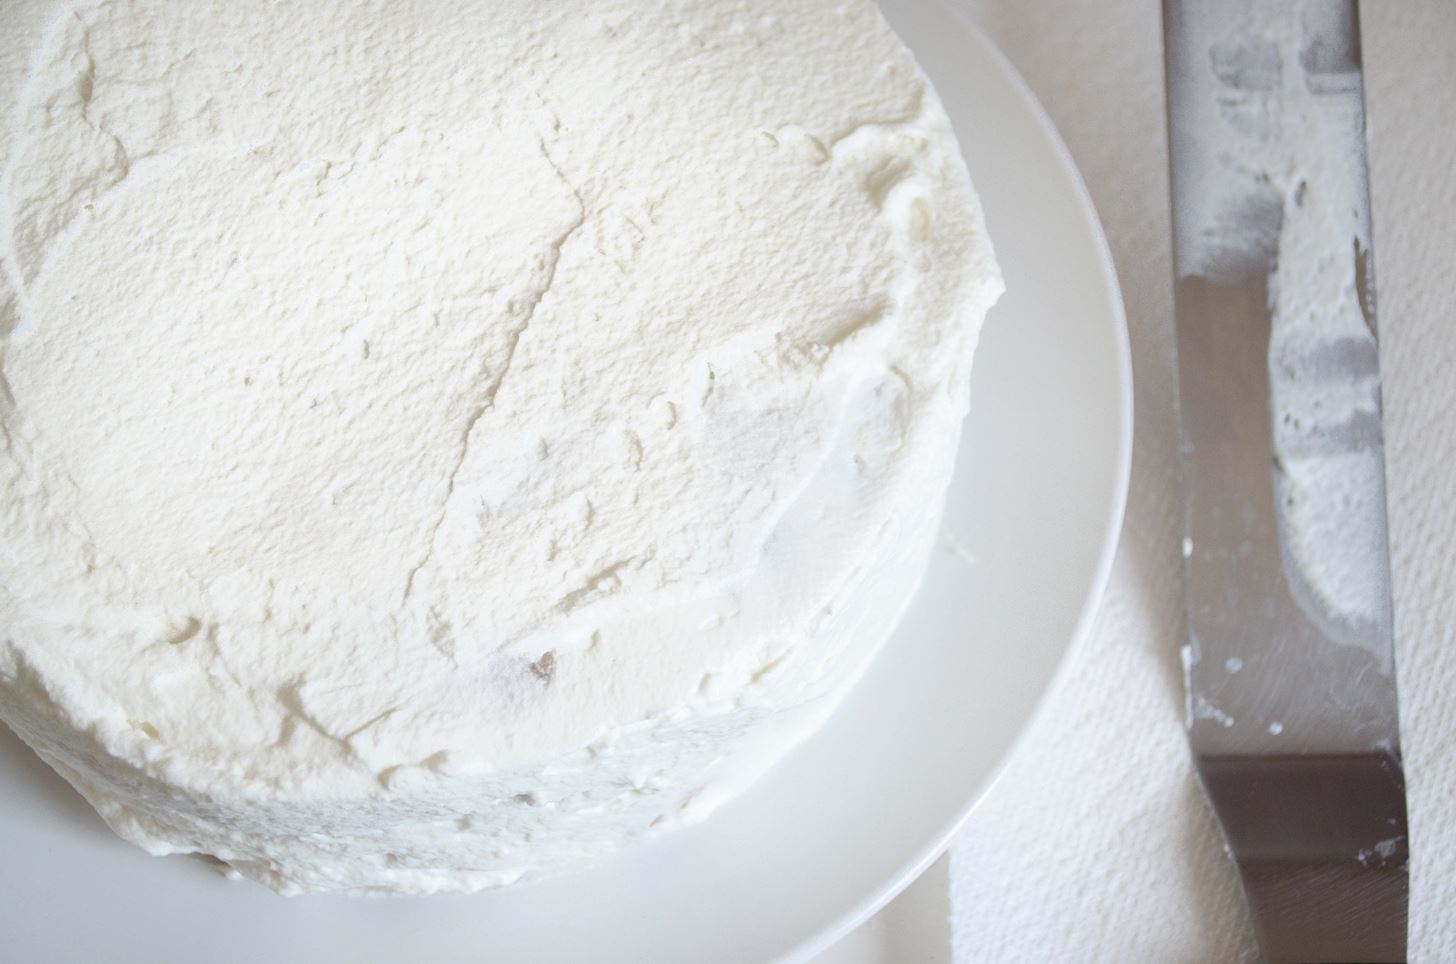
Spread a ½ cup of whipped cream over the first layer of pastry. Then, gently place the second layer on top.

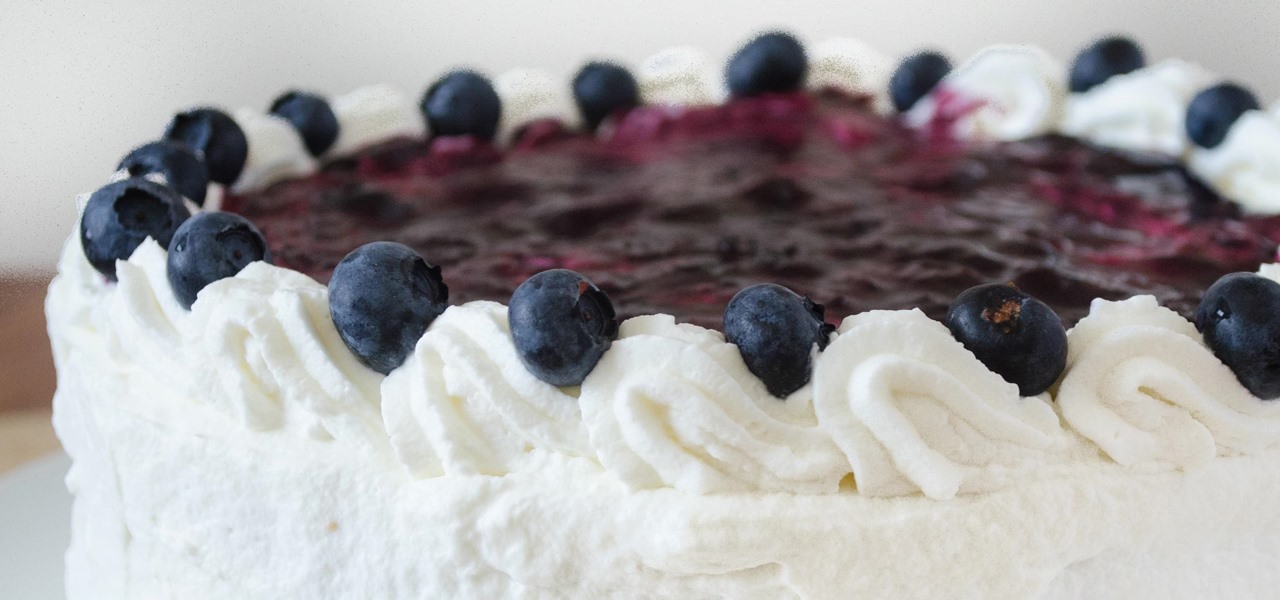
Use the rest of the whipped cream to cover the outside of the honeycomb cake, but you can reserve a little bit of that cream if you wish to get fancy by showing off some piping skills.
Next, add the blueberry compote to the center of the cake and line fresh blueberries along the edges.
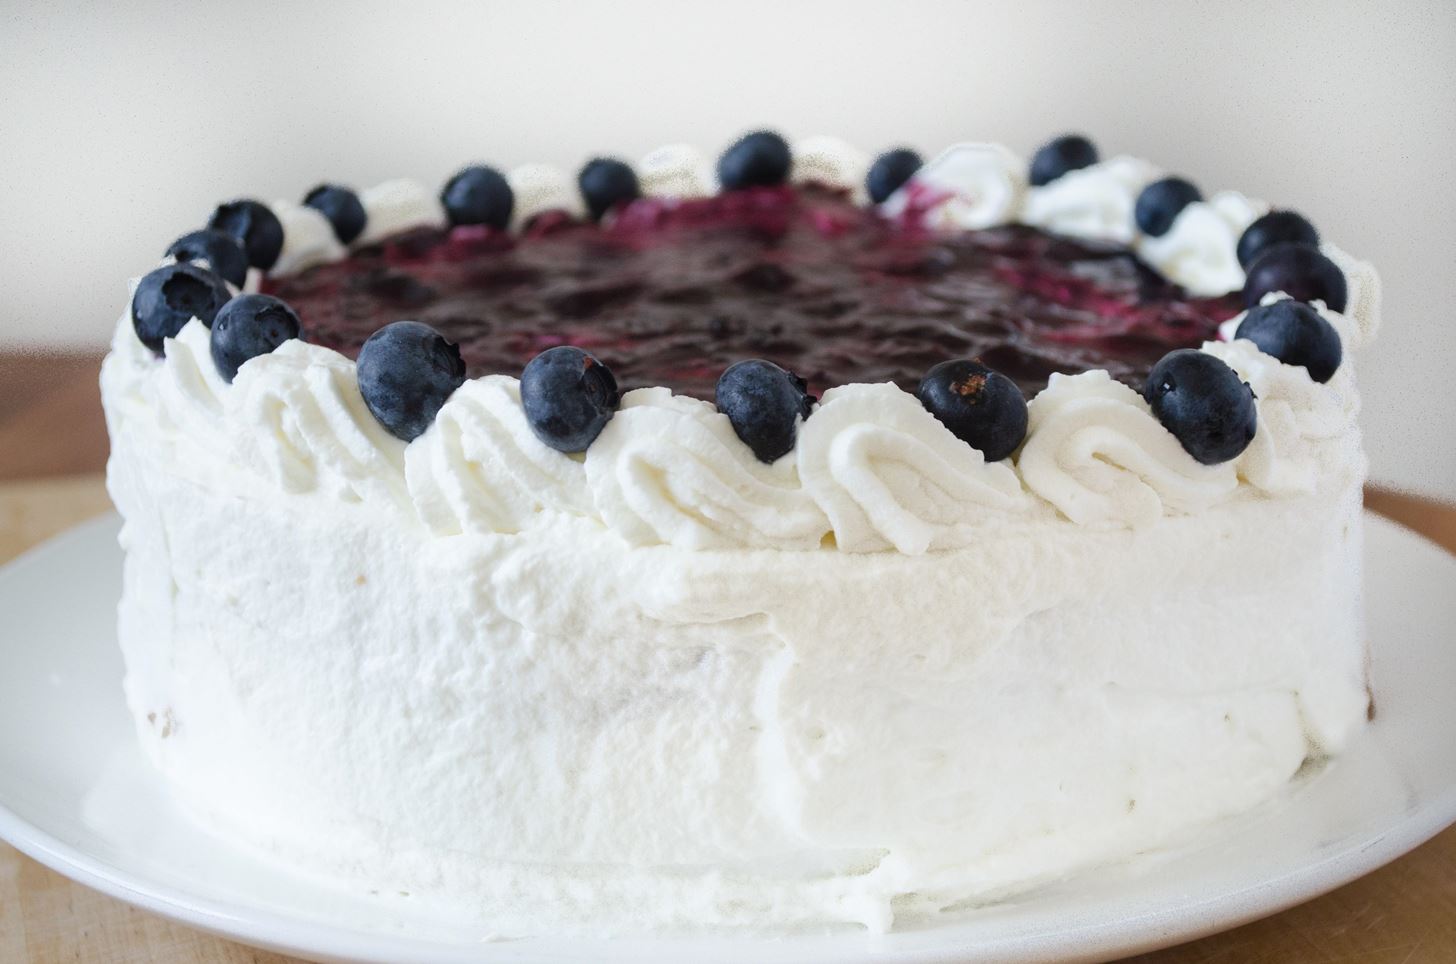
Slice, Serve & Celebrate!
From the outside, this cake looks pretty average. Once it's sliced, however, there's nothing average about it. Everyone at your July Fourth party is going to be blown away by the inside of this cake. With the simple instructions above, you can light up everyone's taste buds as the fireworks light up the night sky.
Happy Fourth of July, everyone!
More 4th of July Food Hacks:
Just updated your iPhone? You'll find new emoji, enhanced security, podcast transcripts, Apple Cash virtual numbers, and other useful features. There are even new additions hidden within Safari. Find out what's new and changed on your iPhone with the iOS 17.4 update.


Be the First to Comment
Share Your Thoughts