
Watching an ice cream pro build you a custom frozen treat mixed with your favorite fruit, candy, and/or toppings makes buying a cone even more exciting. But why go out for ice cream when you can create your favorite combinations in your own kitchen?
While you might not have an expensive frozen slab for ice cream topping your kitchen counters, you can mimic the creamy consistency and customizable options from Cold Stone Creamery and Marble Slab any time you're craving it. Best of all, you don't need a heavy stone slab—just a frying pan and a few other common tools.
So why a makeshift frozen slab? Because it gives you the ability to mix in everything and anything you want: chocolate chips, banana slices, toffee, fresh berries, coconut flakes. The possibilities and flavors are endless.
Mixing up your very own batch doesn't require any cumbersome tools or kitchen mastery; you just need a cold surface on which to work. Some clever home ice cream makers go out and actually buy a stone slab from the home improvement store, but in the video below, NightHawkInLight shows you an even easier way.
As stated in the video, you'll need the following:
- 2 dry towels
- baking pan deep enough to hold the ice
- block of dry ice
- vodka (or rubbing alcohol)
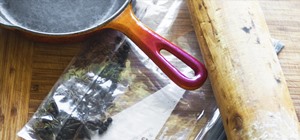
- cast-iron frying pan (a square one is used in the video, but a regular round one is fine)
- your favorite ice cream recipe
- your favorite fruits, candies, and toppings to mix in
- 2 metal spatulas
Make sure you have everything ready to go before you begin the process to make sure you aren't running around finding ingredients or utensils.
Step 1: Set the Towel & Pan
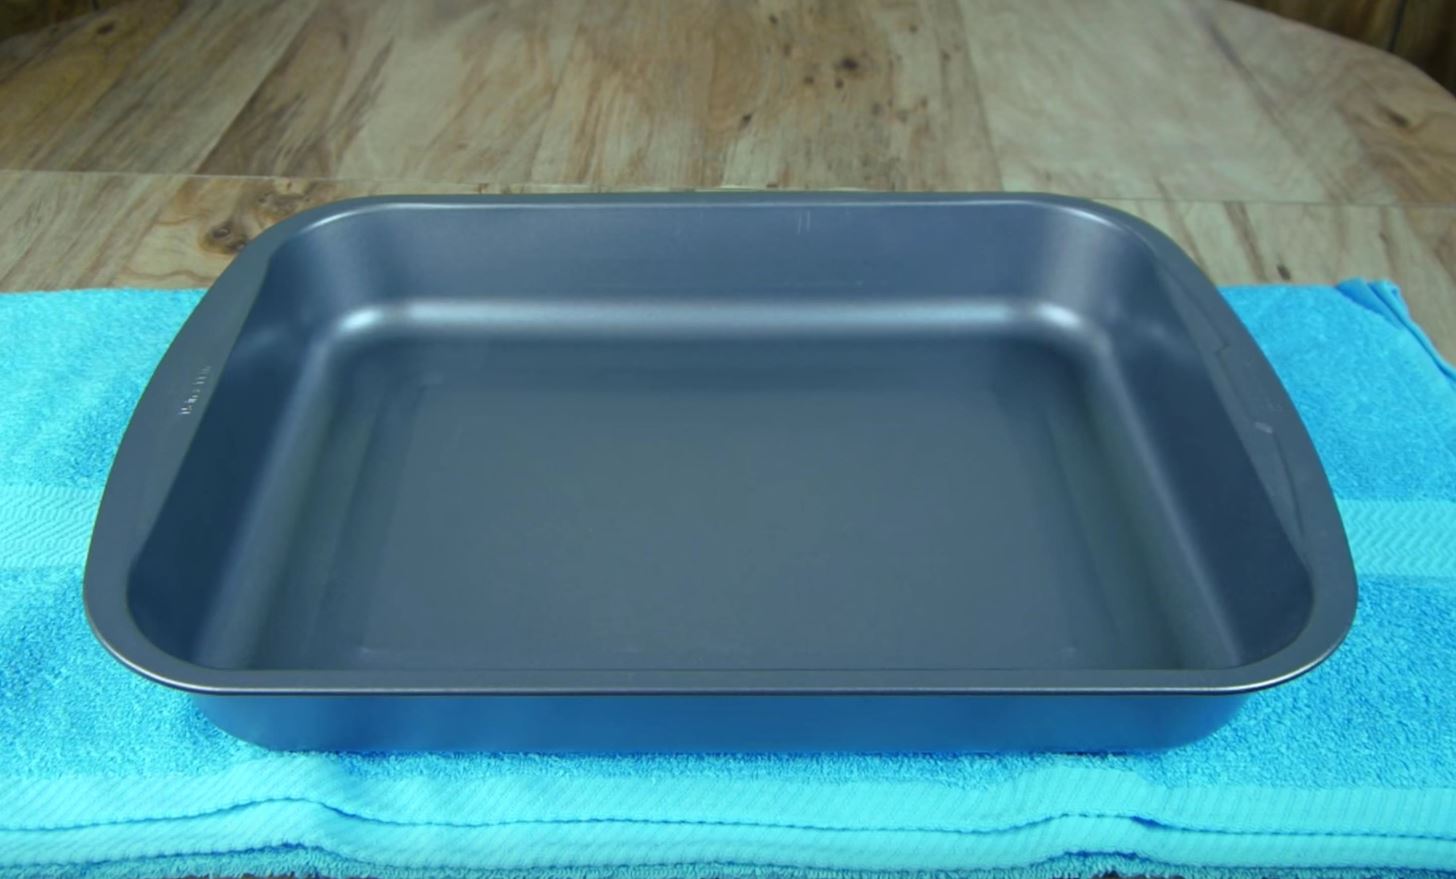
Lay a dry towel across your workspace, then set your empty baking pan on top. Make sure you use a baking pan, not just a shallow sheet pan, so you have enough depth to keep the dry ice from scooting around as you work. The towel will insulate, and also ensures the extremely cold temperature of the dry ice won't bust a crack in your granite, tile, or other counter material.
Step 2: Drop Dry Ice into Your Baking Pan
You can find dry ice at most local grocery stores or any big box stores that also sell bulk packages of ice. Pack a cooler in your car before heading to the store, as you'll need to transport dry ice in its own insulated container.
If you've never worked with dry ice before, don't panic—there's nothing scary about it. It's merely ice cooled to the extremely low temperature of -109.3°F. That super cold temperature does mean that it requires some careful handling, though.
Set your block of ice in the center of your baking pan and let it be. Make sure not to use your bare hands. Instead, use cloth or leather gloves to keep potential burns at bay. Or, you can skip the fancy gloves and use heavy-duty oven mitts or a thick towel to move or handle your dry ice.

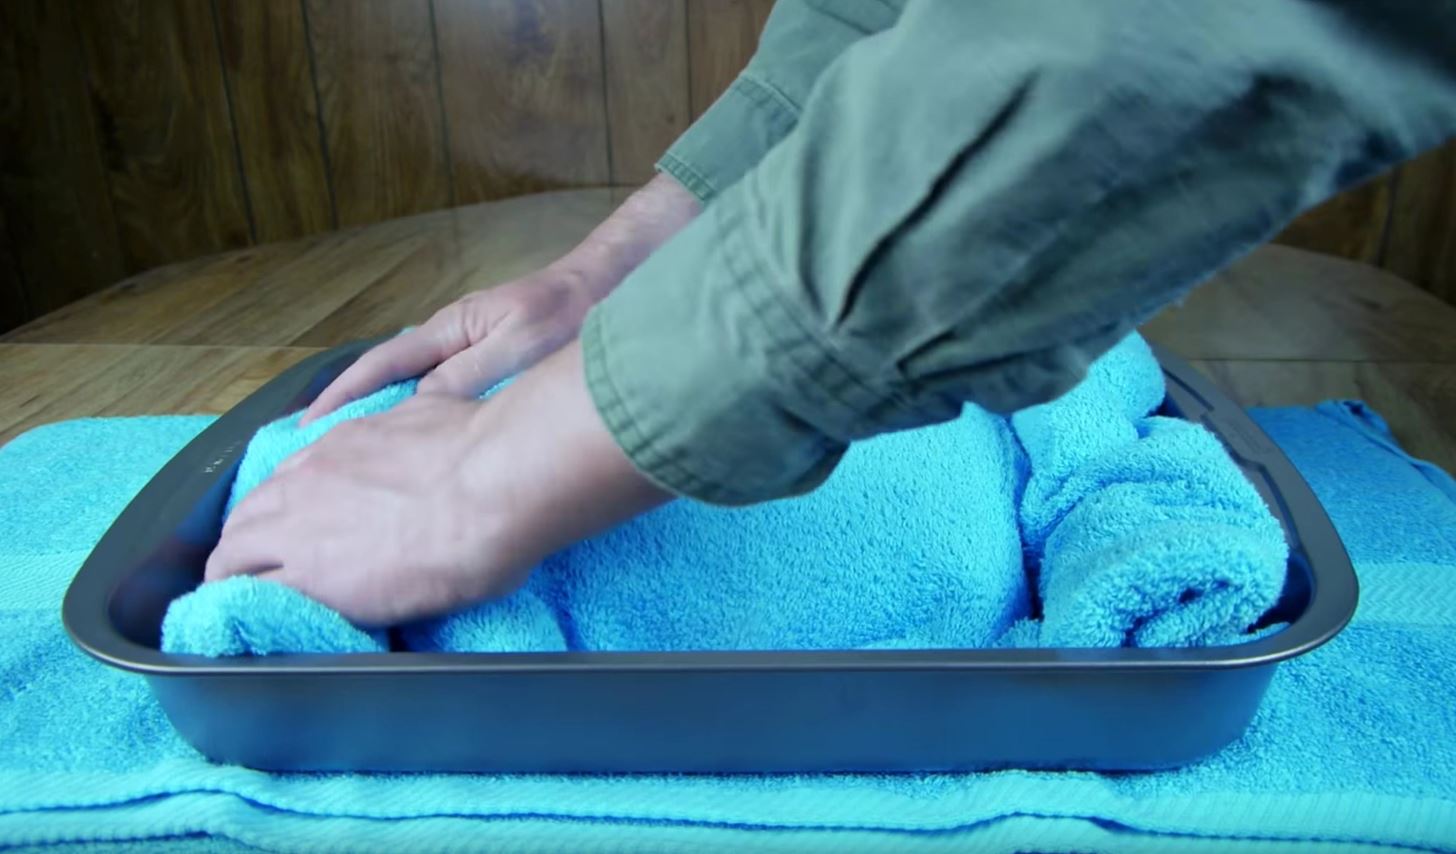
Step 3: Wrap Up Your Dry Ice
Grab another dry towel and lay it over the ice. Tuck in the sides, filling all of the empty space within your baking pan.
This additional towel prevents the ice from moving back and forth in the pan, while also working to slow melting. If your towel is damp at all, it won't insulate the ice as well—and it could freeze due to the low temperature of dry ice, causing a stiff situation when you're ready to clean up.
Step 4: Start Pouring Some Vodka
To enhance the conductivity of your frozen ice cream plate, grab a bottle of cheap vodka. Pour enough alcohol over the towel covering your dry ice to dampen but not soak the towel through. Make sure to pour the vodka just over the top of the ice, not over the whole towel-filled pan.
The addition of vodka gets the towel wet and cold, but keeps it from freezing and adhering to the dry ice. This step will ensure that the bottom of your frozen "stone" is truly ice cold when you're ready to work with your ice cream.
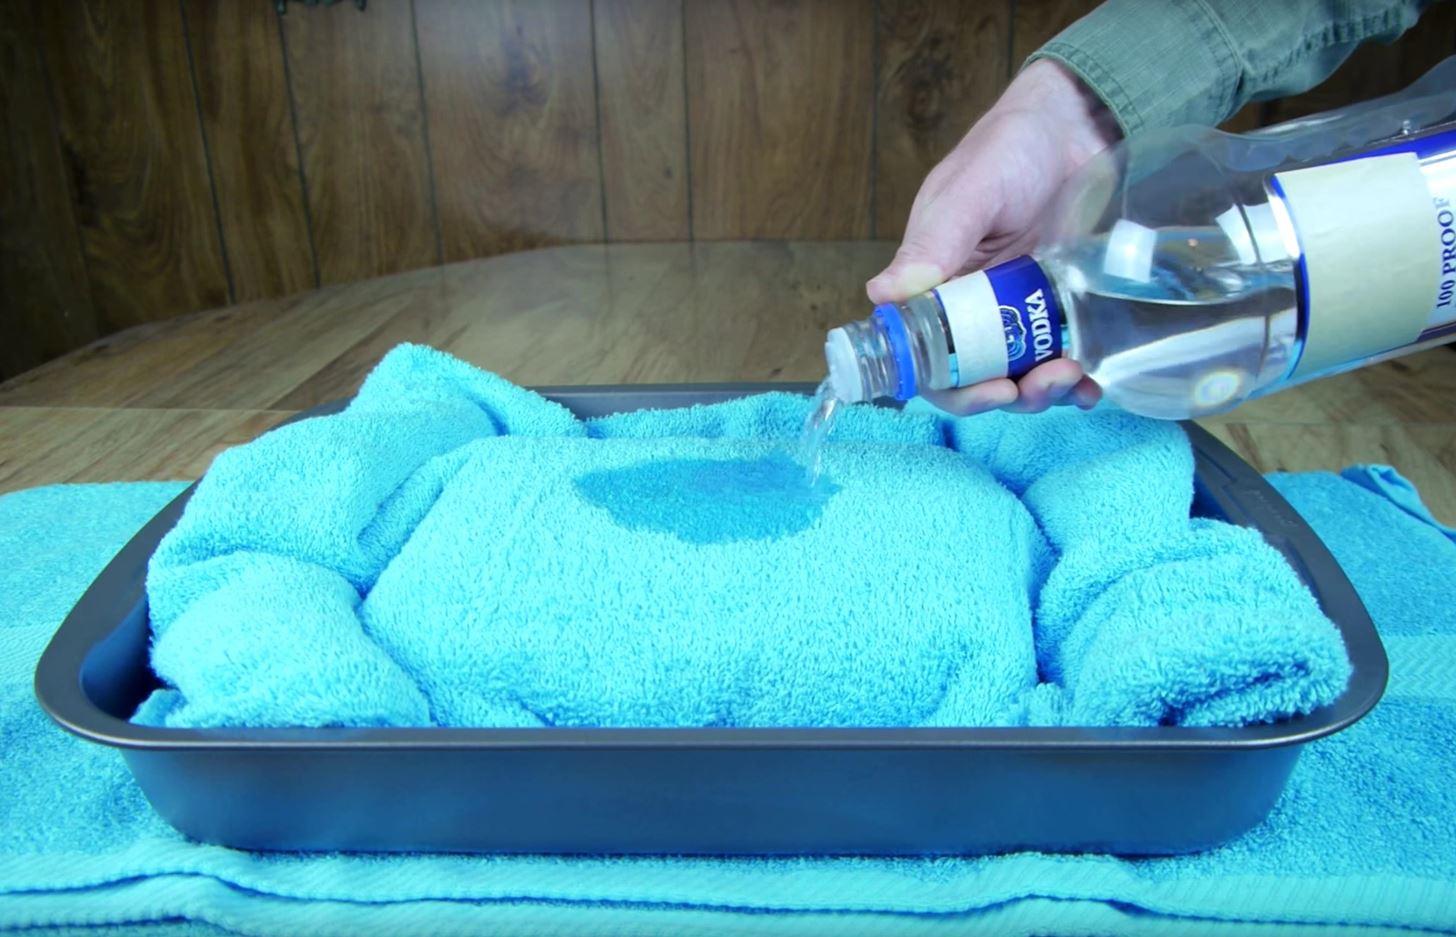
Don't want to use vodka? You can use rubbing alcohol instead, but be careful as you pour. Rubbing alcohol is inedible, so it could even leave your ice cream-loving guests quite sick (and it'll destroy your ice cream if it makes its way into the mix).
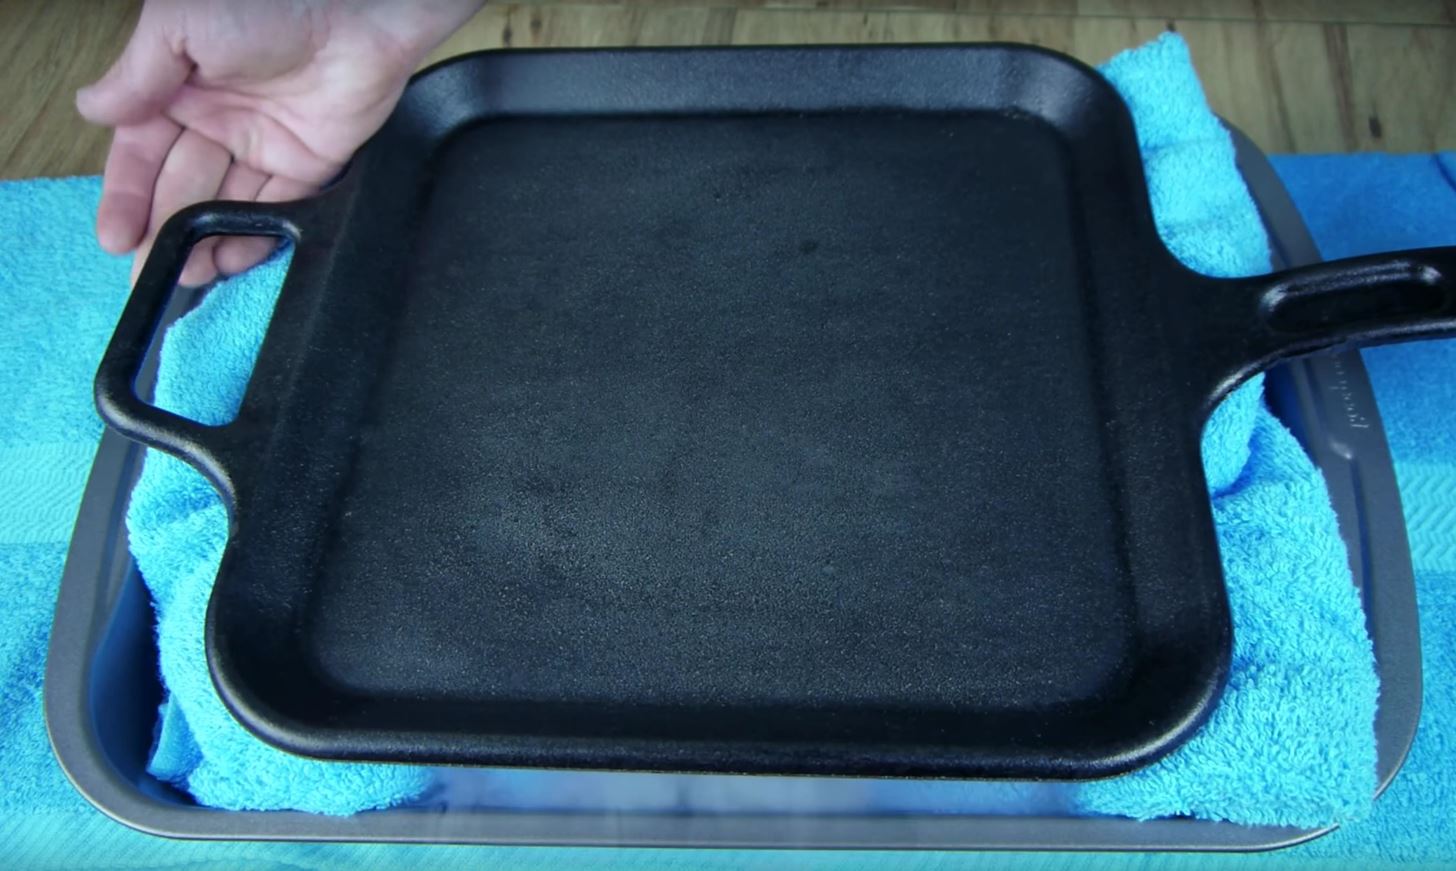
Step 5: Put Your Pan in Place
Place your frying pan atop the vodka-dampened towel and allow it to sit for a few minutes. As the pan stays in contact with the wet towel and the dry ice beneath it, it will drop in temperature. While you're waiting, you can move onto Step 6.
Step 6: Get Your Ice Cream Ready
Grab the ingredients for your favorite at-home ice cream recipe and get mixing while you wait for your frying pan to reach the perfect temperature. Any recipe will work, but NightHawkInLight recommends a basic 50-50 mixture of heavy cream and sweetened condensed milk for a fast and easy solution.
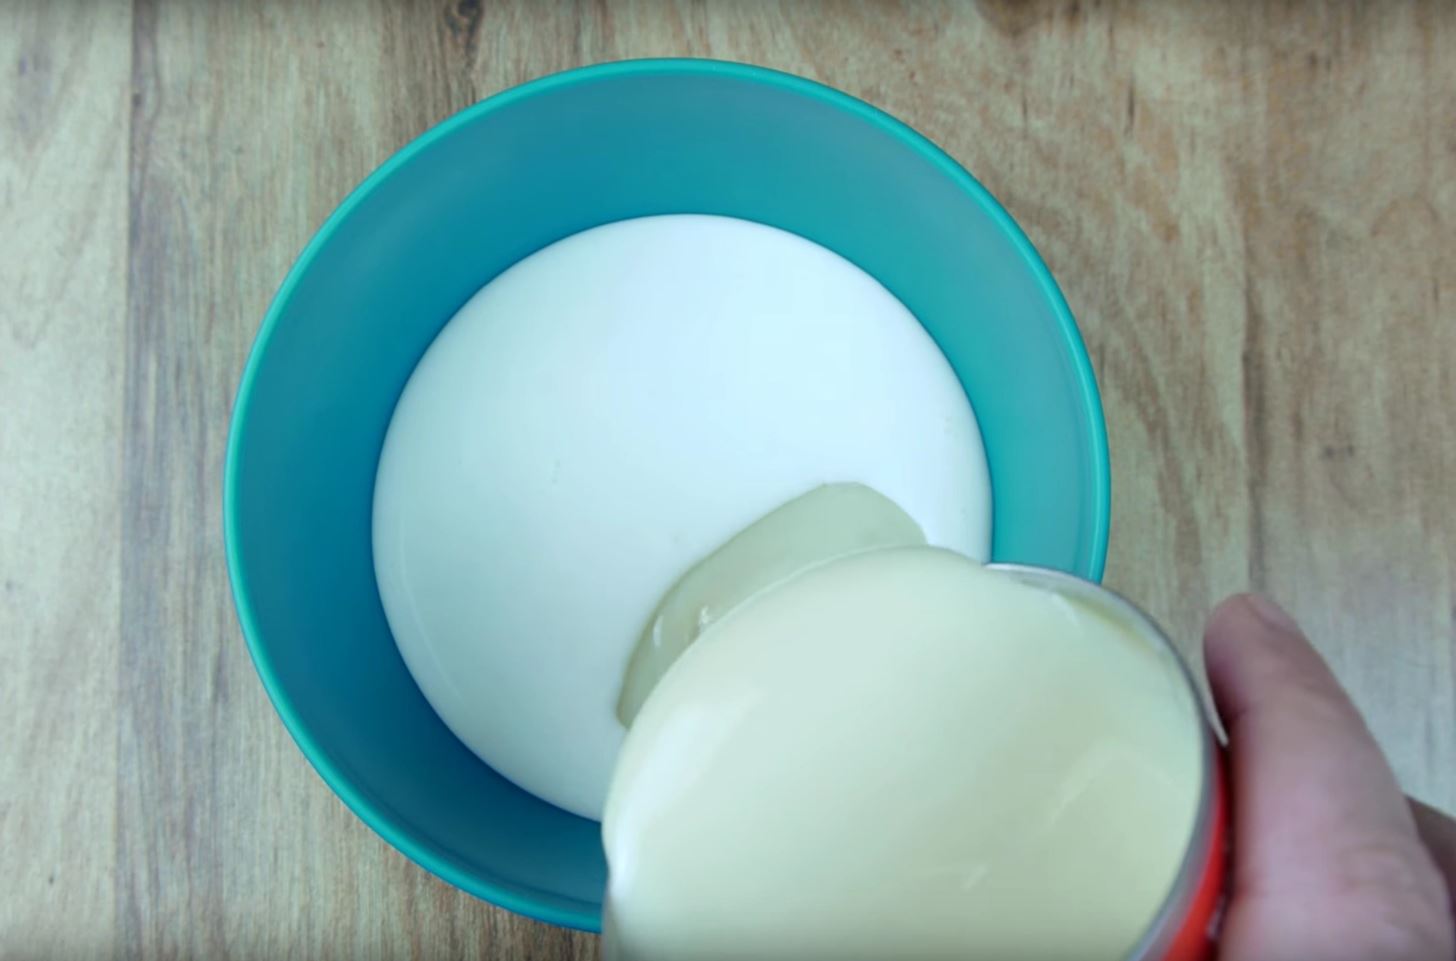
Once your ice cream base is mixed up, you can choose to cool it in your fridge for a few minutes or use it at room temperature. Popping it into the fridge helps the ice cream to freeze faster once it hits the cold frying pan, but room temperature batches take just a few more minutes to achieve the exact same consistency. No matter which method you choose, you're ready to start pouring in mere minutes.
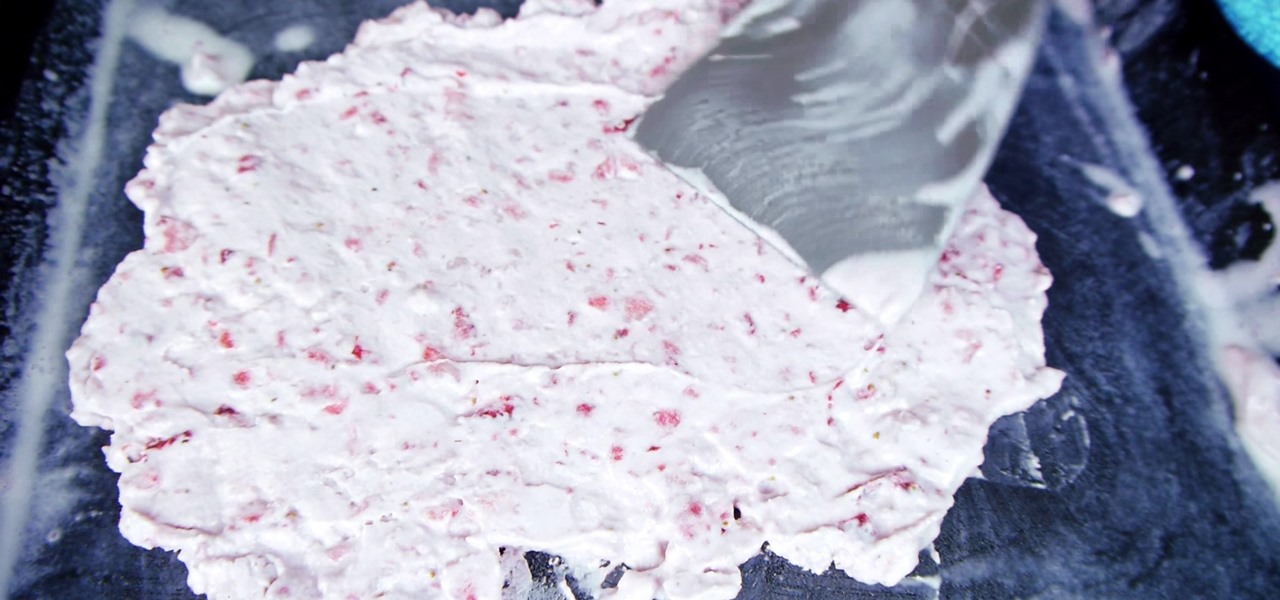
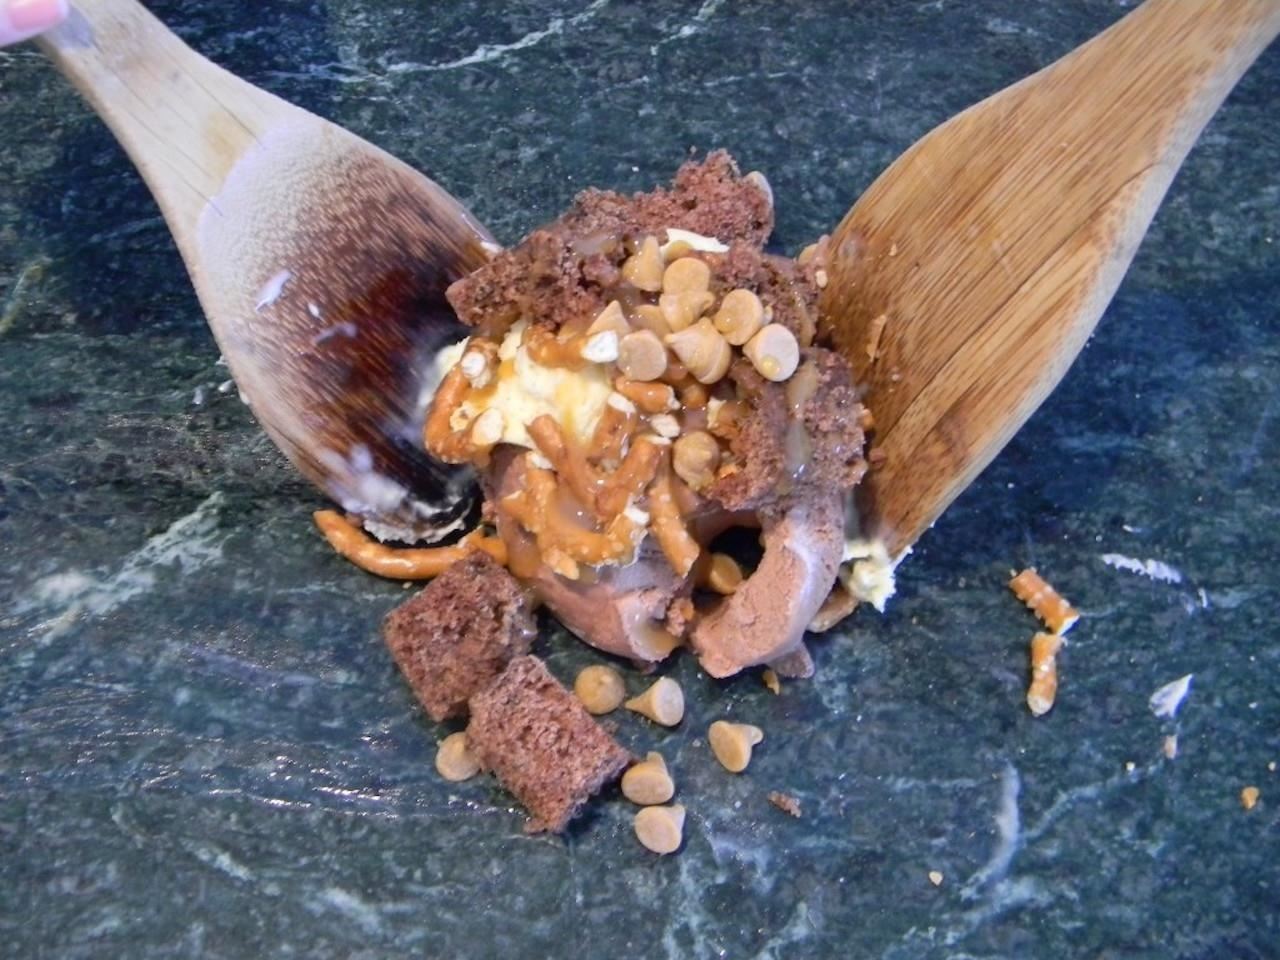
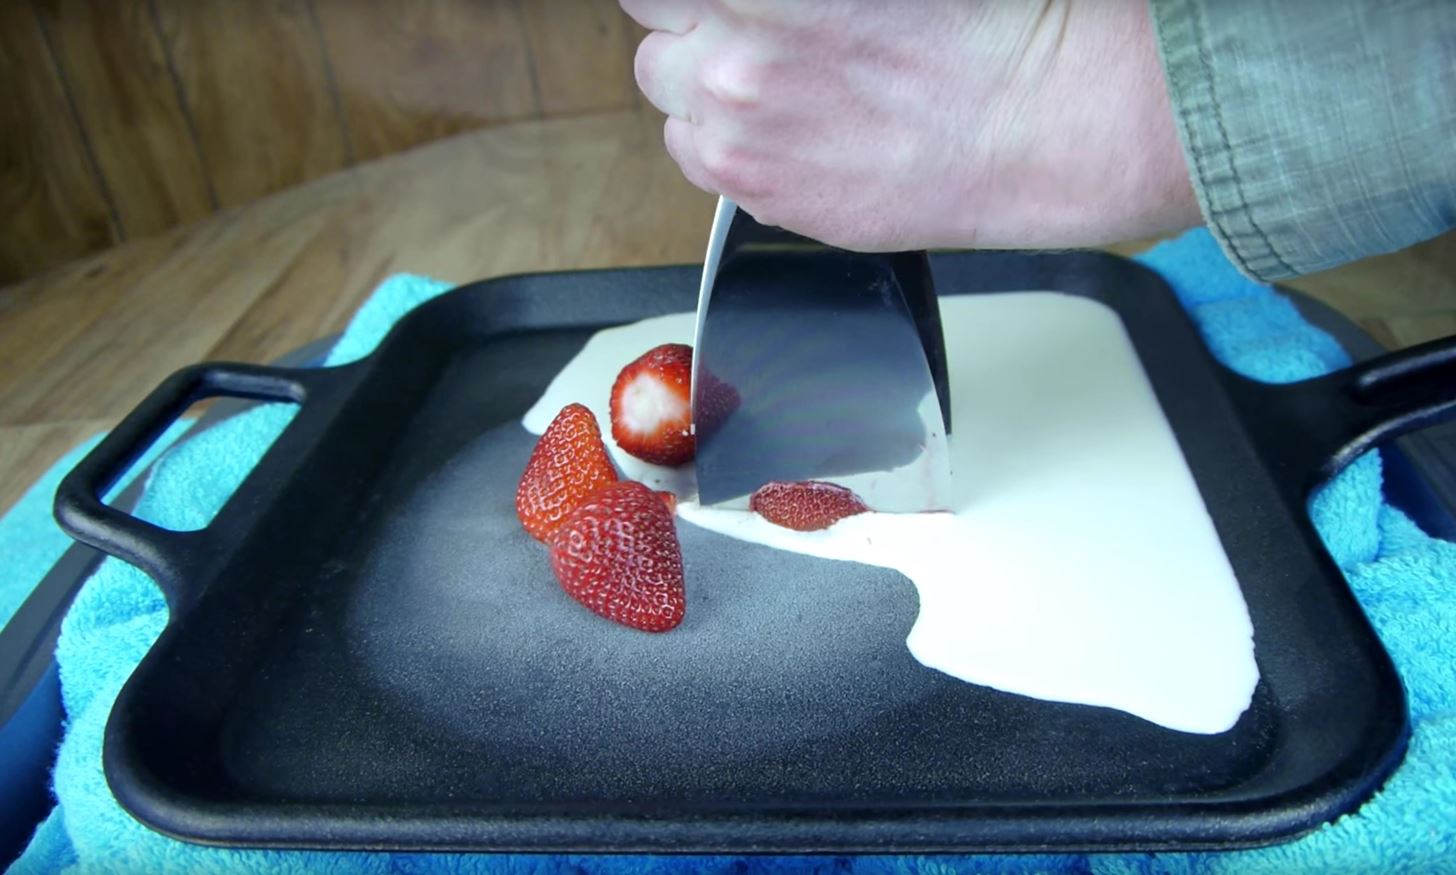
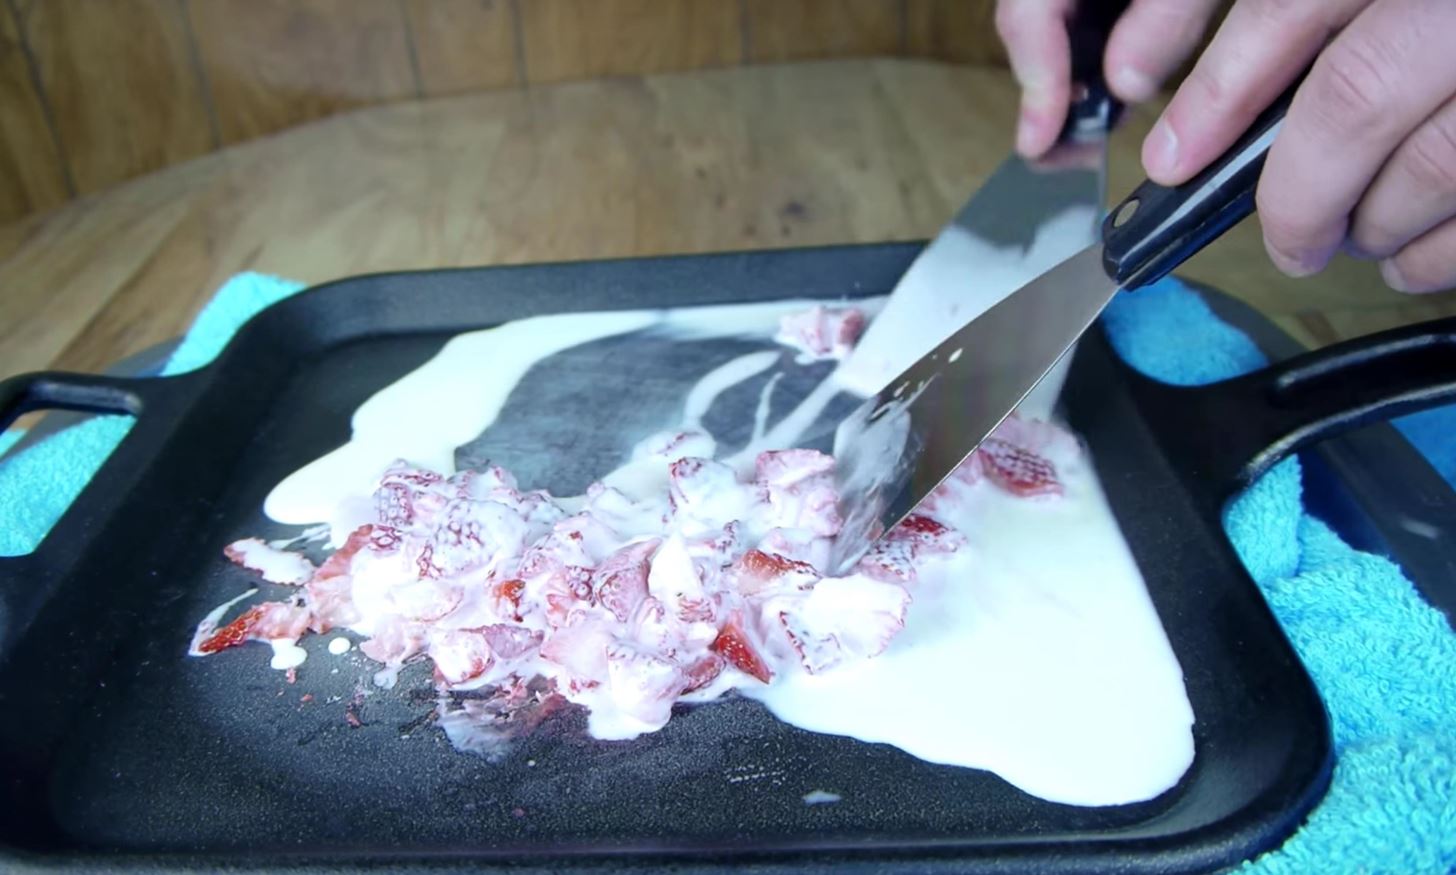
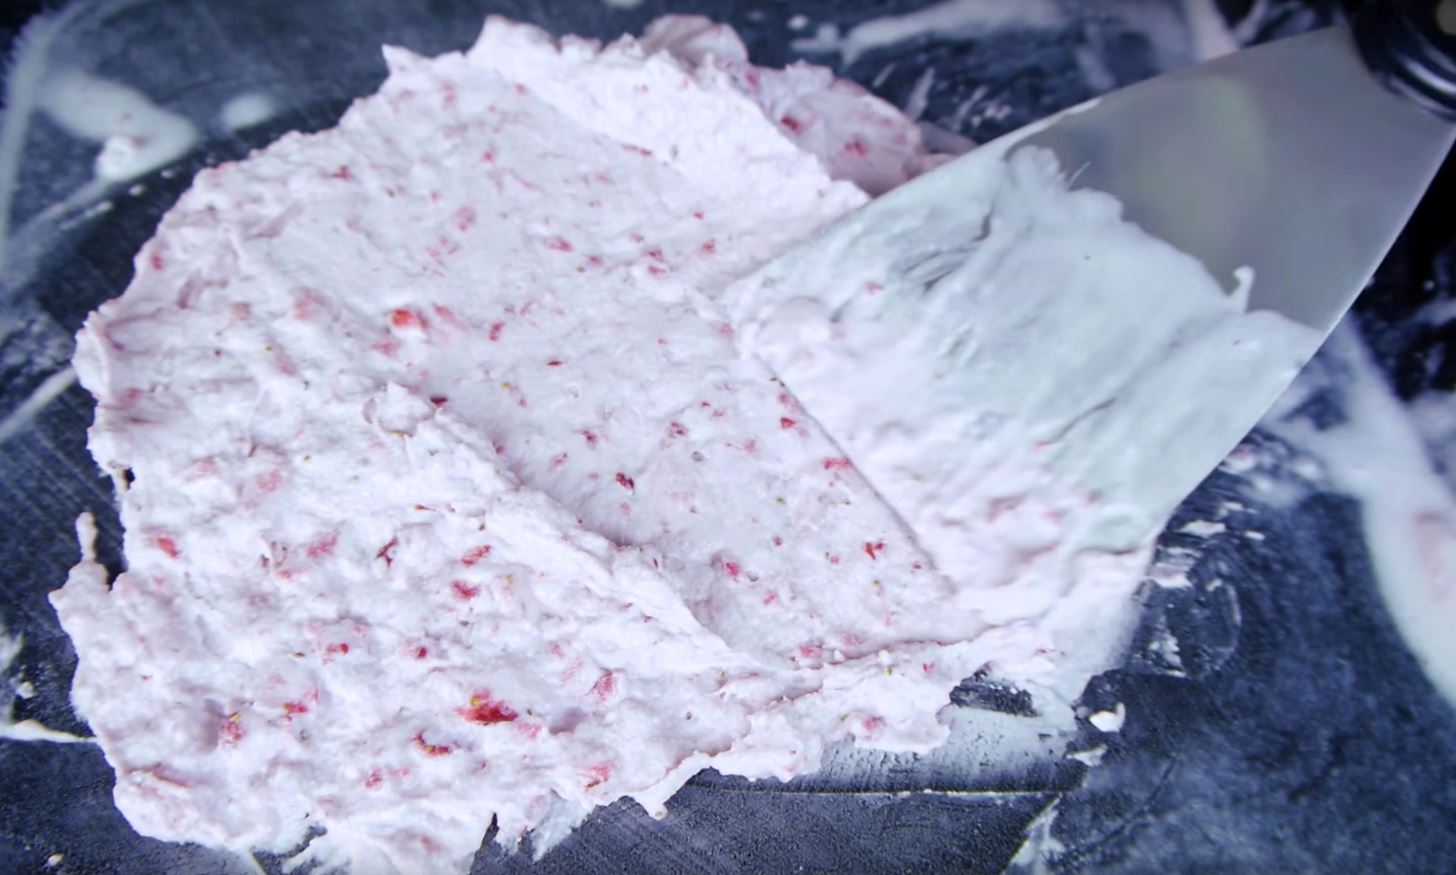
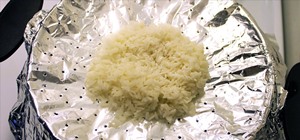
Step 7: Pour, Scrape & Mix
Pour the ice cream mixture onto the frying pan and toss your add-ins on top of it. Grab your two metal spatulas and get to work—move the ice cream and your extra ingredients around, scraping, pushing, and folding to ensure everything is blended together well and perfectly frozen.
The video above shows exactly how it's done, but you've probably eagerly watched while your perfect ice cream was created with hand-selected mix-ins at your favorite ice cream shop. Just keep moving and mixing your ice cream around until it reaches the desired consistency. Once it's thickened up, it's ready to enjoy!
Don't stop with one batch of ice cream—a single block of dry ice will last for several hours, so go ahead and mix up multiple rounds of ice cream and use up that dry ice. You can change up your add-ins and even test out new ice cream recipes to make the flavors and combinations you've always wanted.
Everyone can have his or her favorite flavor: you can easily turn your kitchen into a makeshift ice cream shop! And the best part is nobody is going to give you the side-eye if you make yourself a big double-scooped dish of frozen deliciousness.
More Scientific Ice Cream Hacks:
Just updated your iPhone? You'll find new emoji, enhanced security, podcast transcripts, Apple Cash virtual numbers, and other useful features. There are even new additions hidden within Safari. Find out what's new and changed on your iPhone with the iOS 17.4 update.


1 Comment
Hey there. Just a heads up. Dry ice is not just ice cooled down to 109. It's actually not water at all. It's actually liquified carbon dioxide that is compressed at very high pressure. It can be very dangerous, much more dangerous than just cold ice! ??
Share Your Thoughts