
Making a good pie crust can seem intimidating to the uninitiated, but once you master this skill, a whole world opens up to you. Not only can you make all manner of fruit, custard, and cream-filled pies once you know all the tricks, you can branch out into the world of quiches, savory pies, and flaky, crispy turnovers, too. We've already told you how to get perfect, firm fruit pie fillings, so now, let's learn about crust.
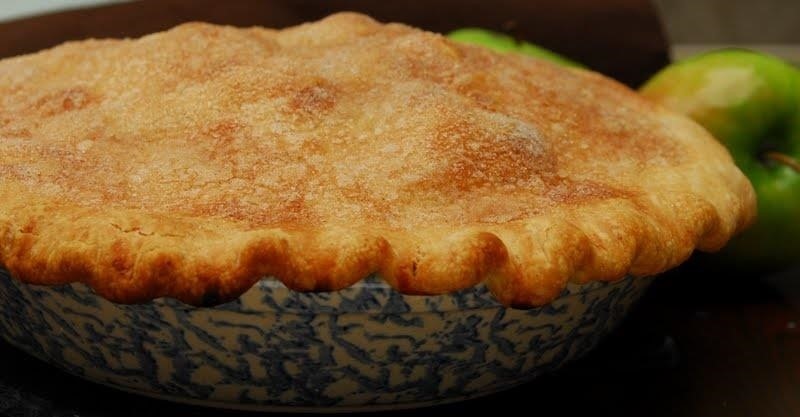
Pie crust consists of very few ingredients: flour, fat, and liquid, plus a bit of sugar and salt for seasoning. That's it. So why does something so simple often come out greasy, tough, and flat? That's where understanding the science of baking comes in handy. Most people agree that the best crusts are flaky, tender, and flavorful. It's the flaky aspect that's hardest to encourage.
Gluten Is the Enemy of Pie Crust
For a pie crust, you don't want to encourage too much gluten to develop. High gluten formation is a desirable thing in bread, since gluten is what creates that chewy texture and airy crumb.
In things like cakes and pie crusts, you want a more tender, toothsome quality. So be sure to use all-purpose, cake, or pastry flour rather than bread flour. Bread flour has more protein, and therefore more gluten. Julia Child actually recommended using a mix of all-purpose and cake flour, since she thought all-purpose alone made a crust too tough, while cake flour was too delicate.
Pie dough also needs to be manipulated in a specific way since vigorous motions like stirring and kneading encourage gluten development. For that reason, you don't want to completely vigorously mix your dough.
Fat also inhibits the creation of gluten. A key element to making a great pie crust is making sure that you have many, many bits of butter in contact with many, many bits of flour.
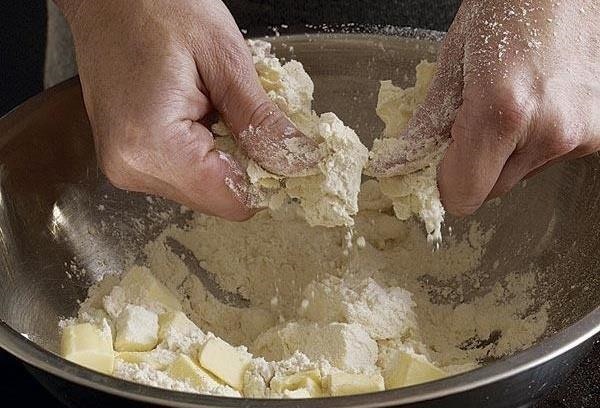
Fine Cooking recommends that you kick it old-school and use your hands to incorporate butter into the flour. Their reasoning is that food processors and mixers (and even pastry cutters, my weapon of choice) blend butter into flour too smoothly. Using your hands, you get flakes of butter that vary in size. For pie crust, that variation is extremely desirable.
Why? Because when your pie crust goes in the oven, the fat will melt in the heat and create air pockets, giving it that oh-so-desirable airy, flaky quality. If it's too smoothly blended, the result will be flat and greasy.
For people who don't want to get so quite up-close-and-personal with a stick of butter, you can use an old French method and cut the butter into the flour using two knives or two large tablespoons. This technique gets you the desired variation of size, but without the greasy hands.
J. Kenji López-Alt, who developed a revolutionary pie dough recipe for Cook's Illustrated (more on that later), recommends food processing only two-thirds of the flour with your fat for a truly tender pie crust.
Why? Because those bits of flour, now fully coated with fat, won't develop gluten. When you add the last third, just enough gluten will occur to give you the desired texture without being tough. Get the complete recipe and explanation here.
Choose a Flavorful Fat
You also want to use a fat that is rich in flavor, since other than the flour, it will be the main ingredient that people taste. Some people even swear by the addition of a little bacon fat in your pie crust or even using only bacon fat for a real taste sensation. The debate over whether to use butter, shortening, lard, or various combinations of all three continue to rage on.
On the one hand, PJ Hamel of King Arthur Flour argues that because butter is mostly water, when the water evaporates, it helps puff up the pie/pastry crust.
However, Cook's Illustrated thinks that butter's high water content actually works against it, since water activates gluten when it's combined with flour. They recommend a mix of butter and shortening, since the latter has very little water.
I will always argue that butter should be the only, or at least the main, fat in your pie crust, because I think it delivers the most rich and consistent flavor. Team Butter all the way!

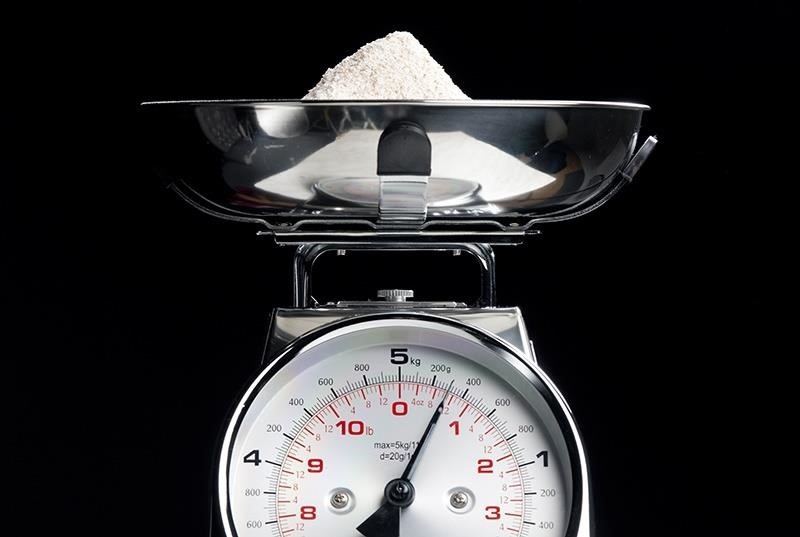
Don't Measure Your Flour: Weigh It
This has always been the biggest stumbling block for me since I refuse to buy a digital scale, but I have to say, when I've been at friends' kitchens and used theirs, it makes all the difference.
Every time you measure flour (e.g., scoop it out of the bag and level it off), you are actually getting a different amount of flour, since things like humidity, sea level, and your eyesight vary from day to day.
Meanwhile, eight ounces of flour is eight ounces of flour no matter what. There is wiggle room in baking (truly), but if you're not familiar with a recipe, you're better off weighing ingredients, since so much of your success will depend on precision.
In other words, don't be like me. Scales aren't that expensive. Get some or borrow a friend's.
What's Cooler Than Cool? Ice Cold
Make sure your pie dough ingredients are as cold as possible. Cut the butter into slices and then freeze them. Get the water ice-cold without actually freezing it. Stick your flour in the freezer for fifteen minutes to half an hour before you start making the dough. If at any point the ingredients start to feel too warm or the butter gets melty as you incorporate it into the flour, put everything in the fridge for another fifteen.
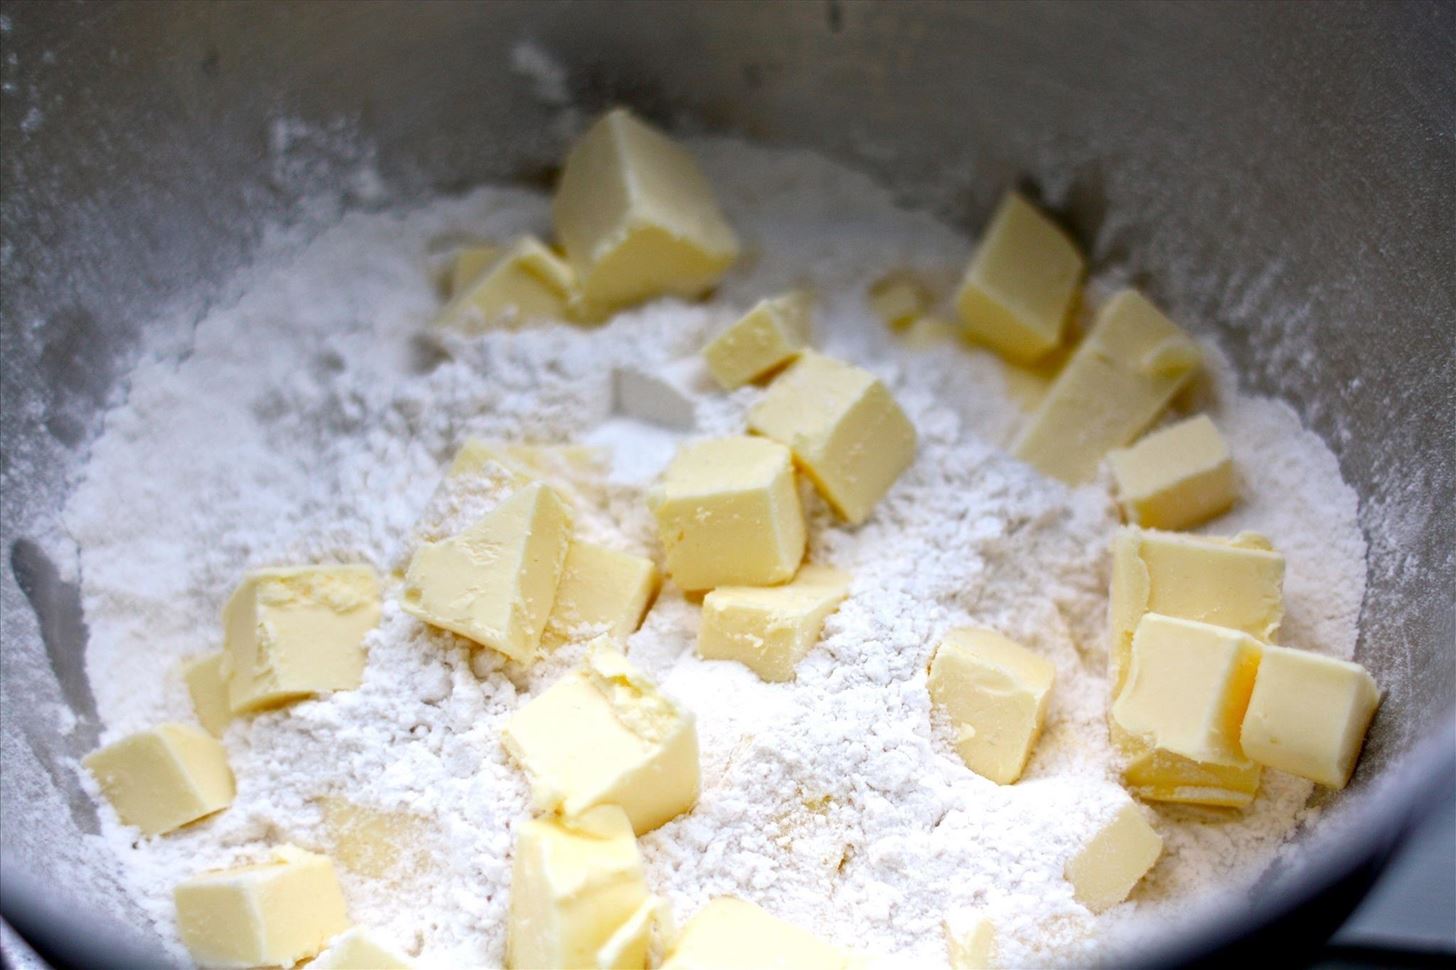
When combining butter and flour to make your crust, you want to break your fat down into the smallest pieces possible so that a lot of flour can come in contact with it. This works only if your butter stays cold. You want the rest of the ingredients to stay cold, too, to encourage your butter to do the same.
Weather & Altitude Affect Pie Crust
If you live in a very humid or very dry place, the amount of liquid you may need to get your pie crust to come together will vary. Altitude also affects pie crusts: they need more liquid so they can roll out easily. These little secrets trip up many new cooks when it comes to pie crust, who tend to want to obey recipes to the letter.

So don't get too beholden to what the directions say. Start off with the amount the recipe recommends, but use your own judgment. If your crust feels too dry, add more liquid. If it's a really humid day, reserve about a quarter of your liquid of choice unless you're absolutely sure you need it.
Vodka, Water, or a Tablespoon of Vinegar?
Remember that revolutionary pie crust recipe I mentioned? It came out in 2007. Cook's Illustrated changed the way cooks thought about pie crust by recommending ice-cold vodka as the liquid of choice. Their argument was:
"Since water bonds with flour to form gluten, too much of it makes a crust tough. But rolling out dry dough is difficult. For a pie dough recipe that baked up tender and flaky and rolled out easily every time, we found a magic ingredient: vodka. Using vodka, which is just 60 percent water, gave us an easy-to-roll crust recipe with less gluten and no alcohol flavor, since the alcohol vaporizes in the oven."
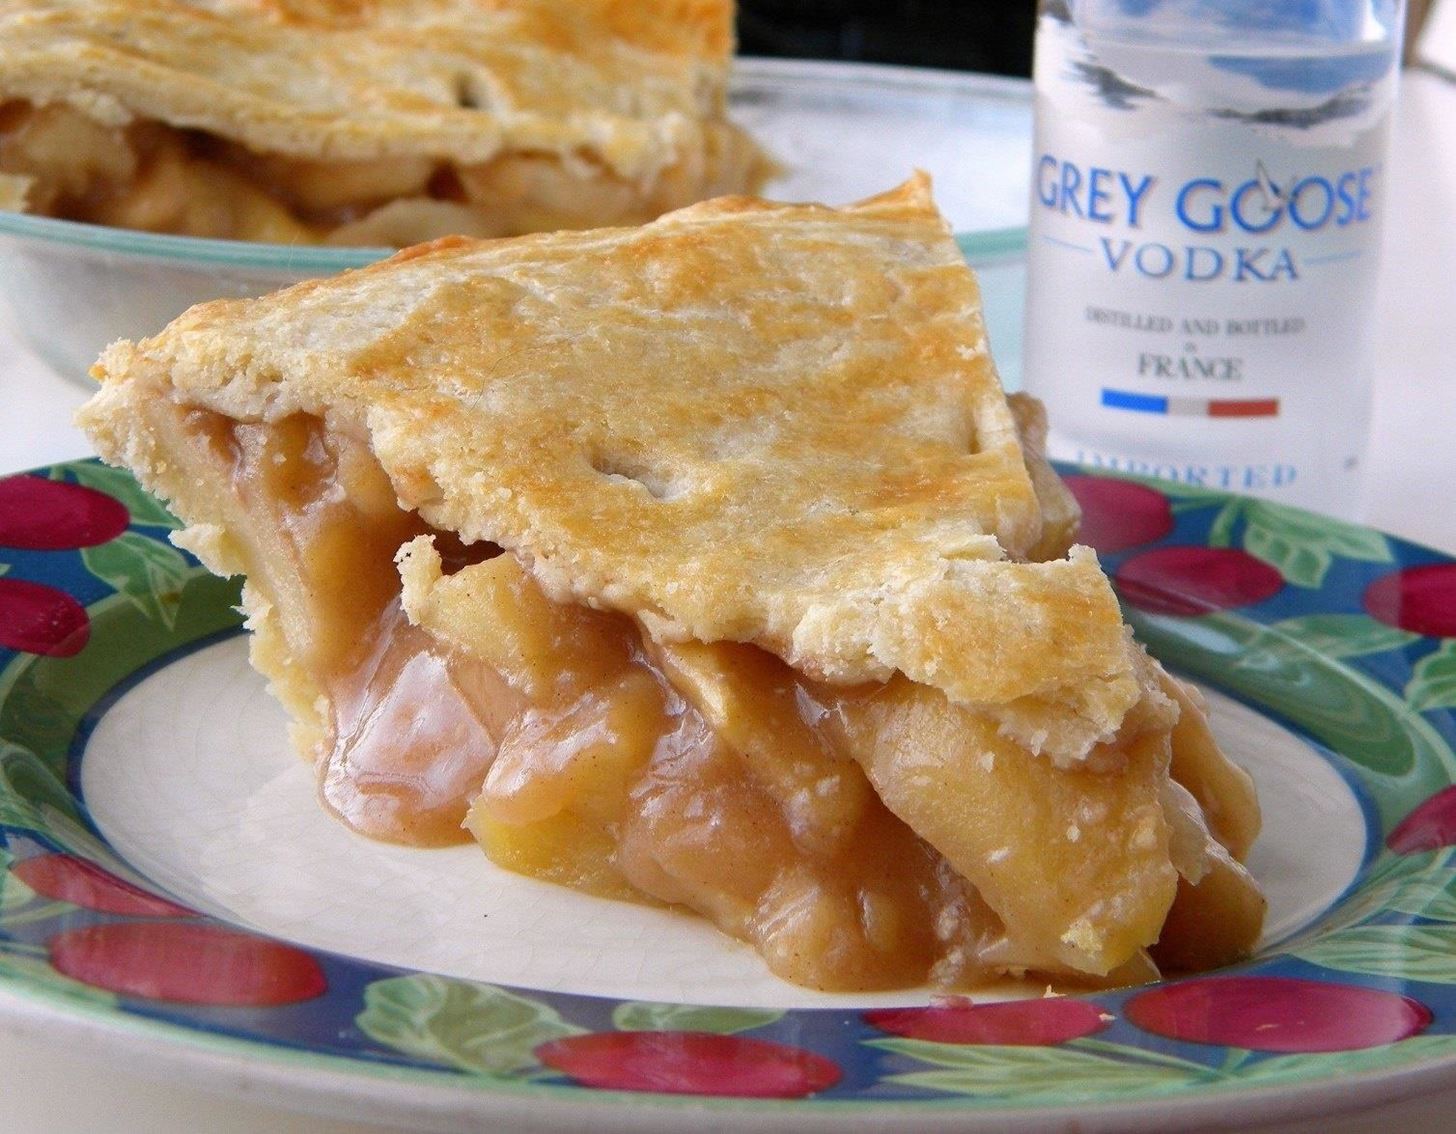
I remember when this article came out and literally it was all my friends and I could talk about for days, which led to a two week-long run of pie-making and comparison. Then again, my friends and I are giant nerds.
However, not everyone loves this method. Many cooks swear by ice-cold water and add a sprinkle of chilled vinegar (white or apple cider) to the dough. The idea is that the acid in the vinegar inhibits gluten formation, although this is not entirely true (you'd have to add more vinegar than is desirable to really stop gluten from forming).
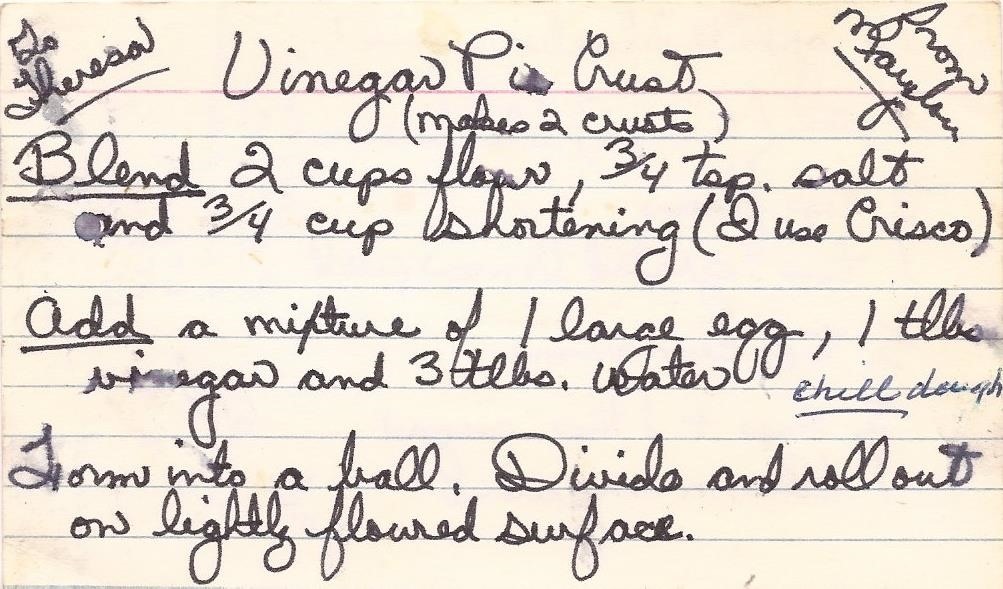
My current theory is that the mild acid in vinegar breaks down the protein structure in the flour and makes more receptive to the fat, which does prevent gluten formation. Buttermilk or regular cow's milk would work, too, since they contain lactic acid, which will have the same effect.
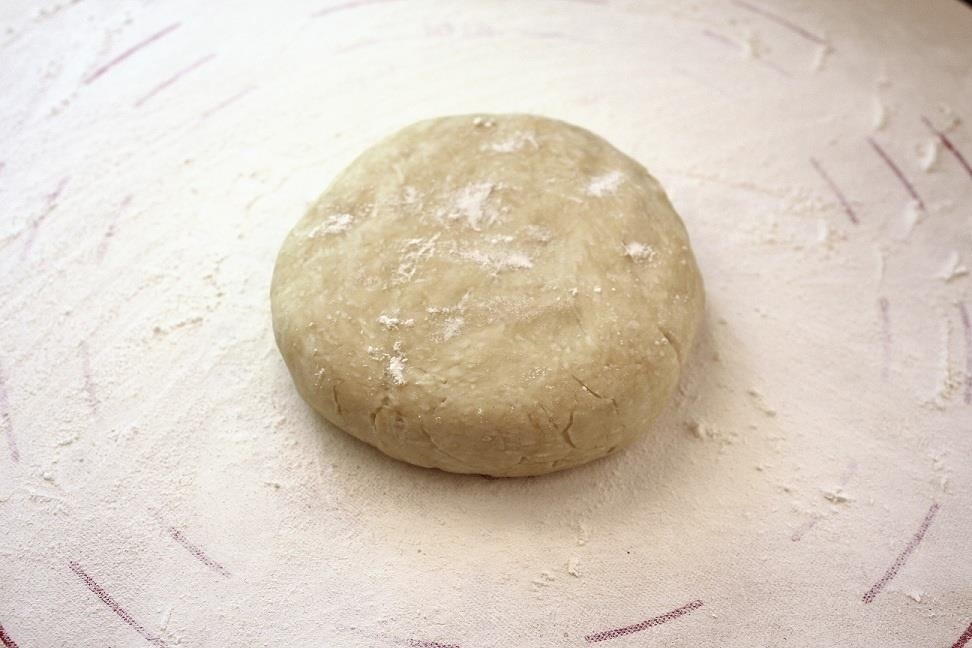
Roll Your Dough into Fat Disks to Decrease Ragged Edges
Before you get out your rolling pin, you're going to need to chill the dough (see below). In order to prevent ragged edges when you roll it out, do yourself a favor and prep it properly.
Instead of mushing your dough together before you chill it, gently form it into a ball, roll it around a few times to smooth it out, then flatten it into a satisfyingly fat disc. Then roll the edge of the disc around like a wheel to smooth out the edges further. These preparatory steps will stop your edges from getting raggedy and broken when you roll it out.
Let Your Dough Rest & Chill
Just like with meat, dough needs to rest. You definitely need to chill it once all the ingredients have been mixed (45 minutes minimum, 2 days maximum). After it's been rolled out and put in the pan, chill it again for another fifteen.
Why? The principle is the same as with chocolate chip cookie dough. The first rest time in the fridge will let the dough age and let the ingredients thoroughly meld. Also, the butter will able to fully solidify once it's in the fridge and give the dough a firm, dry consistency, which is especially important before it goes in the oven.
Use Lots of Flour to Dust Your Rolling Pin & Work Surface
It's always so sad to start rolling out your pie crust and see half of it stick to the rolling pin or work surface. Use generous handfuls of flour to make sure your pin and countertop are dry. Seriously. Don't skimp. Any moisture results in broken pie crusts, which means you have to rework that dough again, which decreases its tenderness.

Don't forget you can use a wine bottle to roll out your dough if you don't have a rolling pin.
Blind Bake the Crust Before Adding (Most) Fillings
Blind baking sounds like some extreme cooking technique, but all it means is that you bake the crust separately before adding your pie filling. (Note: no one really knows why it's called blind baking, but there are a few good theories here.)
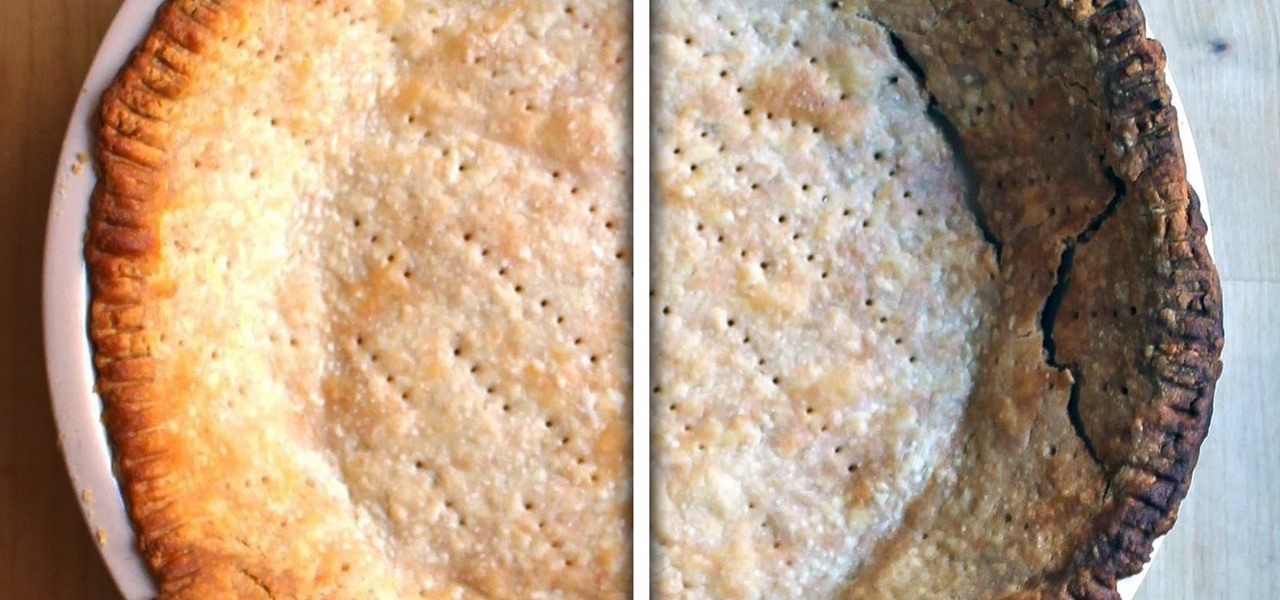
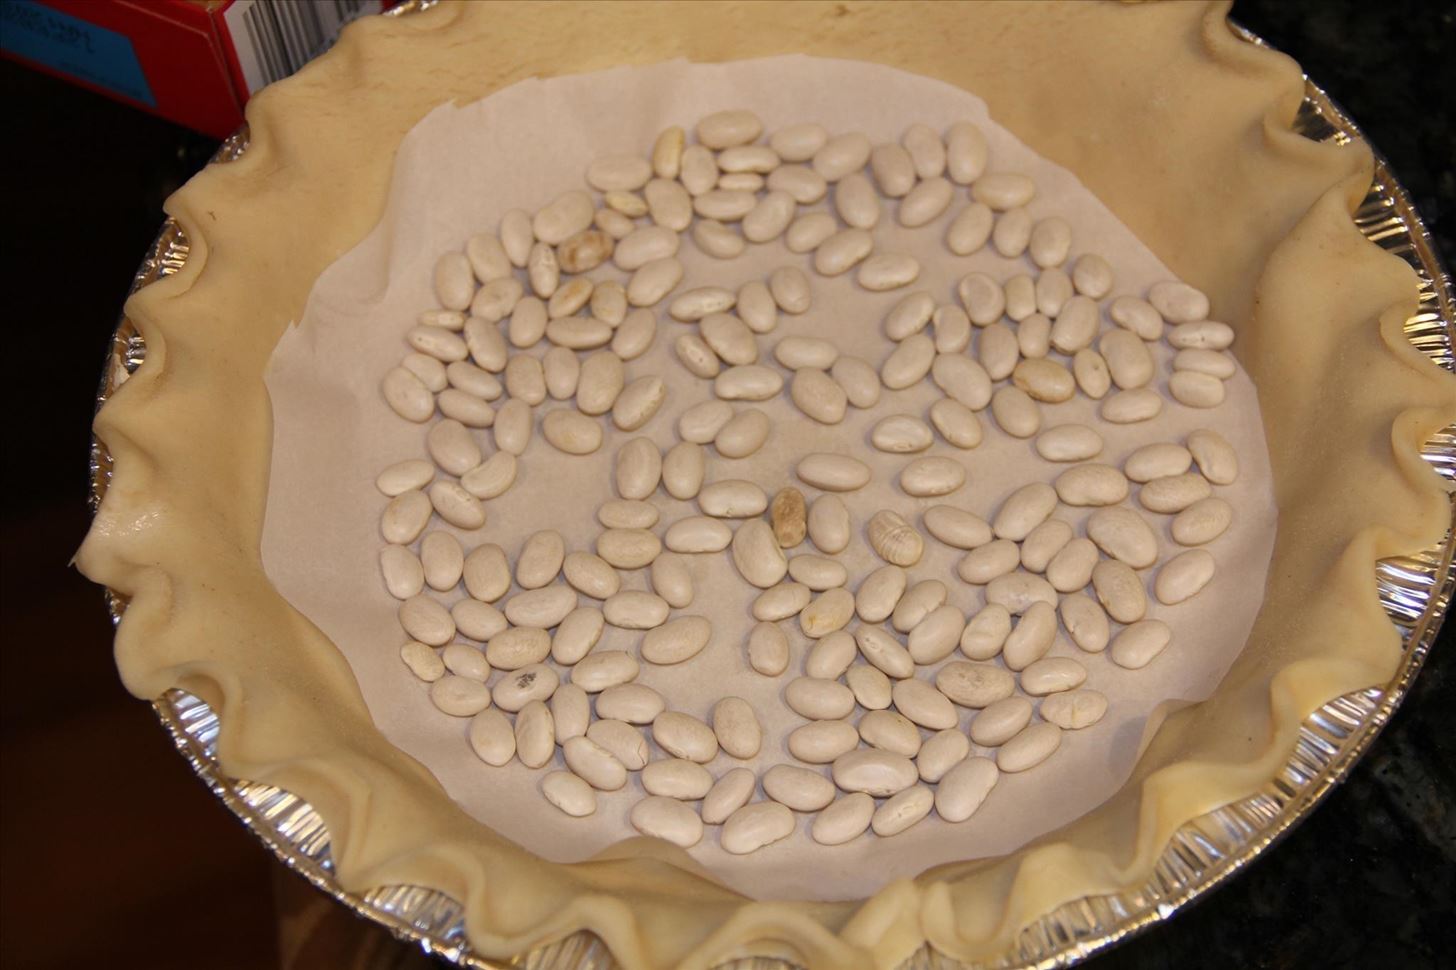
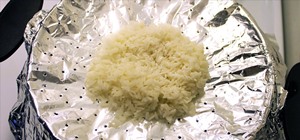
Why should you blind bake? Because it prevents your crust from getting soggy. This is especially good to do with pies that have creamy or custard fillings. Remember to place a sheet of aluminum foil or parchment paper over the pie, then use pie weights on top of that. You need to keep the crust weighted down so that it holds its shape and doesn't develop air pockets.
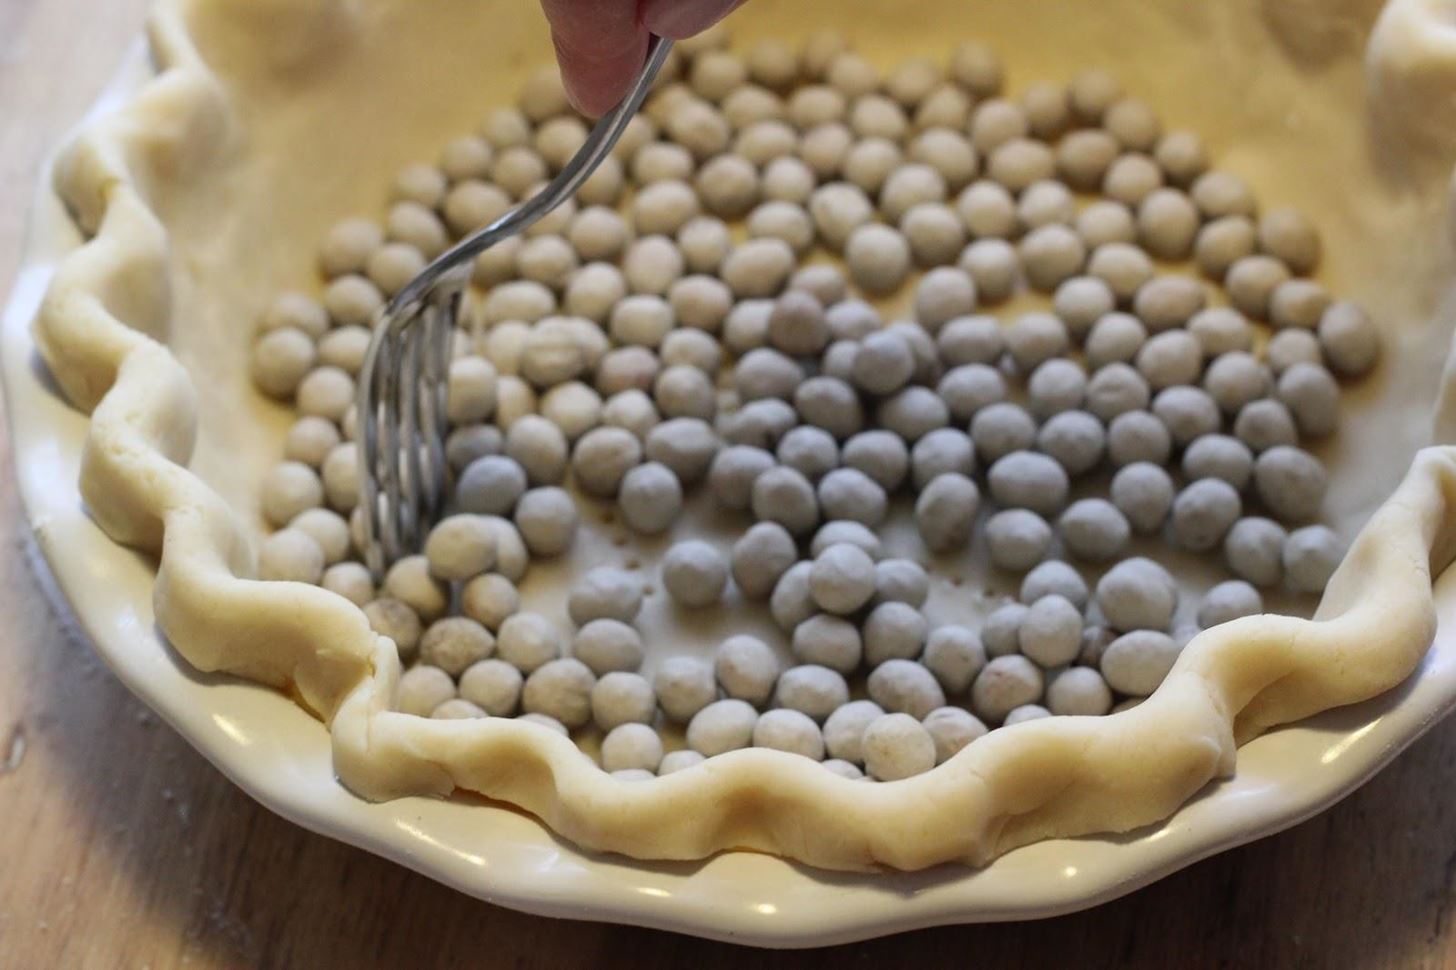
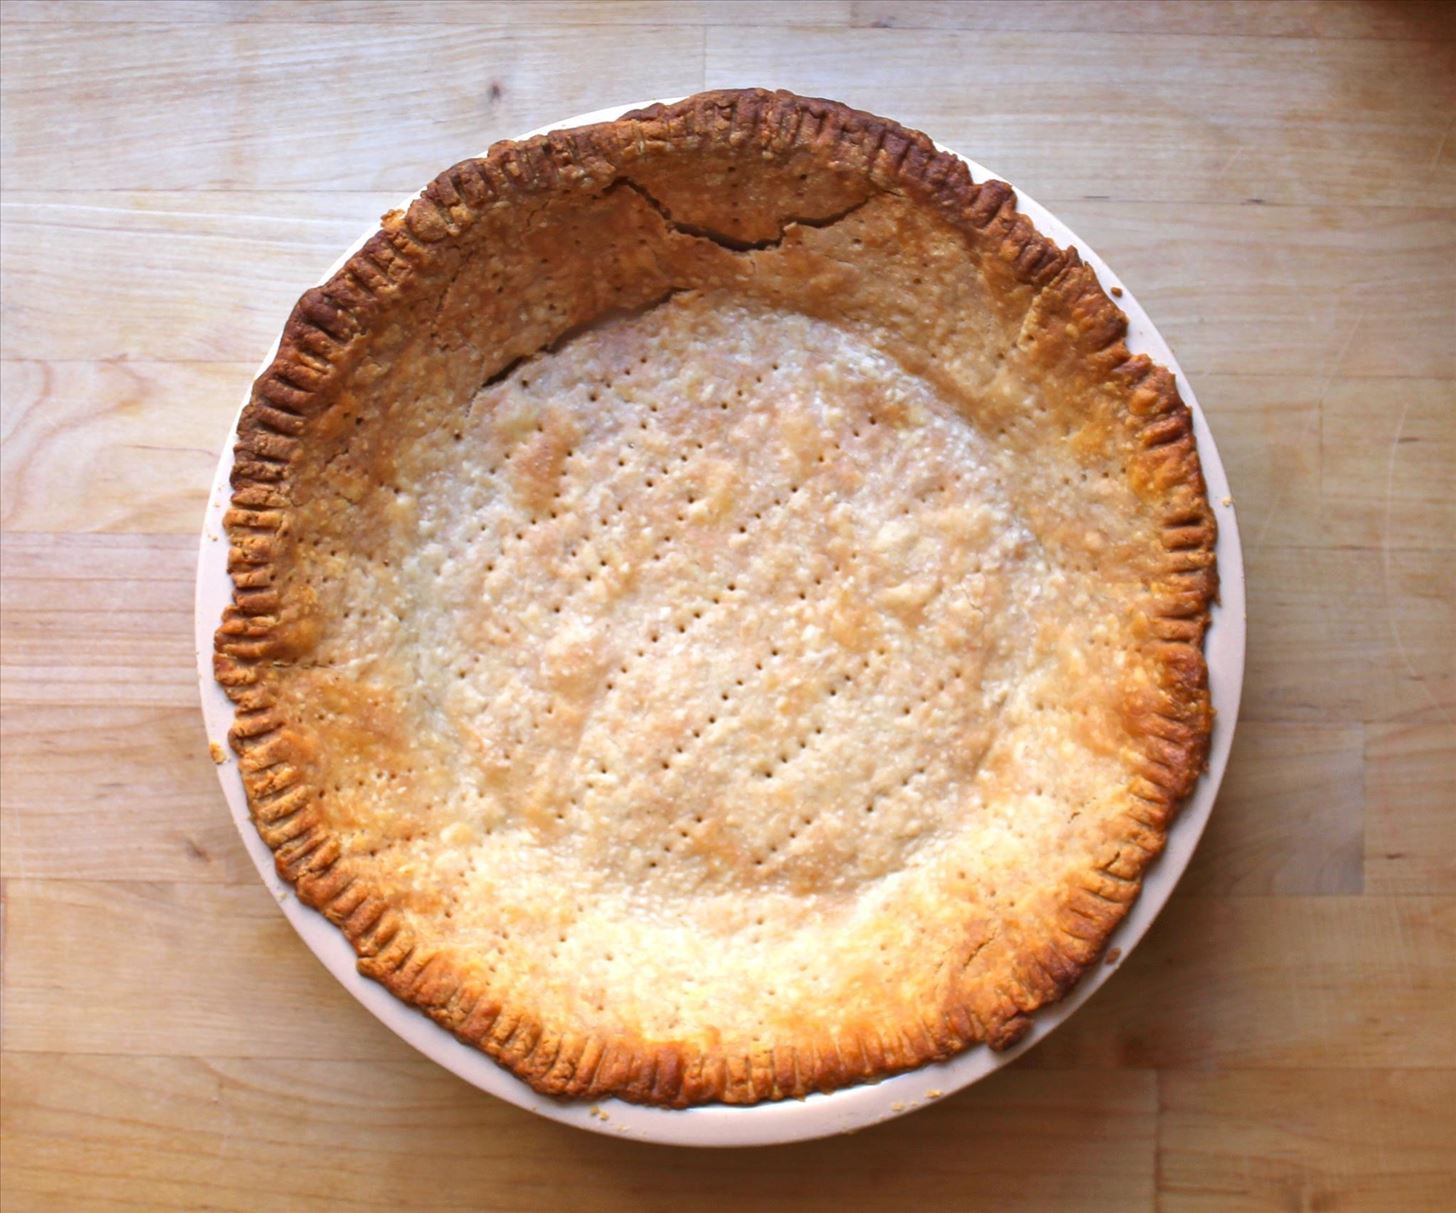
If you don't want to buy actual pie weights, never fear. Beans, rice, coins, small marbles: there are several common household items you can use as substitutions. And if you're a no-fuss type who wants to skip the pie weights, then just prick the bottom of the crust several times with a fork, as pictured above—this will do in a pinch.
Experienced Cook Tip: Use a Clear Pie Pan for Your First Pies
I prefer using metal pans for nearly all my baking since they conduct heat more evenly and encouraging browning. However, Design Mom has a great tip to those who are new to pie-making: use a glass pie pan to make your first pies. That way you can pull them out and easily see if the bottom is either too pale or about to burn.
What other tips and tricks do you know for making foolproof pie crusts?
Just updated your iPhone? You'll find new emoji, enhanced security, podcast transcripts, Apple Cash virtual numbers, and other useful features. There are even new additions hidden within Safari. Find out what's new and changed on your iPhone with the iOS 17.4 update.


1 Comment
I incorporate cream cheese and heavy whipping cream instead of water into my go to pie crust and it has never failed me
Share Your Thoughts