
Making pizza at home is fun and easy—until you get your creation into the oven. Then all of a sudden, your crust gets soggy and your toppings ooze off into one big mess.
A home oven just can't cook a pizza the same way as a professional one built specifically for pizzas. But there is a simple solution, and it can be found at your local home improvement store.
According to Instructables user NHLavalanche, unglazed ceramic tile is a cheap and effective way to get your pizza crust crispy while melting the cheese and heating the toppings evenly without any mess. Plus, it's incredibly easy for anyone to turn their oven into a mock pizza oven, and here's how you do it.
What You Need
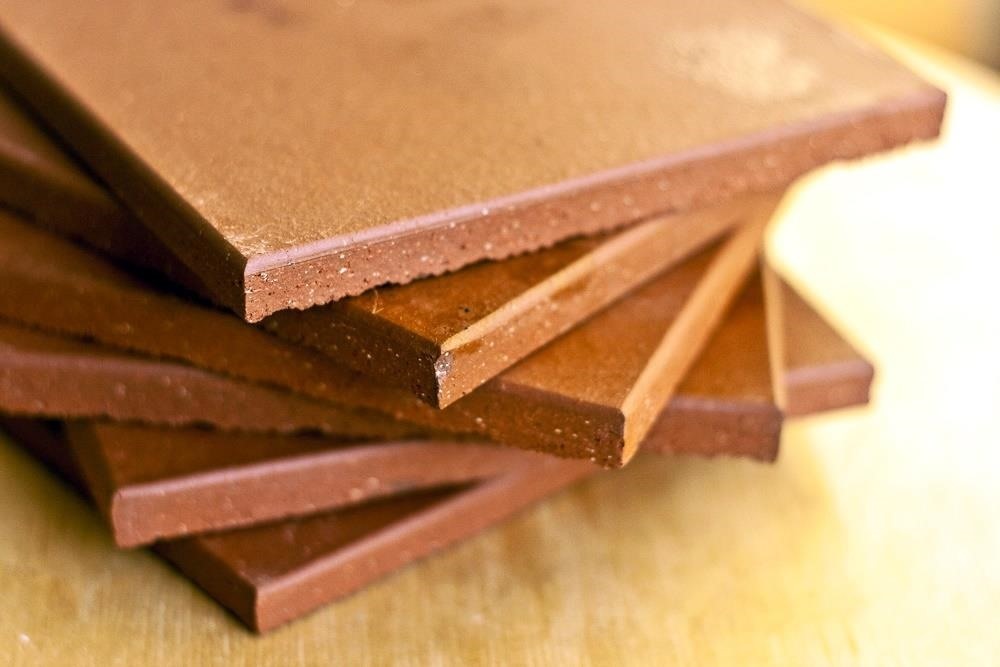
A few unglazed ceramic tiles, plain and simple. They must be unglazed and free of any treatment. To be a little more specific, look for unglazed quarry tiles, which you can snag at Home Depot, Lowe's, and other home improvement stores. Just don't buy any 25-packs, or you might as well just buy a couple of pizza stones instead.
Step 1: Set Up Your 'Stones'
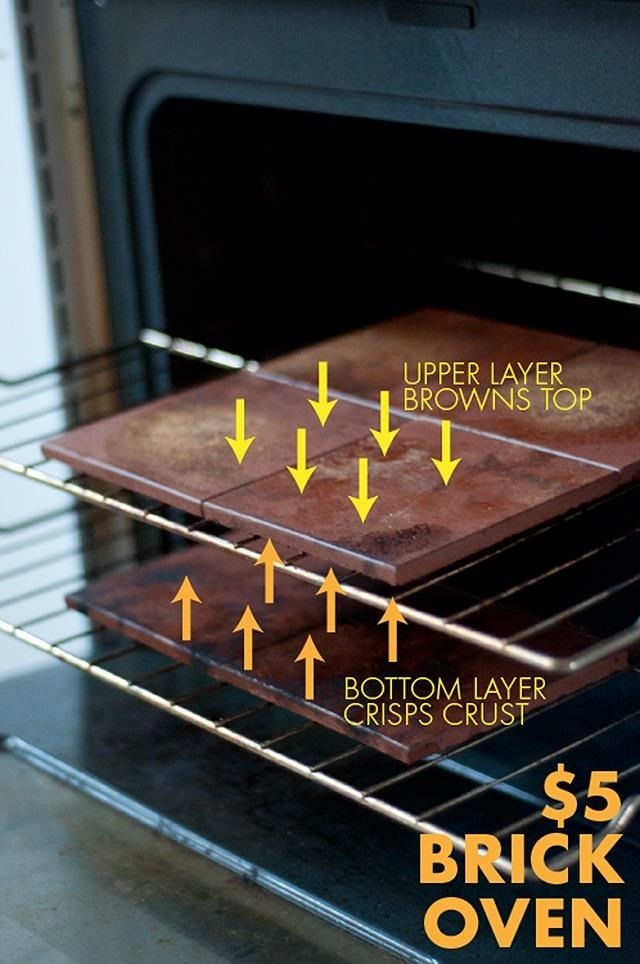
While your oven is off (and cool), layer the two racks with your unglazed tiles. If you were able to find 12-inch tiles, you'll need just two: one on the top rack and the second on the lower rack.
Another option is 6-inch tiles; with these, place four on the top rack and four on the bottom. No need to grease them or treat them in any way. And it goes without saying that if you want to make bigger pizzas, you'll need more tiles.
(If you already have a pizza stone, using some tiles above it will give it the full pizza oven effect.)
Step 2: Heat Up the Oven
Now it's time to preheat your oven and your tiles. Set it to the highest temperature possible—NHLavalanche recommends 500ºF, which is the common max setting on home ovens. That high level of heat will warm the ceramic tiles so they're ready to help cook your pizza once you slide it inside.
Step 3: Let Your Pizza Bake
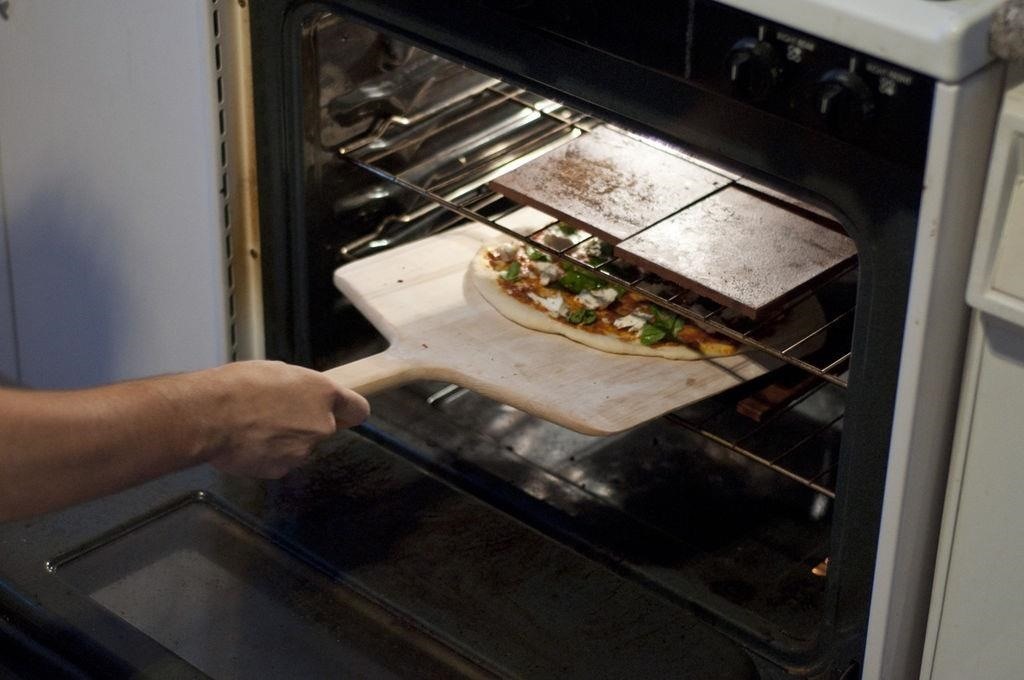
Once your oven reaches its intended temperature, it's ready for your pizza. Place the pizza on a paddle or the back of a cookie sheet to slide it onto the heated ceramic tiles. Just be careful however you do it with whatever you have available—we want less mess, remember?
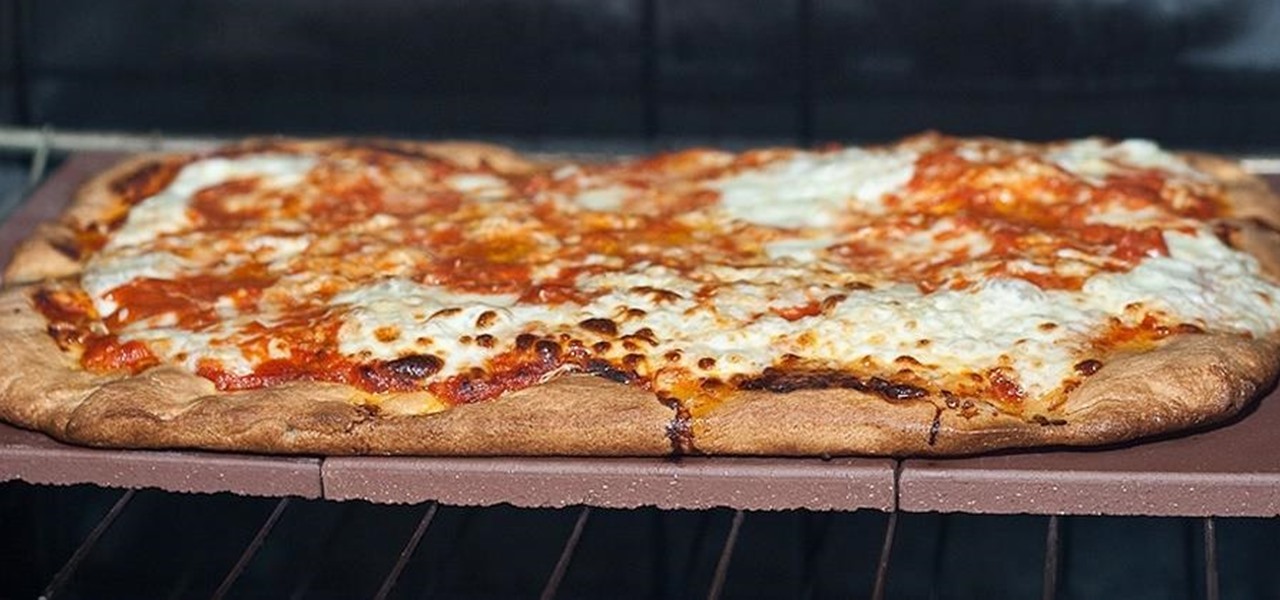
Bake for 5 to 7 minutes (depending on how heavily topped your crust is), then remove your za from the oven and marvel at how perfectly cooked it is!
The two layers of ceramic tile do the work of a real pizza oven, holding onto the heat of your home oven and ensuring that your pizza cooked at a constant, even temperature. The bottom tiles help create a crust that is beautifully browned, solving your mushy crust blues. The top tiles radiate heat downward to give you bubbly cheese, fully cooked veggies, and crispy pepperoni.
Now dig in and enjoy your pizza. Oh, and this hack works for oven-baked breads and panini, too. Give it a try!
More Perfect Pizza Hacks:
Just updated your iPhone? You'll find new emoji, enhanced security, podcast transcripts, Apple Cash virtual numbers, and other useful features. There are even new additions hidden within Safari. Find out what's new and changed on your iPhone with the iOS 17.4 update.


Be the First to Comment
Share Your Thoughts