
If you're using a mobile device, it's a pretty safe bet that your apps are sending lots of information back and forth from their servers. To make sure there is no inappropriate data collection going on, it's worth setting up a web proxy to spy on this traffic, so you know exactly which apps are "phoning home" and when.
With a web proxy established, you can sniff out everything that's being sent and received by your Android or iOS apps. You can even monitor any encrypted traffic being sent over HTTPS. The web proxy acts as a man-in-the-middle, letting you see everything that's going on, giving you an idea of what apps should be uninstalled.
After all, there's no limit to the type of data collection that might be happening. Everything from seeing how long you spend on a specific screen to raw sensor data is frequently collected, either for companies to analyze internally or sell to third parties. Some of this info you may not want them having or selling.
Step 1: Install Charles Proxy on Your Computer
My preferred tool for analyzing HTTP traffic is Charles Proxy. It's available for all modern operating systems (Linux, macOS, Windows), and you can download a free 30-day trial at charlesproxy.com/download. After the trial is up, you can expect to pay $50 for a user license.
Charles is an immensely powerful tool, not only for sniffing app traffic but for all kinds of analysis and debugging of web applications, so it's a good investment if you're into mobile development of any kind. If you're just wanting to see what's going on with the apps on your smartphone or tablet, the free trial will be sufficient. Just note that the free trial is limited to 30-minute sessions, so you'll have to close and restart Charles whenever 30 minutes is up.
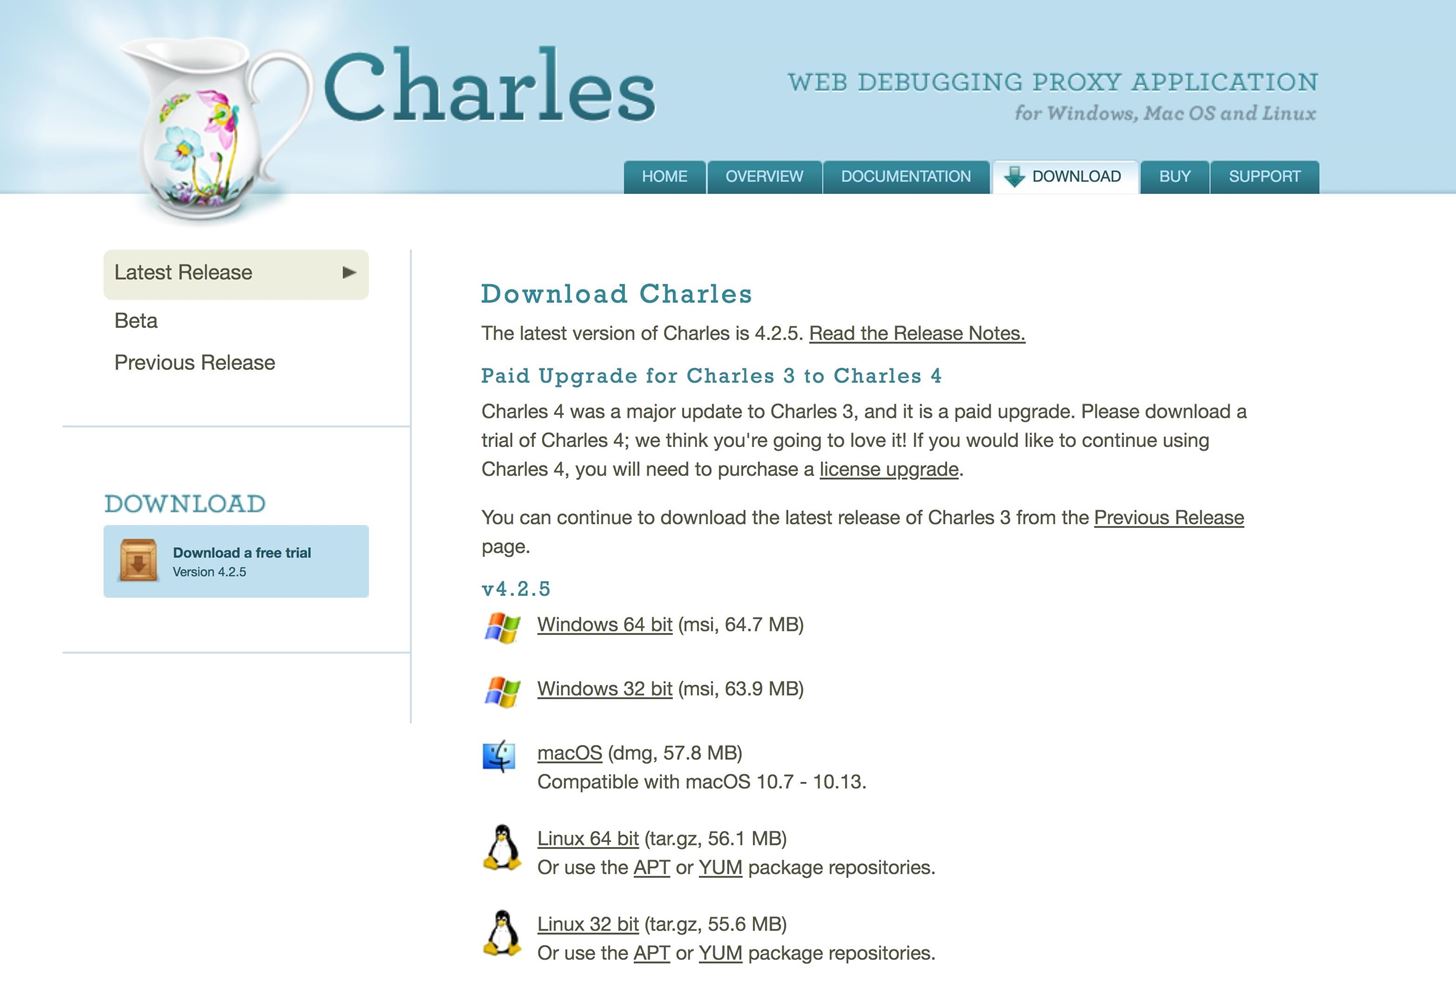
After downloading the MSI, DMG, or TAR.GZ file, open it up and follow the instructions to install Charles like you would any other app you install from a compressed file.
Step 2: Open Up Charles Proxy to Start a Session
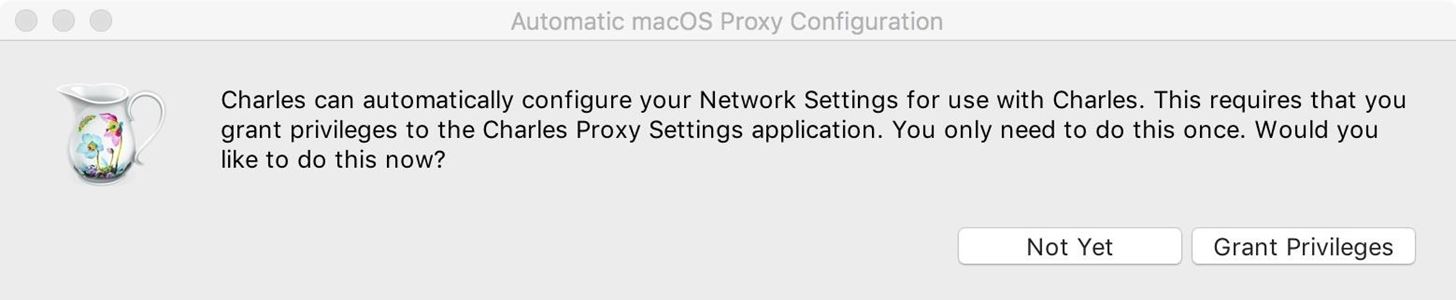
After installing Charles, open it up. If you're running macOS (previously Mac OS X), you'll need to grant permissions for the Charles Proxy Settings app to modify your network settings to function properly. You can do this later, but it's easier to just "Grant Privileges" now. You'll need to enter your password to continue.
On a Windows system, you'll need to "Allow access" on the Windows Security Alert that pops up. Just keep everything as seen below (keep "Private" checked, "Public" unchecked). You may or may not have to enter your password to continue.

When Charles starts, it immediately begins recording a session. Initially, you'll just see traffic on your local machine. You can expand a hostname to see detail about each HTTP request; There are panels to inspect headers, cookies, JSON, and form data.
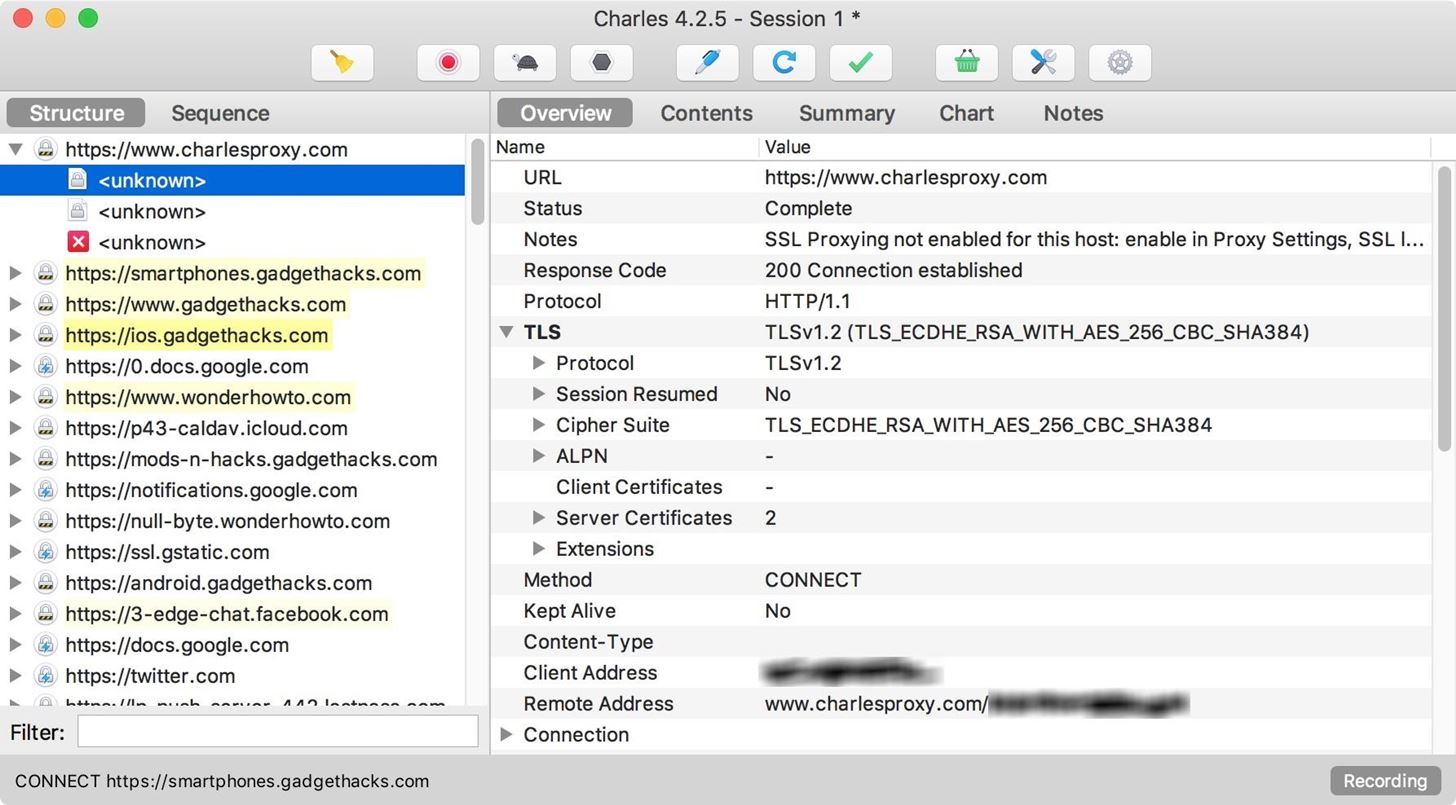
You might notice that information isn't available for hosts using HTTPS; This is because HTTPS traffic uses a cryptographic protocol called Transport Layer Security to encrypt data between servers and users. Fortunately, Charles provides us with the capability to install and trust a root certificate, unique to each installation, that will let us see HTTPS data in plaintext.
Step 3: Find Your Computer's IP Address & Port Number
Instructions for configuring your desktop browser and operating system to route traffic through Charles vary depending on what you're using. If you want to use Charles to inspect web traffic from your browser, I would recommend visiting this Charles documentation on the topic.
For our purposes, we want to inspect traffic coming from a smartphone, so we'll start by configuring an iPhone to use the computer running Charles as a web proxy.
First, on the computer running Charles, select "Help" from the menu, then "SSL Proxying," and click on "Install Charles Root Certificate on a Mobile Device or Remote Browser."
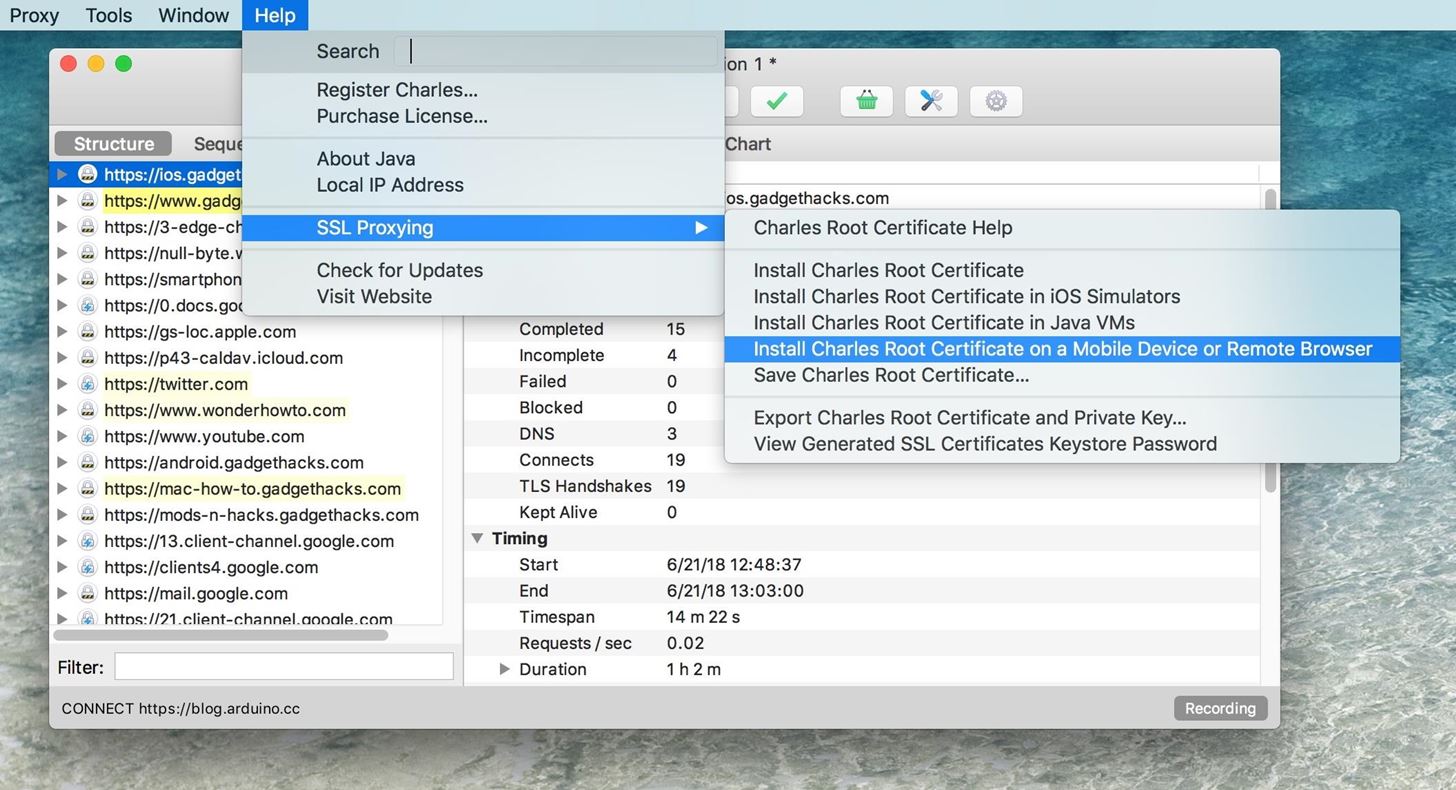
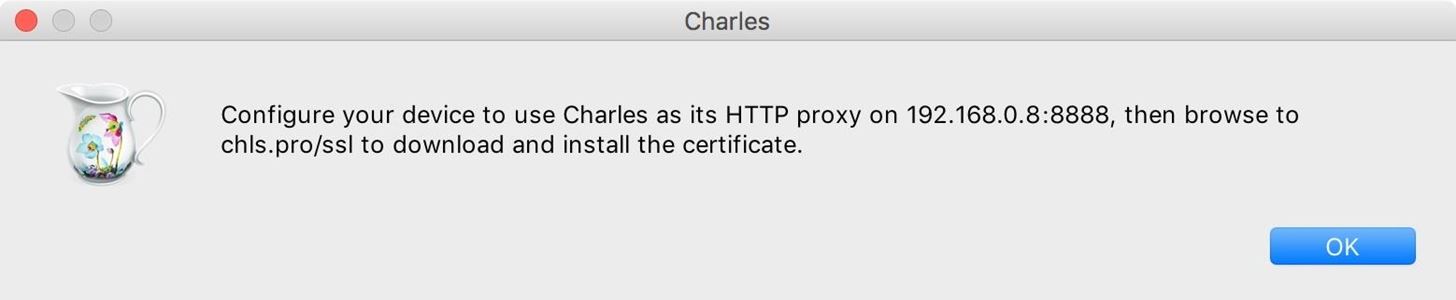
You'll see a dialog like this one that provides an IP address and port for the machine running Charles:
Step 4: Configure Your Phone to Use Charles Proxy
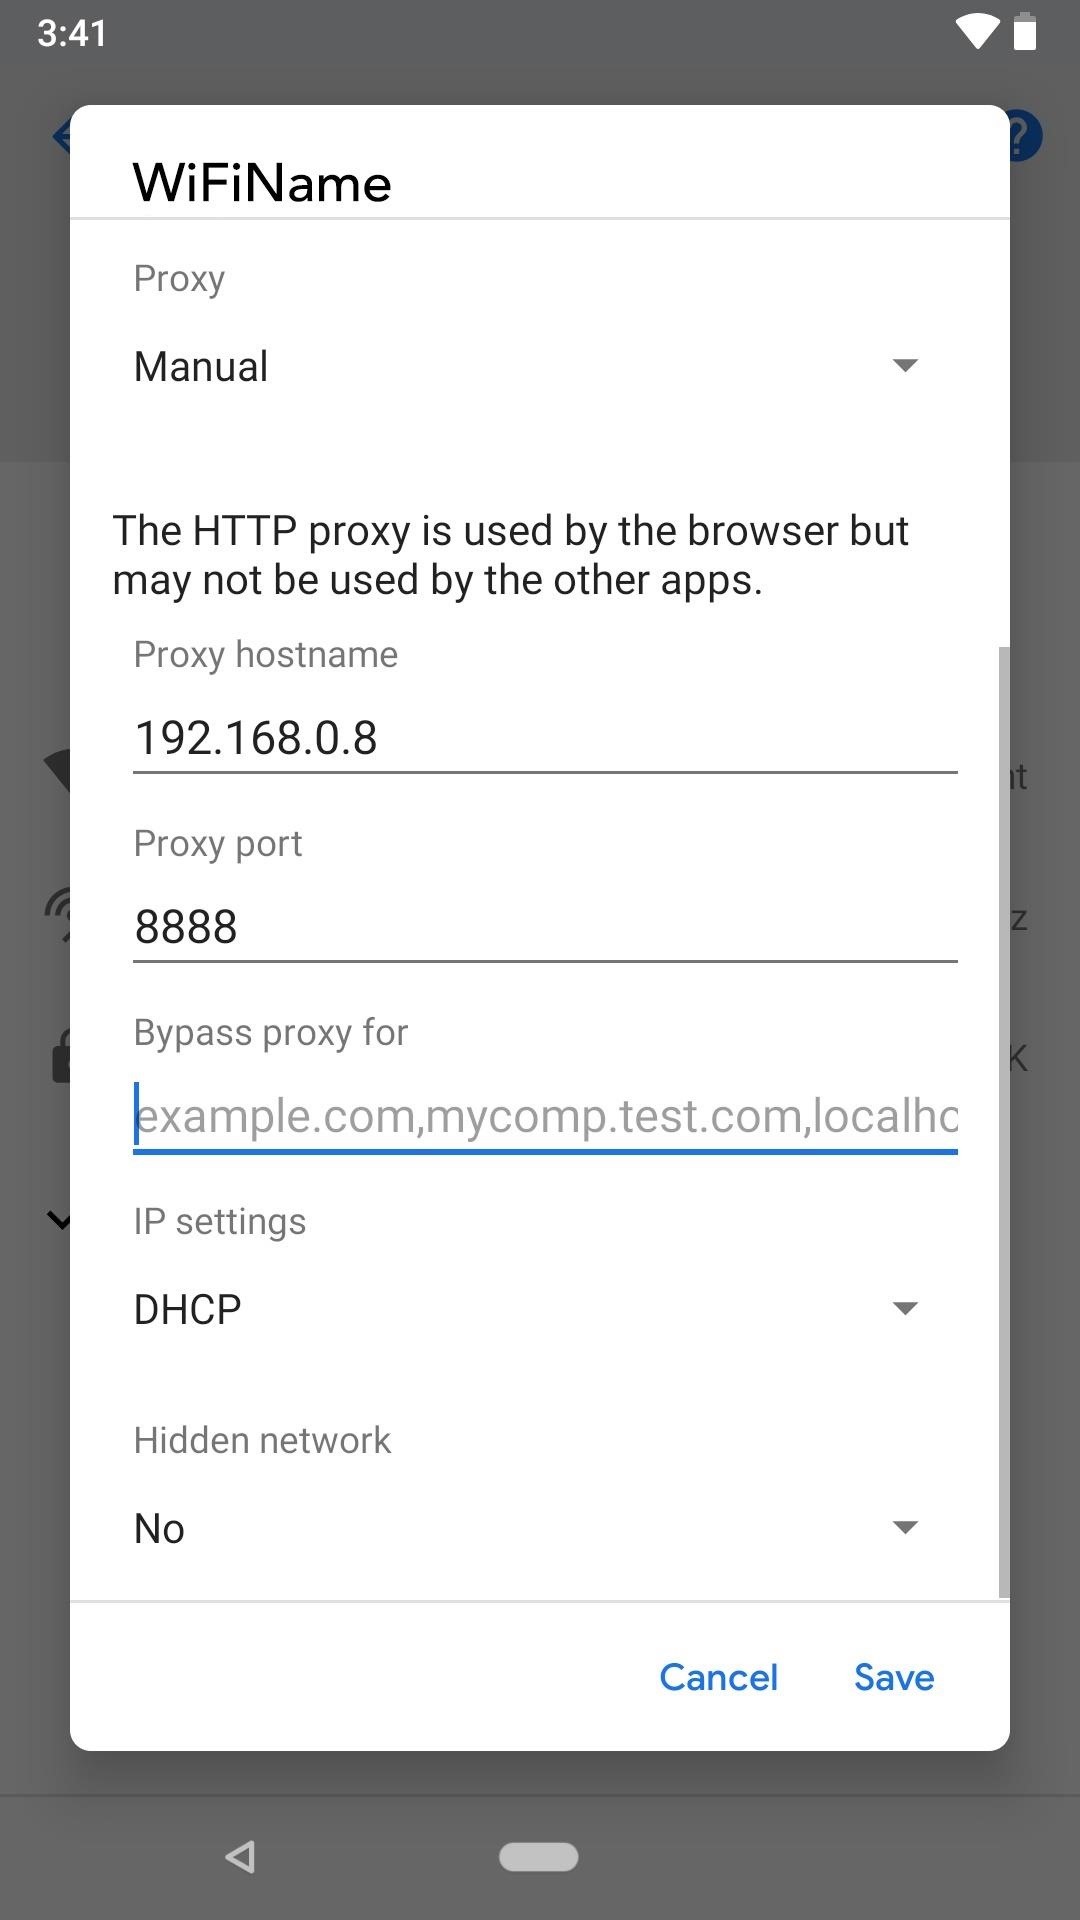
On an iPhone, navigate to "Wi-Fi" in the Settings app, then make sure it's on the same network as Charles. Tap the info icon next to the connected network, then scroll to the bottom and select "Configure Proxy." Select the row for "Manual," and enter the server and port numbers from the last dialog Charles gave you. Tap "Save" to finish.
For Android phones, the process differs slightly depending on the OEM and software version. Generally, you would open up the Wi-Fi settings, tap-and-hold on the shared network, then select something like "Manage network settings" or "Modify network" or a pencil icon. Select the option to show advanced settings, then open the "Proxy" settings and manually enter the server and port numbers that Charles gave you before. Make sure to tap "Save" to finish up.

Your smartphone is now configured to route HTTP traffic through Charles.
Step 5: Allow the Connection to Charles
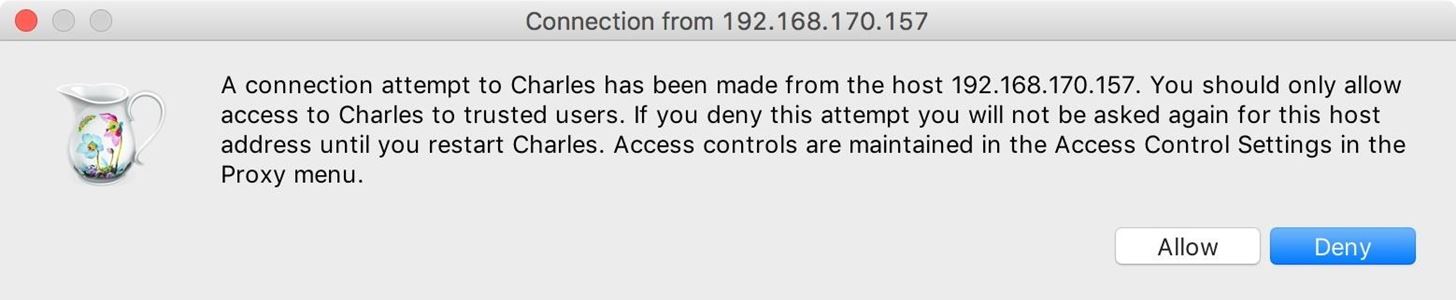
When your smartphone is connected to Charles, you'll get a dialog on your computer alerting you that Charles has received an attempt to connect. Select "Allow" now. If you deny it, instead, you'll need to restart Charles to get the prompt again.
Step 6: Install the Root Certificate on Your Phone
Next, using the web browser on your smartphone, navigate to chls.pro/ssl.
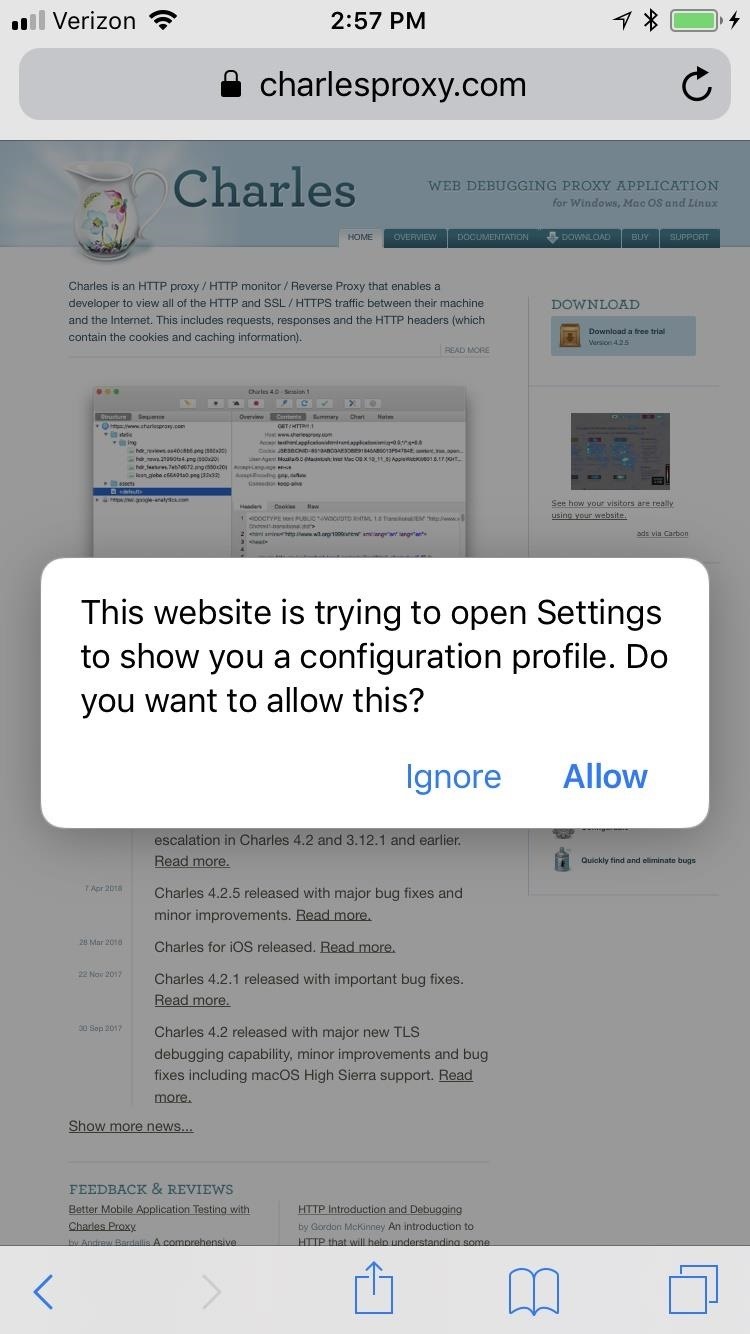
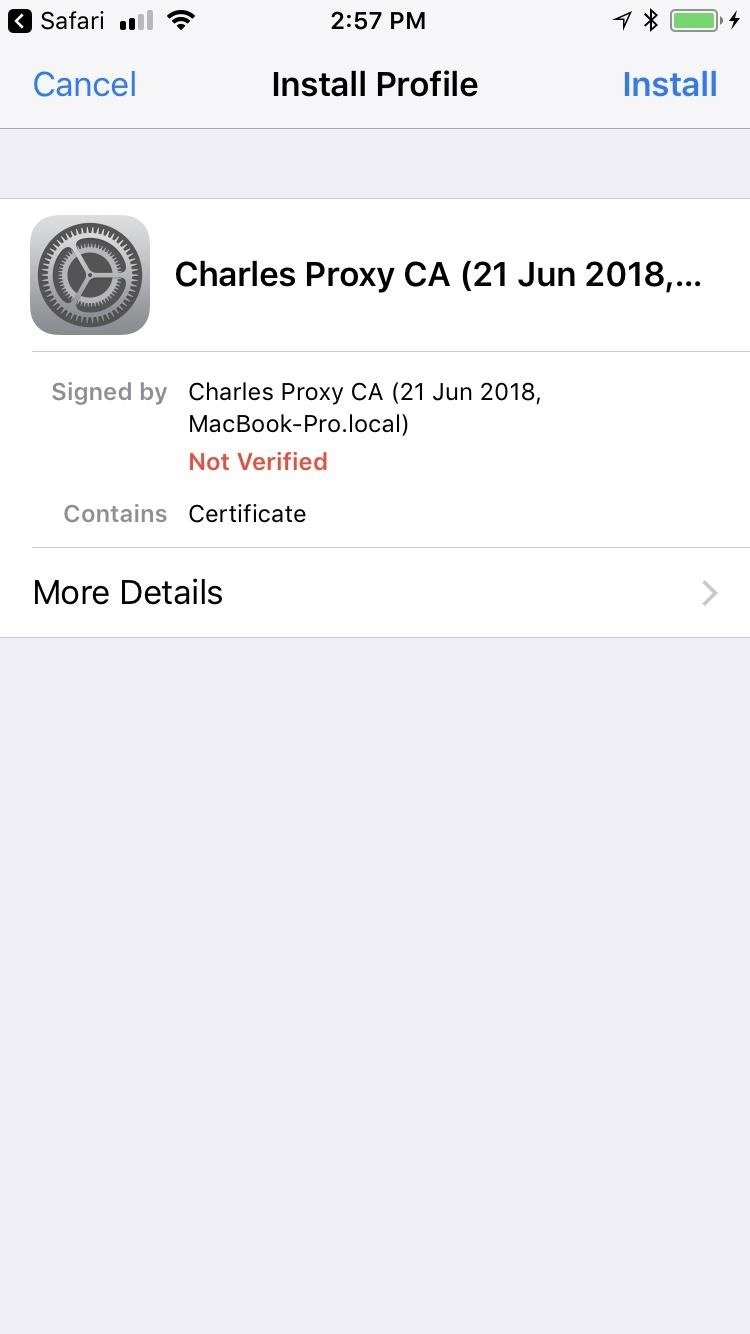
On an iPhone, you'll immediately get a prompt asking to allow the site to show you a configuration profile. Tap "Allow." After that, you'll be brought to the Install Profile screen for the Charles Proxy CA. Tap "Install," which will bring you to a warning page. Tap "Install" again, and yet again on the popup. Lastly, tap "Done" to finish up.
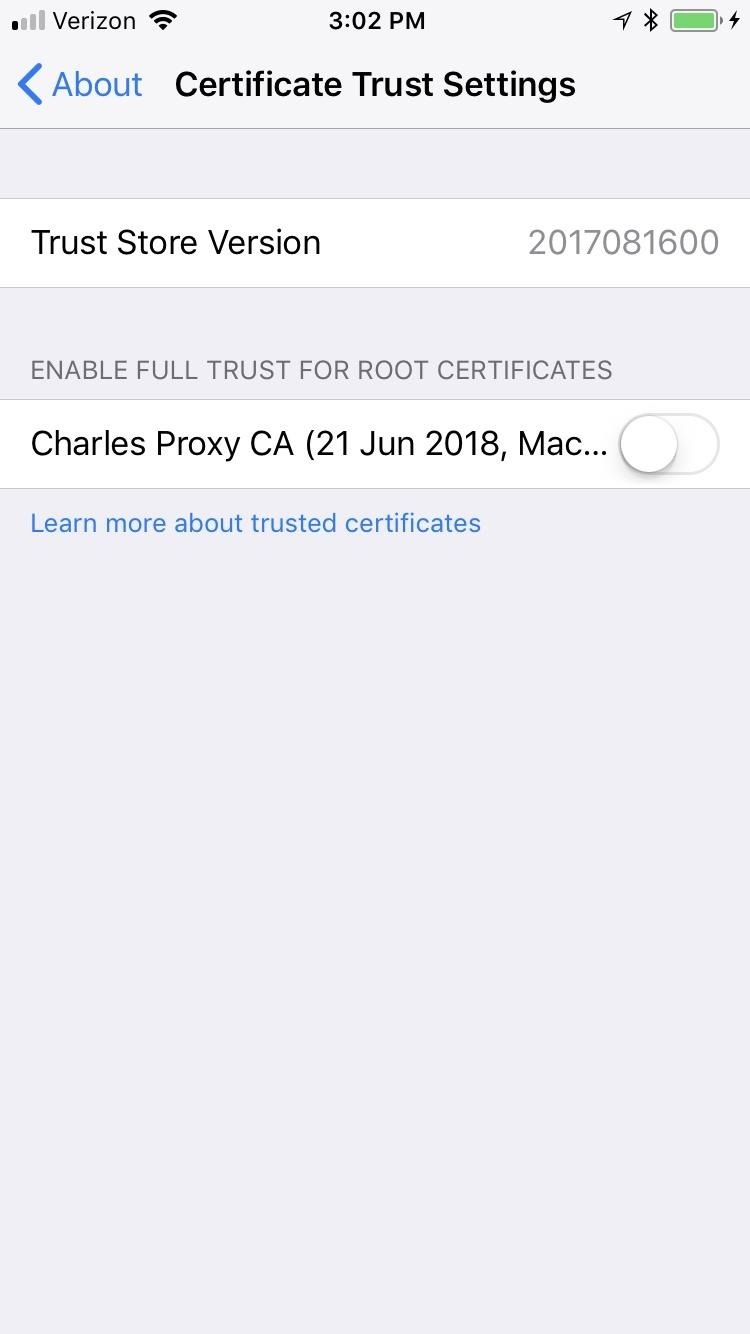
If you're on iOS 10 or above, you'll also have to visit "General" in the Settings app. Tap "About," then "Certificate Trust Settings" at the bottom. Under the Enable Full Trust for Root Certificates section, tap the toggled next to the Charles Proxy CA.
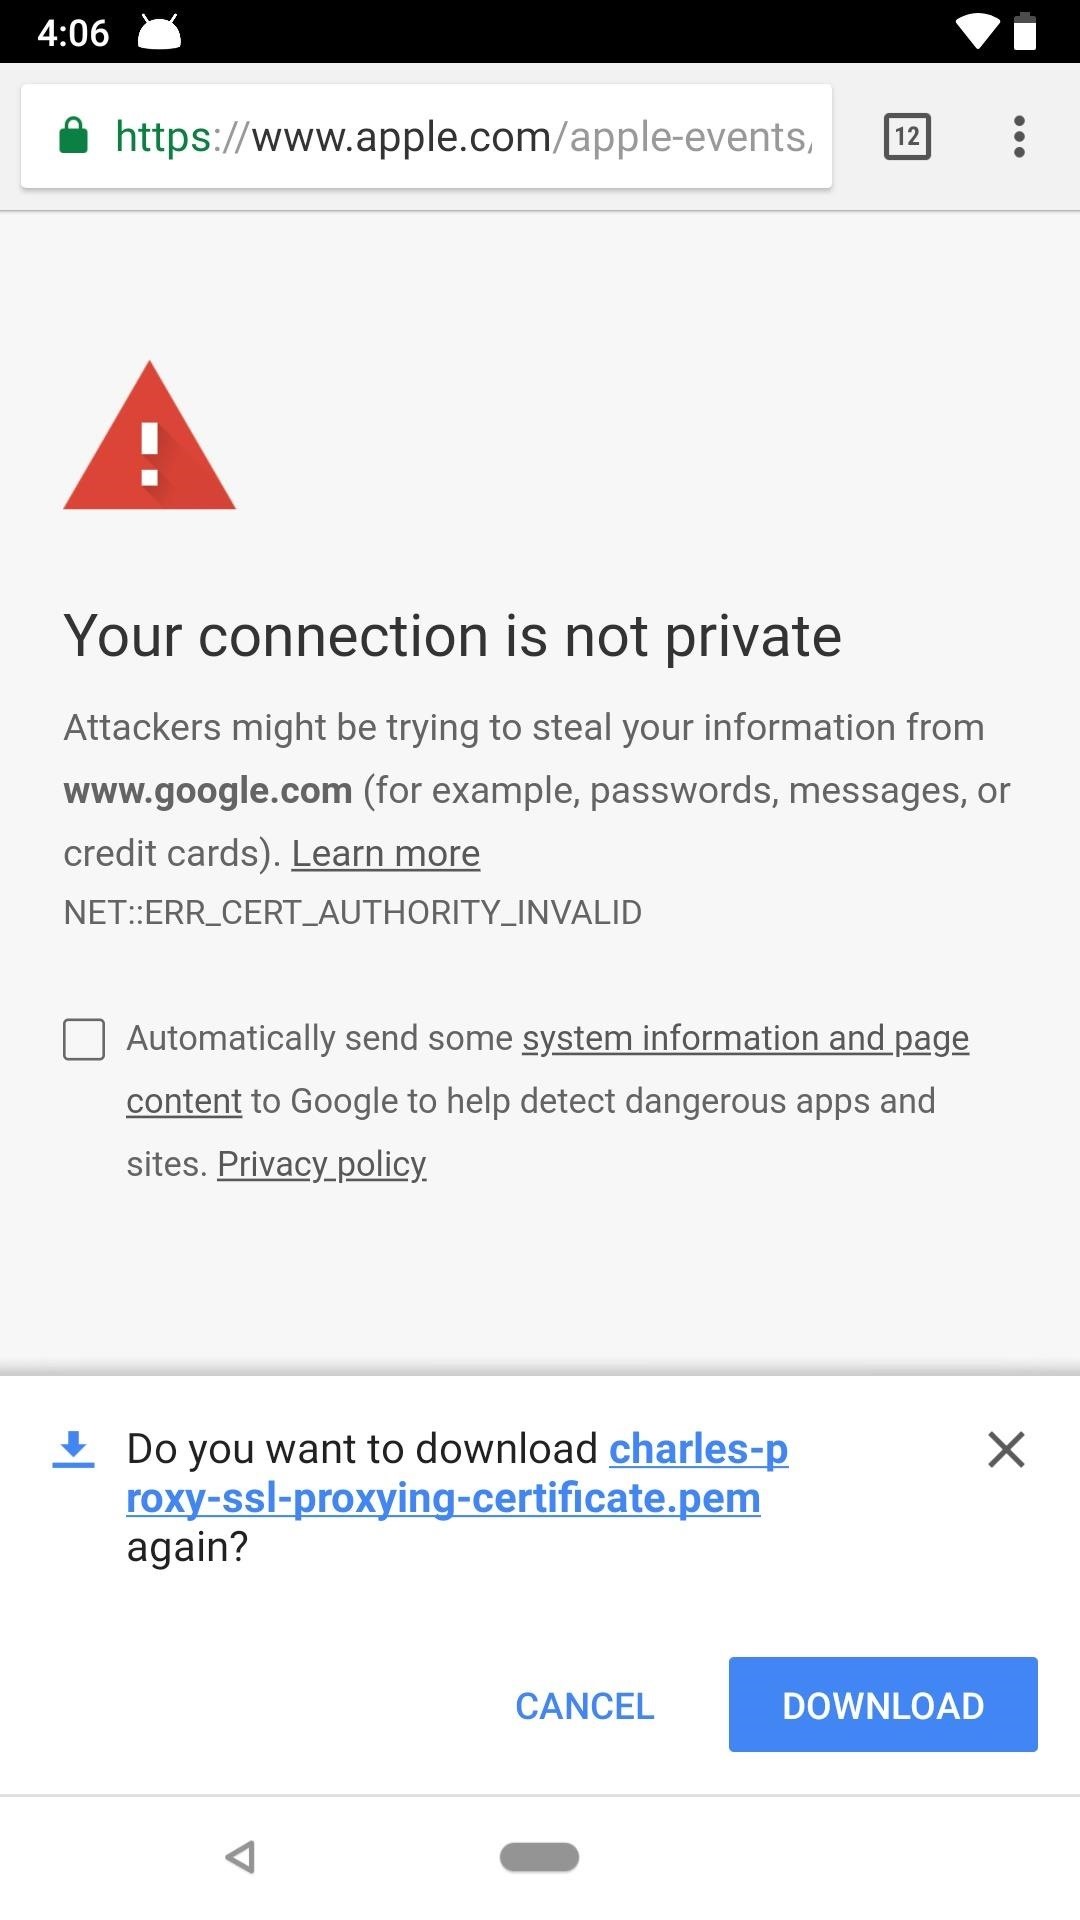
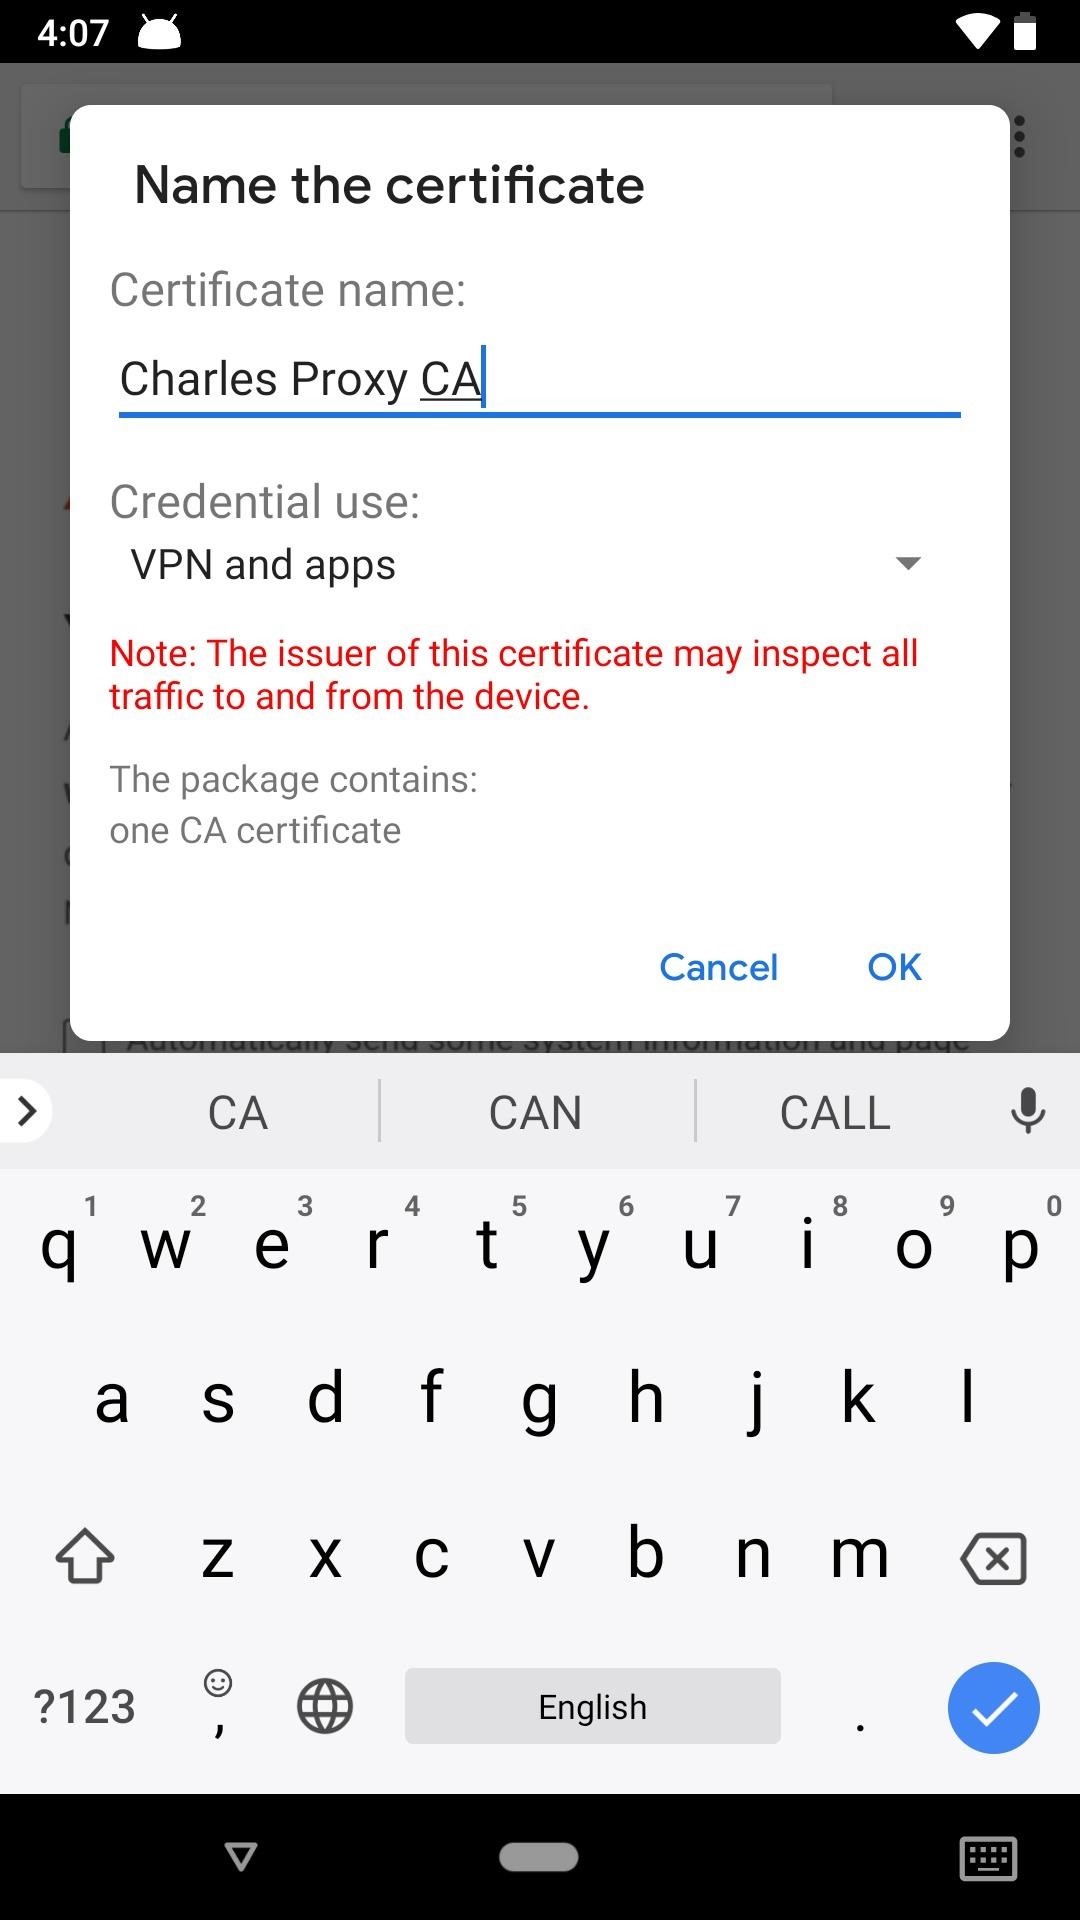
On an Android device, the file should immediately try to download on your device. If it doesn't, you may get a prompt asking to download it, in which case you'd hit "Download." After downloading, you will have to enter in your PIN or fingerprint in order to continue. Then, the certificate window will pop up, where you'll want to name the certificate something like "Charles Proxy CA." Hit "OK" when finished.
Note that you will need to have ay DNS-based ad-blockers disabled on your Android device in order to install the certificate from Charles Proxy. Also, later on when analyzing the data, having your ad-blocker turned on again will only mask the traffic, so it's best to keep it off until you're down using Charles.
Now that you have the certificate installed, you can see encrypted HTTPS data in plaintext in Charles, not just HTTP data like without the certificate.
Step 7: Enable SSL Proxying for All Hosts in Charles
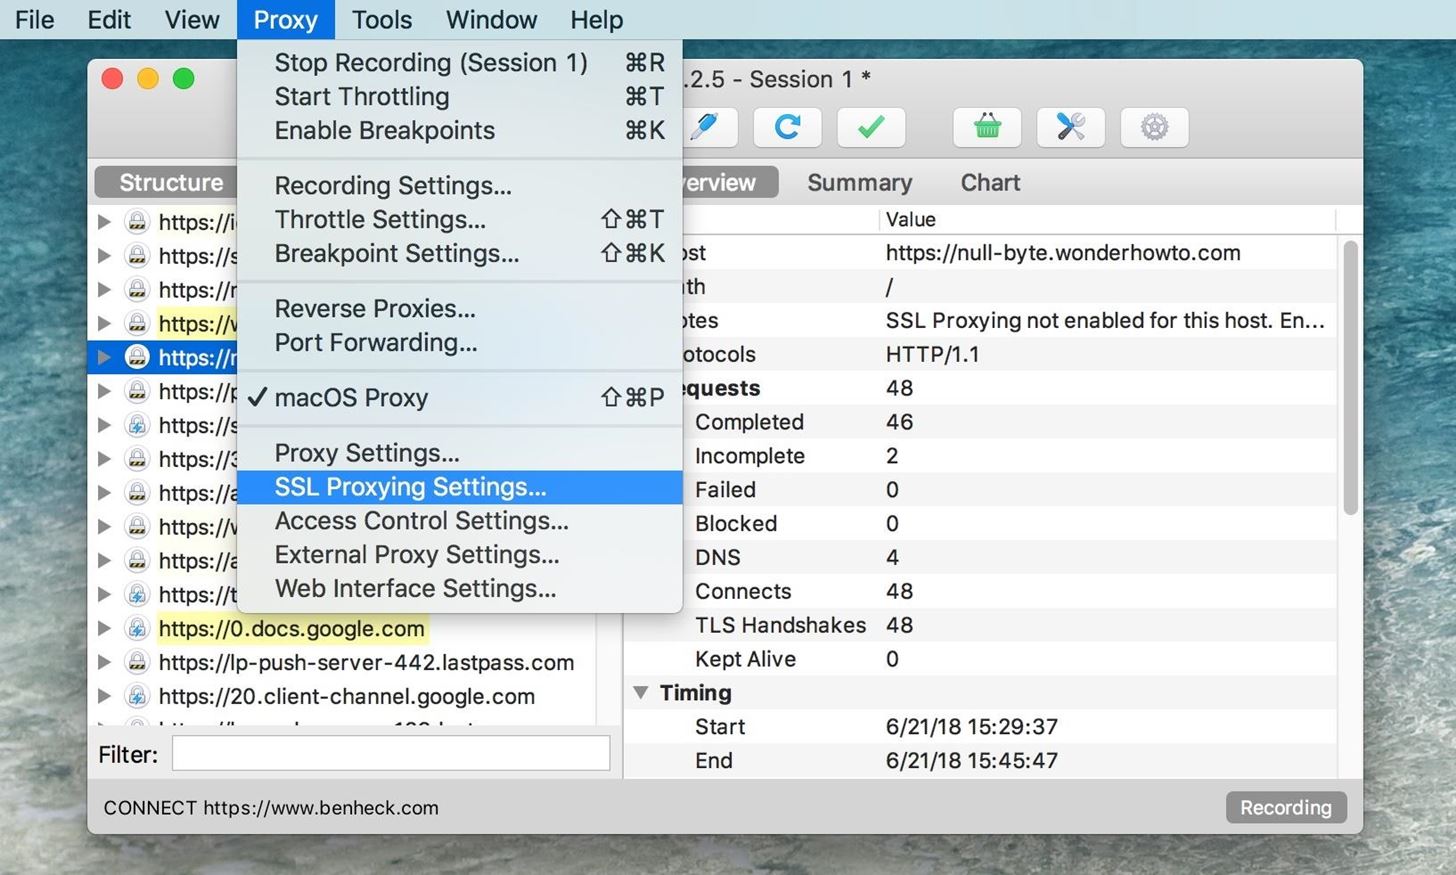
You're not done just yet. There's one more step before viewing all the data coming and going from apps. You'll need to configure Charles to enable SSL proxying for all hosts. Navigate to "Proxy" in the menu, then select "SSL Proxying Settings."
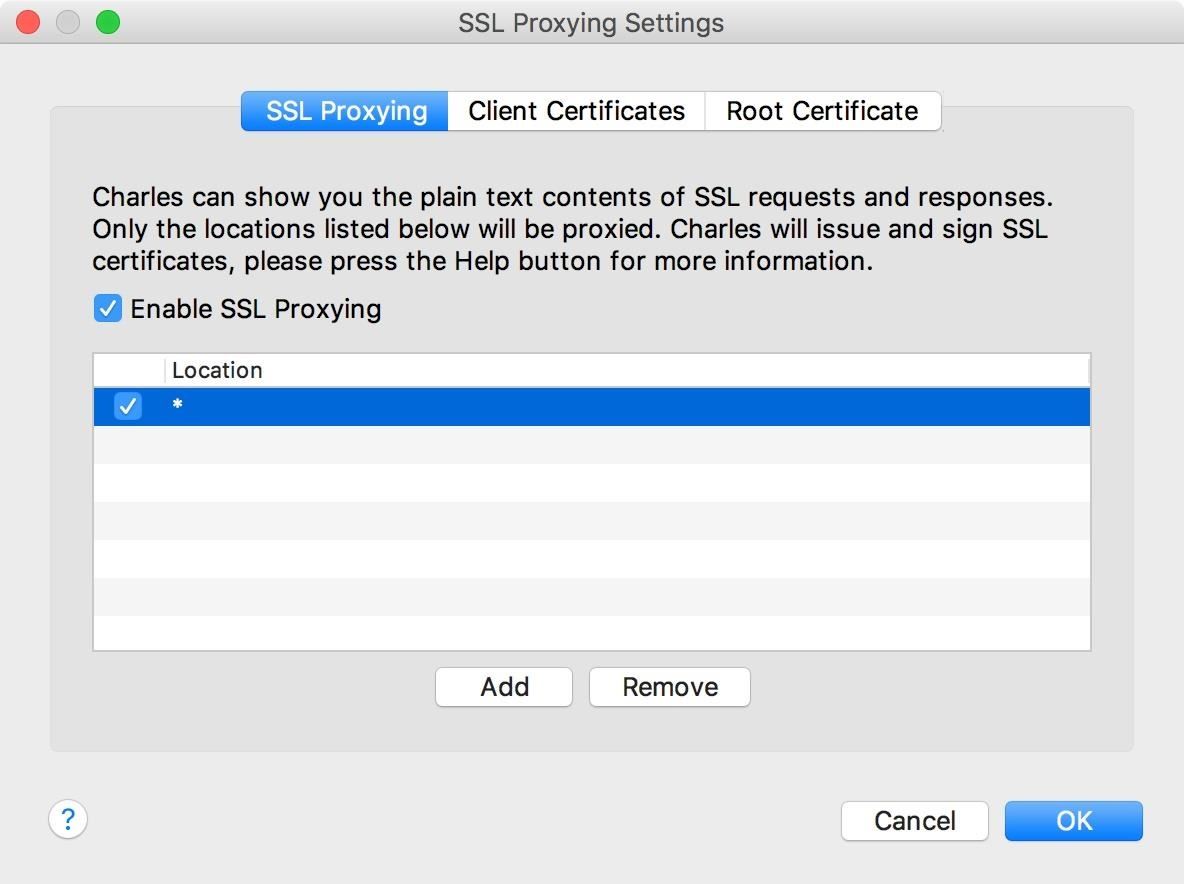
When the options come up, hit the "Add" button in the "SSL Proxying" tab. When the Edit Location box appears, just hit "OK" or manually enter * (a single asterisk) into the Host field and hit "OK." This is a wildcard character that will apply to all hosts. Leaving the Host field blank will create a wildcard for you.
Make sure to hit "OK" in the SSL Proxying Settings window to save your settings. And now that you're all set up, open an app on your smartphone to see what kind of data they're sending!
Step 8: Isolate the Phone Traffic from Other Devices
Depending on what kind of web traffic is being generated on the machine running Charles, it can be hard to tell what requests are coming from a phone or not. Charles automatically modifies your network settings to route HTTP traffic on your computer through the proxy, but it's pretty simple to change that manually so you only see phone traffic.
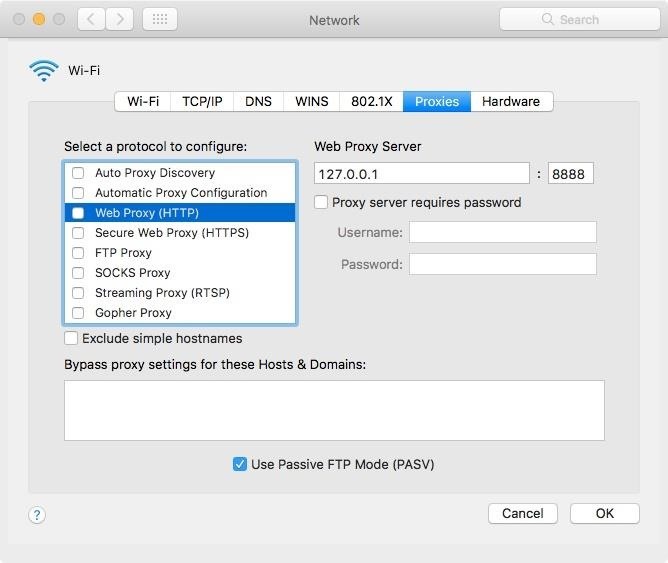
In macOS, you can change this in "System Preferences." Once there, navigate to "Network," then "Advanced," and under the "Proxies" tab, uncheck the boxes for "Web Proxy (HTTP)" and "Secure Web Proxy (HTTPS)." Charles will automatically change this setting every time it starts up again, so you'll need to repeat this step every time you want to isolate phone traffic.
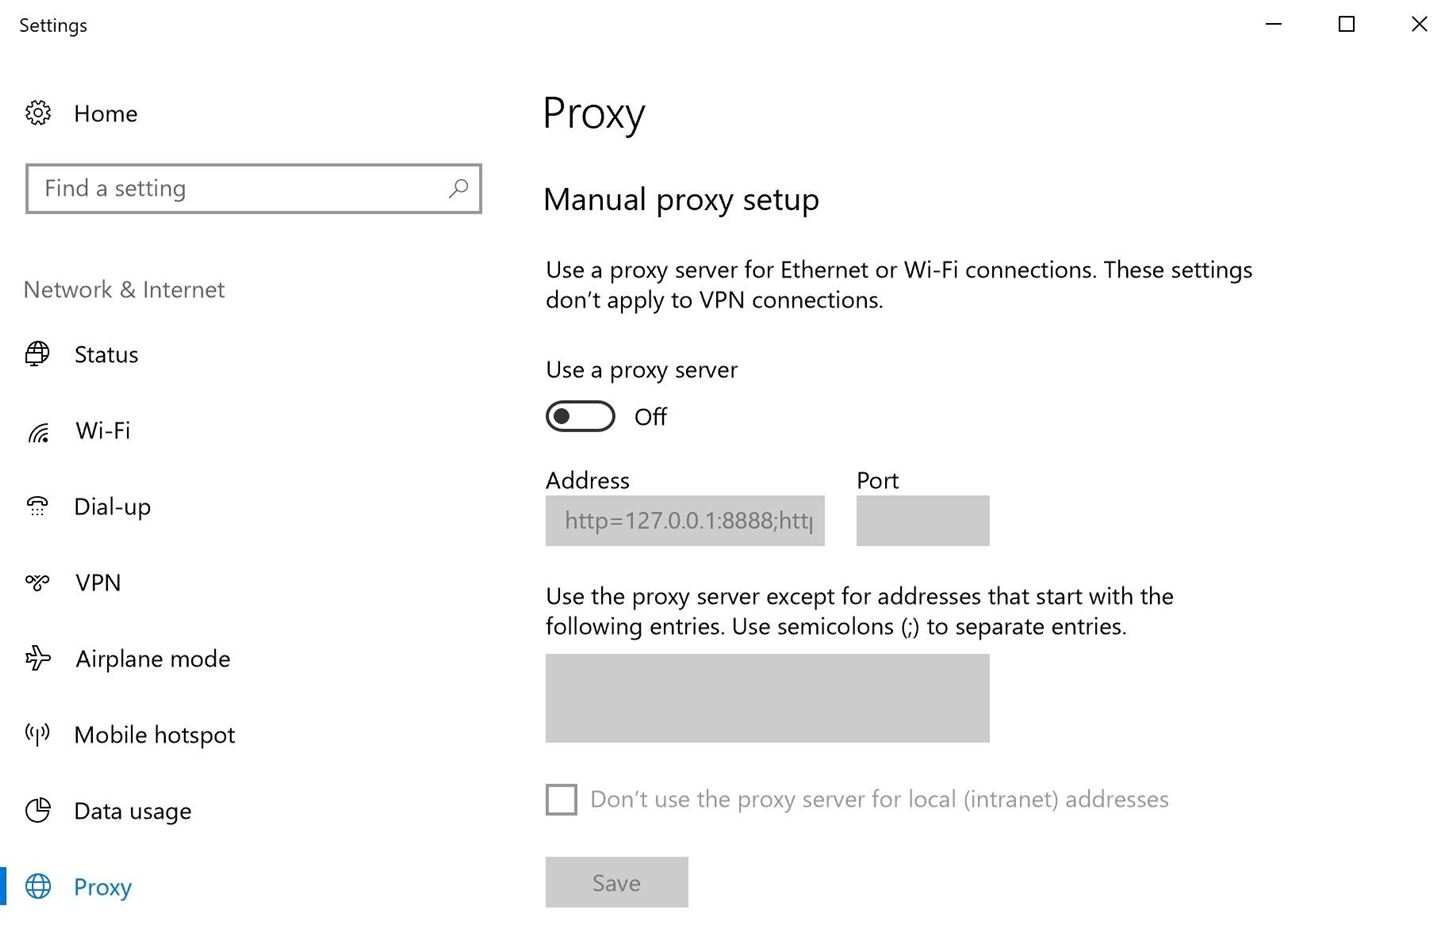
On a Windows setup, you'll need to open up your "Settings." Next, select "Network & Internet," then "Proxy." When there, scroll down to Manual proxy setup, then toggle off the "Use a proxy server" switch. Unlike with Macs, you will not need to do this each time after restarting Charles.
Step 9: Use Your Apps & Analyze the Results
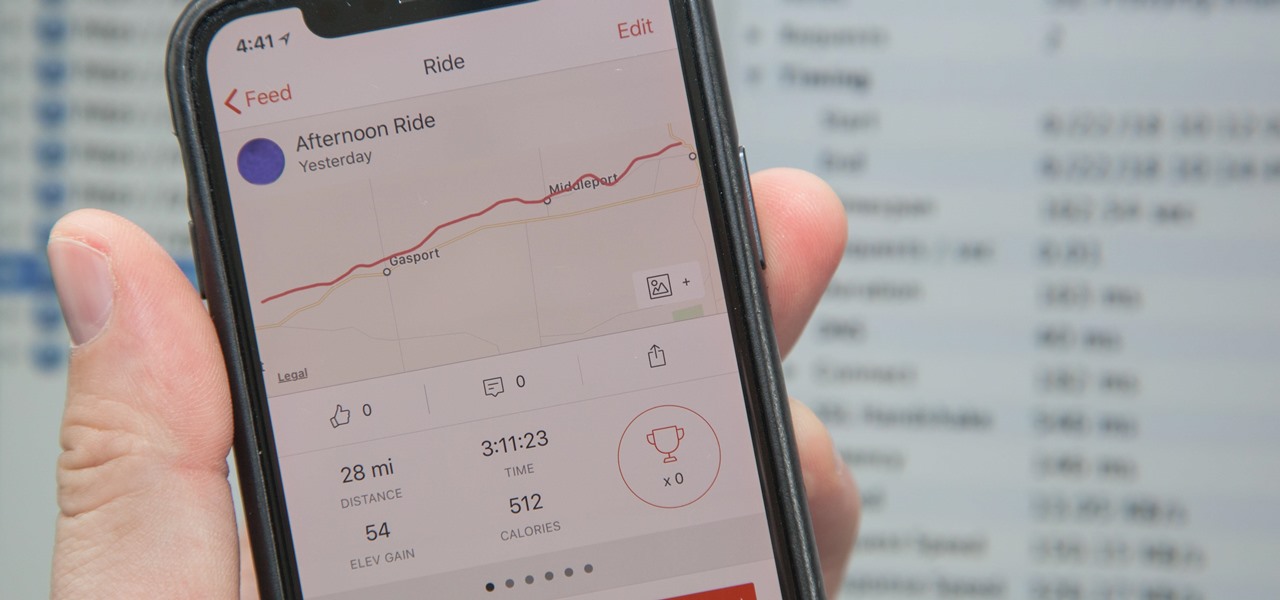
I chose to test this on something I use pretty often, Strava, a fitness-tracking app that lets users record and upload data for workouts. When I open Strava on my smartphone, I see a number of hostnames, i.e., domains, populate in the left panel in Charles.
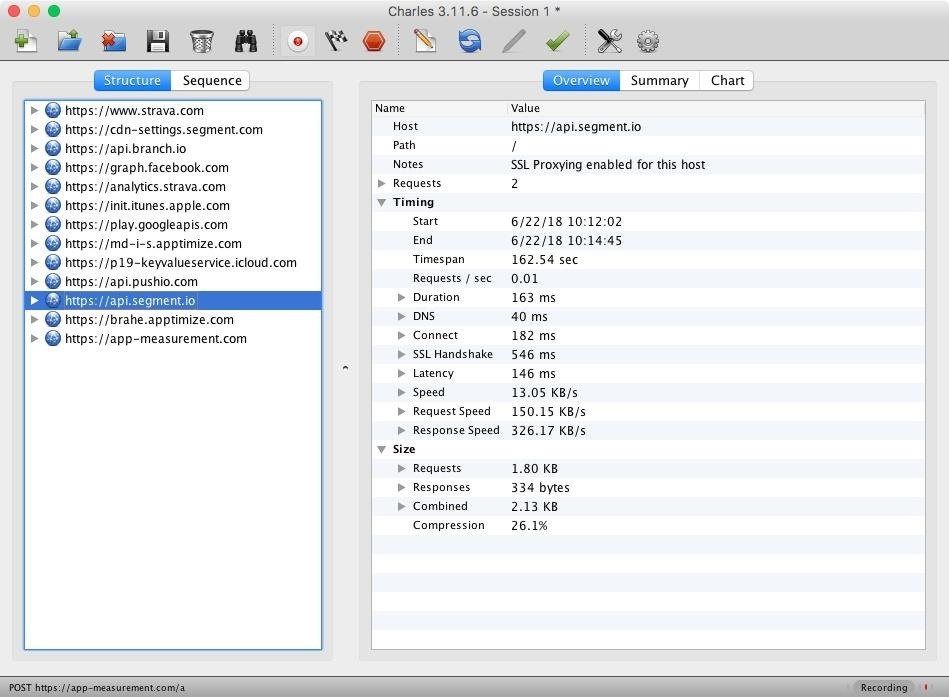
By expanding these and inspecting in the "Contents" panel on the right, you can see exactly what information these apps are sending to manufacturers and third parties. I recognized one of the entries for Strava as a commonly used analytics platform and decided to check it out.
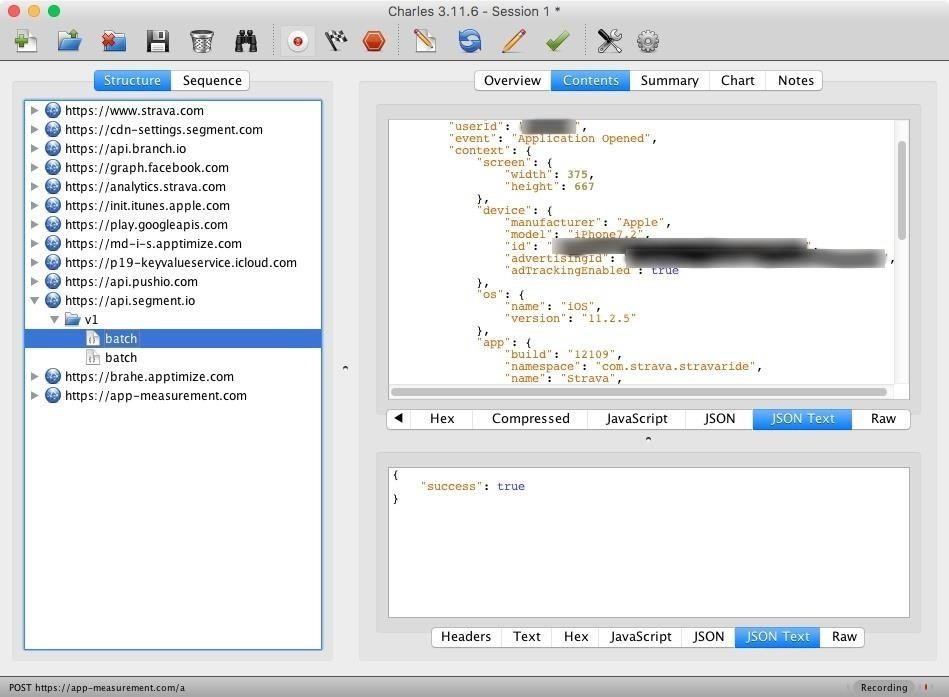
I'm not naïve enough to post the entire payload, but there was some really detailed info that I found in here, including my name, location, wireless carrier, email address, and even some advertising categories that it had placed me in. This isn't very surprising, knowing how much info these apps can harvest, but it was interesting to see it all laid out in plaintext.
Keep an eye out for requests to known app analytics companies. A few of the more popular ones include Segment, Fabric, Flurry, and Firebase. Ad providers also receive a pretty creepy volume of tracking data and can be a good place to look as well — you can often tell what these are by the hostname.
For the most part, the data being sent and received by apps is usually innocuous. Anything going to an address that looks like api.appname.com, for example, tends to be functional data needed for the app to work. Looking into these requests can give you a good behind-the-scenes look at how the app works, and it's a good place to look to make sure it's not "phoning home" with data you don't expect it to be accessing.
Can't Get Some Apps to Work on Your Phone?
A lot of apps implement SSL certificate pinning, meaning they specifically validate the root certificate and won't be susceptible to a man-in-the-middle attack like this. In my case, the actual Strava API validates certificates, but the third parties receiving my information did not.
If you try using an app on your phone and it won't load or work properly, it likely implements SSL certificate pinning, so you won't be able to see any of the web traffic for it. A lot of apps from Apple and Google have this level of security baked in, so third-party apps are the ones you'll want to try out — they're the ones more likely to be doing shady things with your data anyway.
Removing Everything Once You're Done
Once you're done analyzing the mobile app traffic on your smartphone, you should remove the installed certificate as you wouldn't want your man-in-the-middle certificate to stay on your device any longer than you need it there while you're explicitly using it. You may also want to remove the proxy setup.
On an iPhone, to delete the certificate, go to "General" in Settings, then select "Profile" near the bottom. Tap the "Charles Proxy CA" configuration profile, then hit "Remove Profile." Tap "Remove" to confirm. To stop the proxy server, select "Wi-Fi" in Settings, tap on the Wi-Fi network, select "Configure Proxy," then turn it "Off" and hit "Save."
For all of you Android users, the process will differ depending on your device. Select "Security & location" or "Lock screen and security" from Settings, tap "Advanced" or "Other security settings," then "Encryption & credentials" or "View security certificates." On stock Android, you will also have to tap "Trusted credentials." Now, select the "User" tab, then tap on the "Charles Proxy CA." Tap "Remove," then "OK" to delete it. As for the proxy, just go back into the options for the Wi-Fi network and change the proxy settings from "Manual" to "None."
Just updated your iPhone? You'll find new emoji, enhanced security, podcast transcripts, Apple Cash virtual numbers, and other useful features. There are even new additions hidden within Safari. Find out what's new and changed on your iPhone with the iOS 17.4 update.


Be the First to Comment
Share Your Thoughts