

Fondant looks pretty, but man, it sure does taste weird.
If you've ever slaved over decorating a cake with fondant, you know how disappointing it is to watch people peel it off and only eat the cake. You can avoid this by skipping the fondant altogether, but you'd also be giving up a slick and smooth-looking cake.
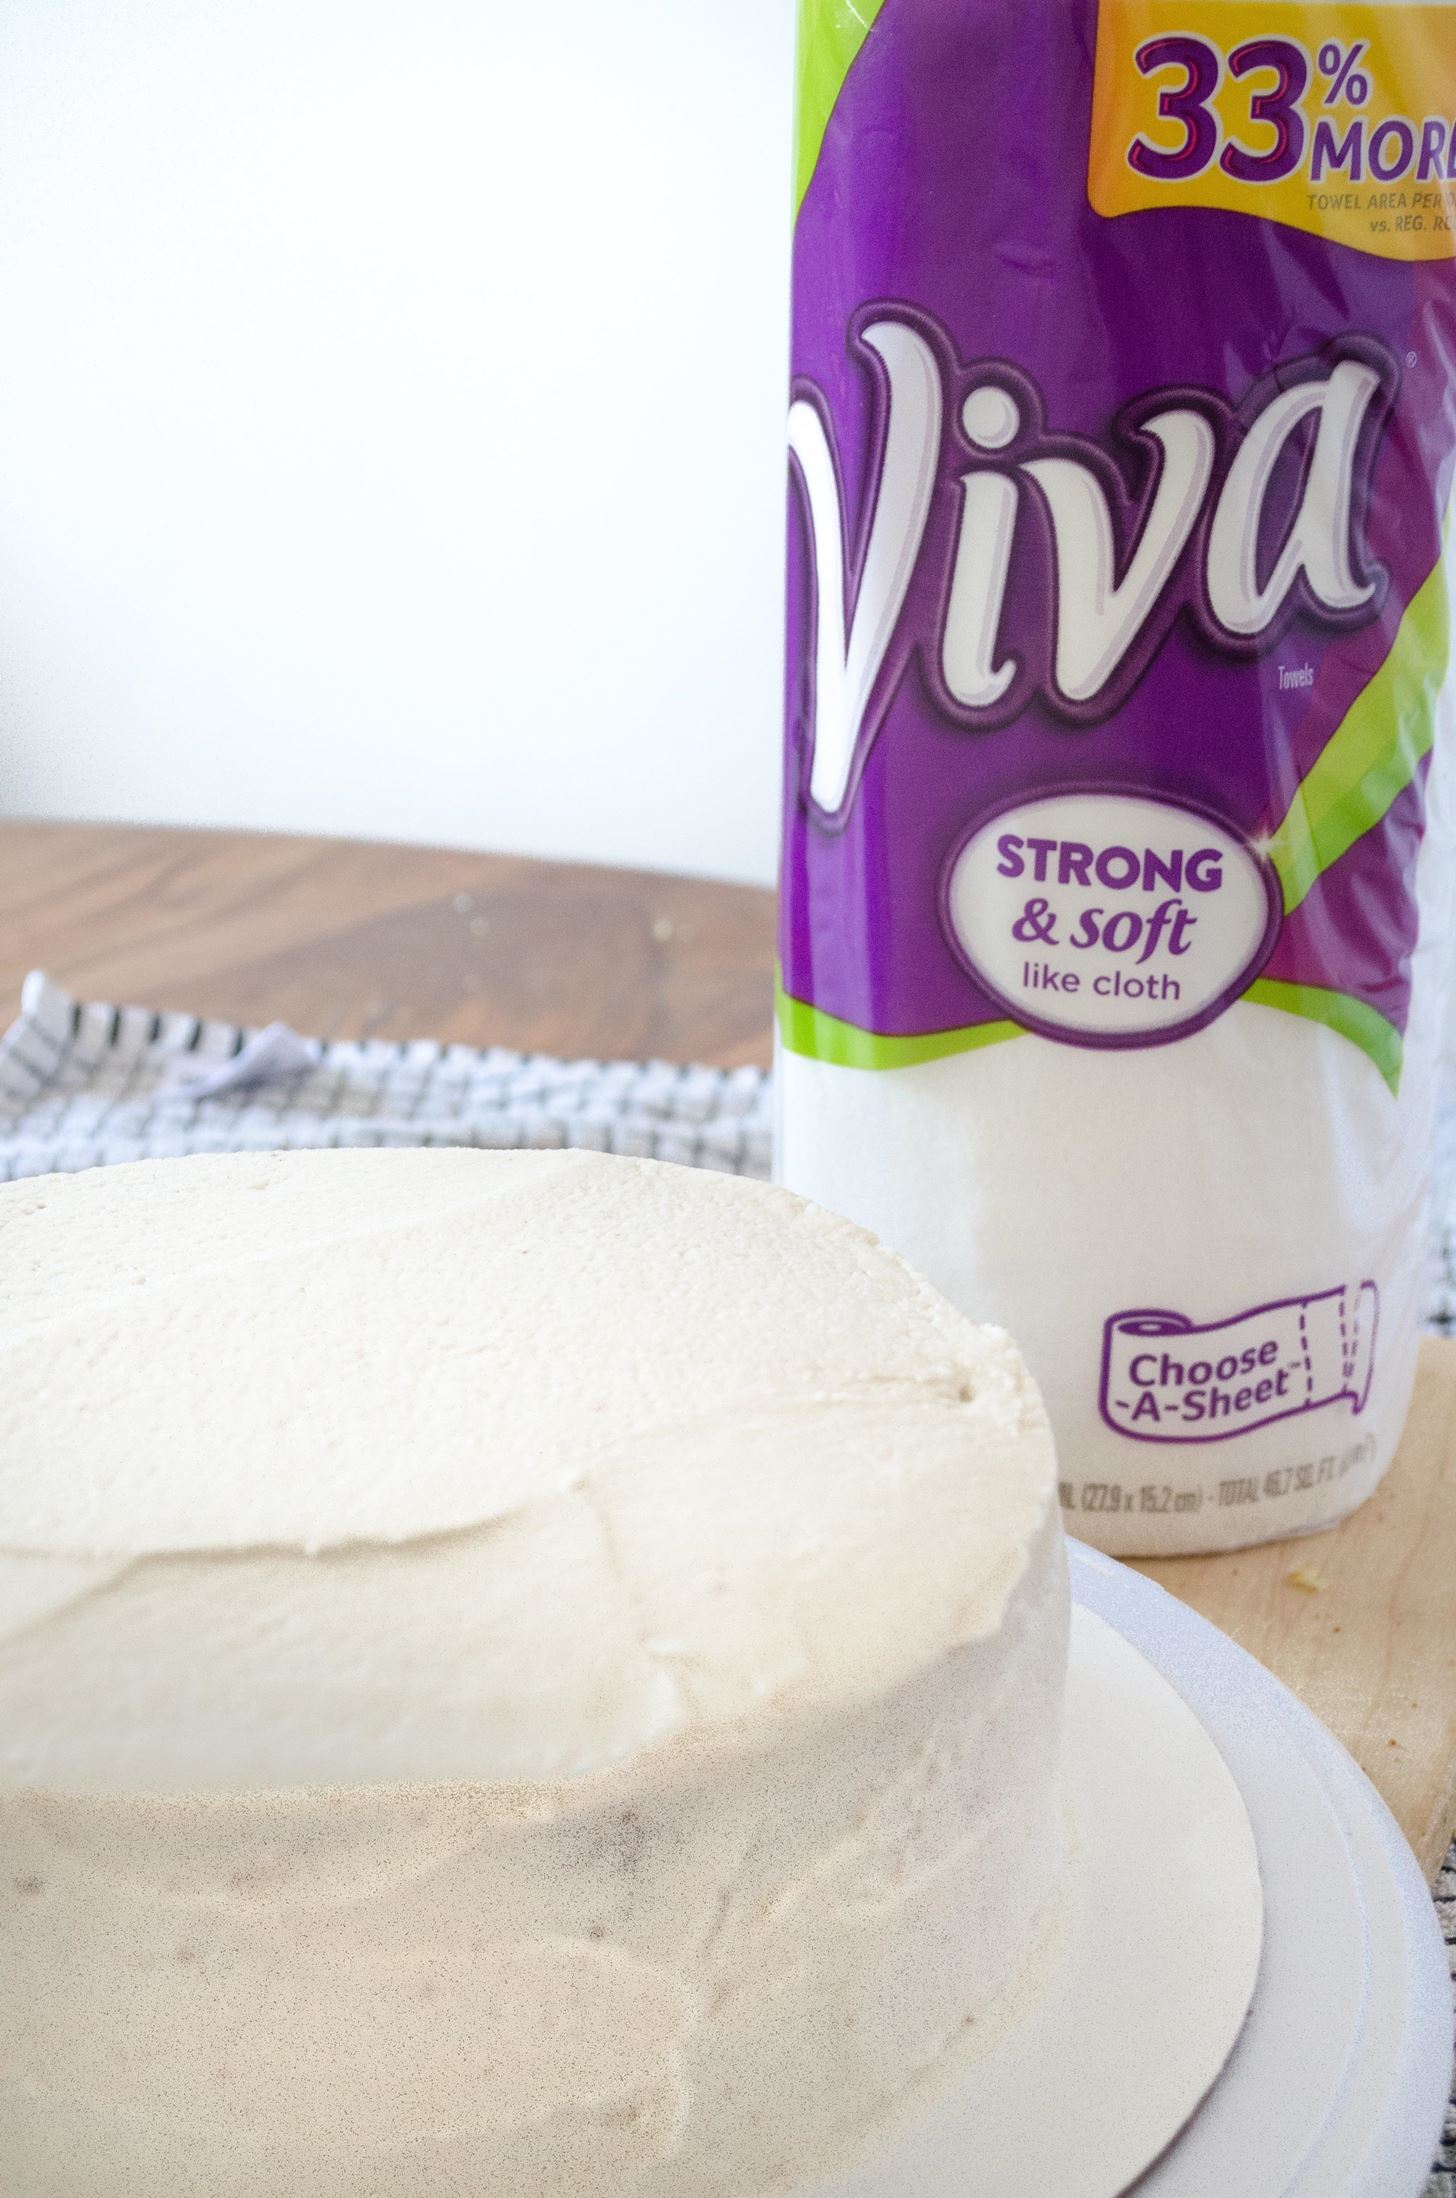
Well, I'd like to introduce you to the Viva paper towel frosting technique. This genius decorating hack makes it possible to achieve a professional, fondant-smooth cake—without actually using fondant. Big shout out to Brooke Edwards of Frost Me Up for introducing us to this clever cake hack.
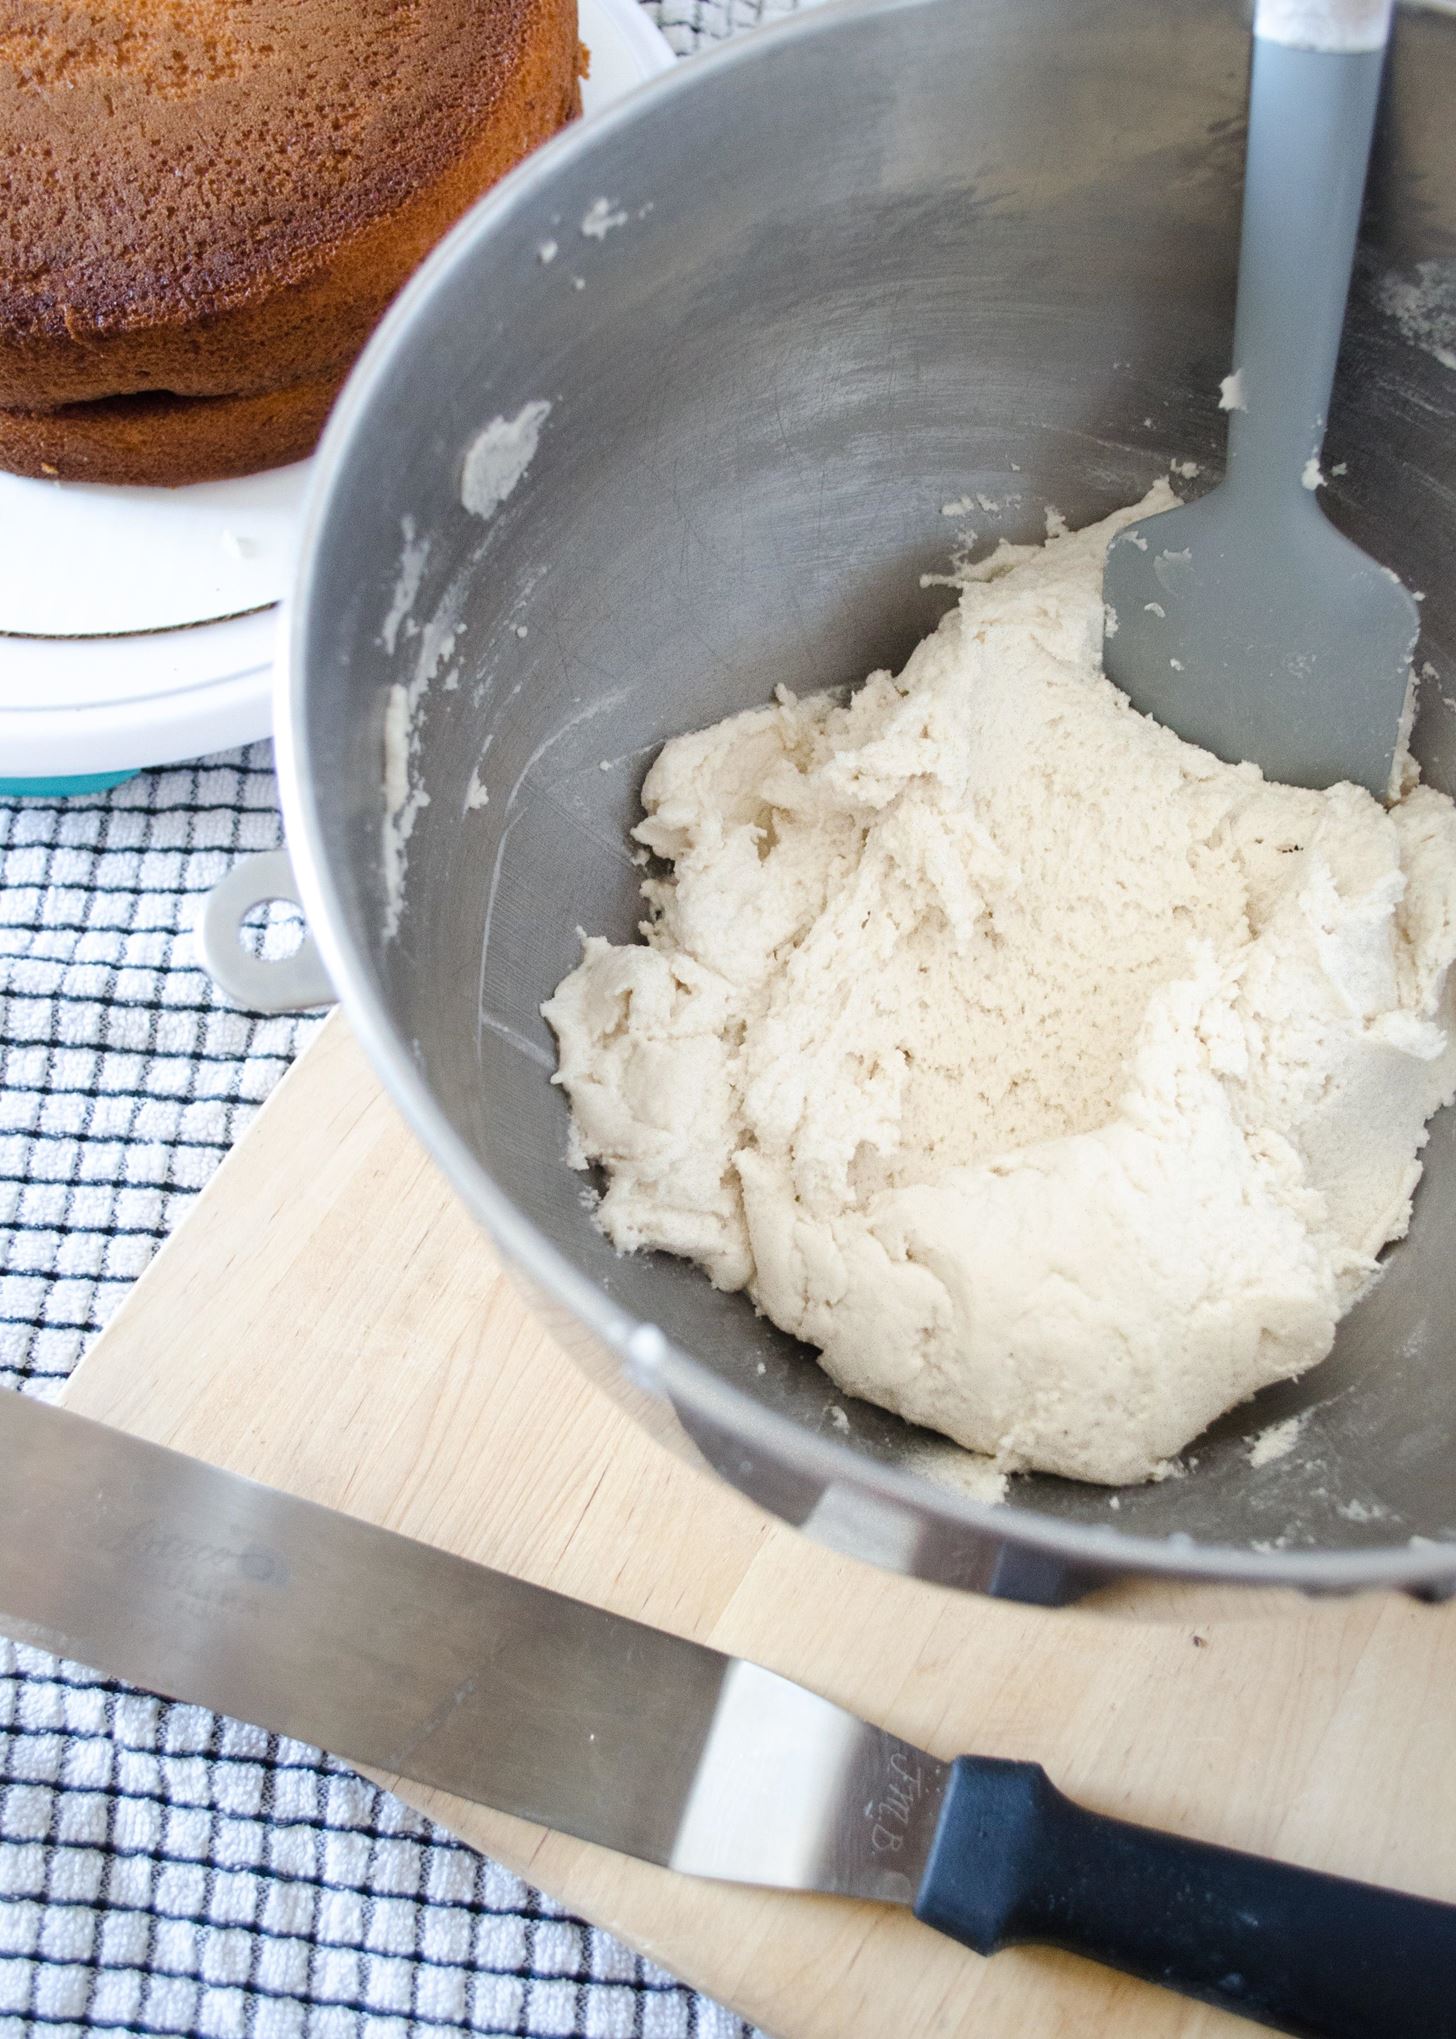
The Best Frosting for the Job
As per Brooke's recommendation, I used her classic white frosting recipe, which uses 100% vegetable shortening, rather than butter. Frosting made with shortening is less moist and forms a "crust" layer that doesn't stick to a paper towel, whereas traditional buttercream frosting stays soft and will stick to the paper towel (making a mess you don't want). Additionally, a frosting made with shortening will be much more pristinely white than a butter-yellow buttercream.
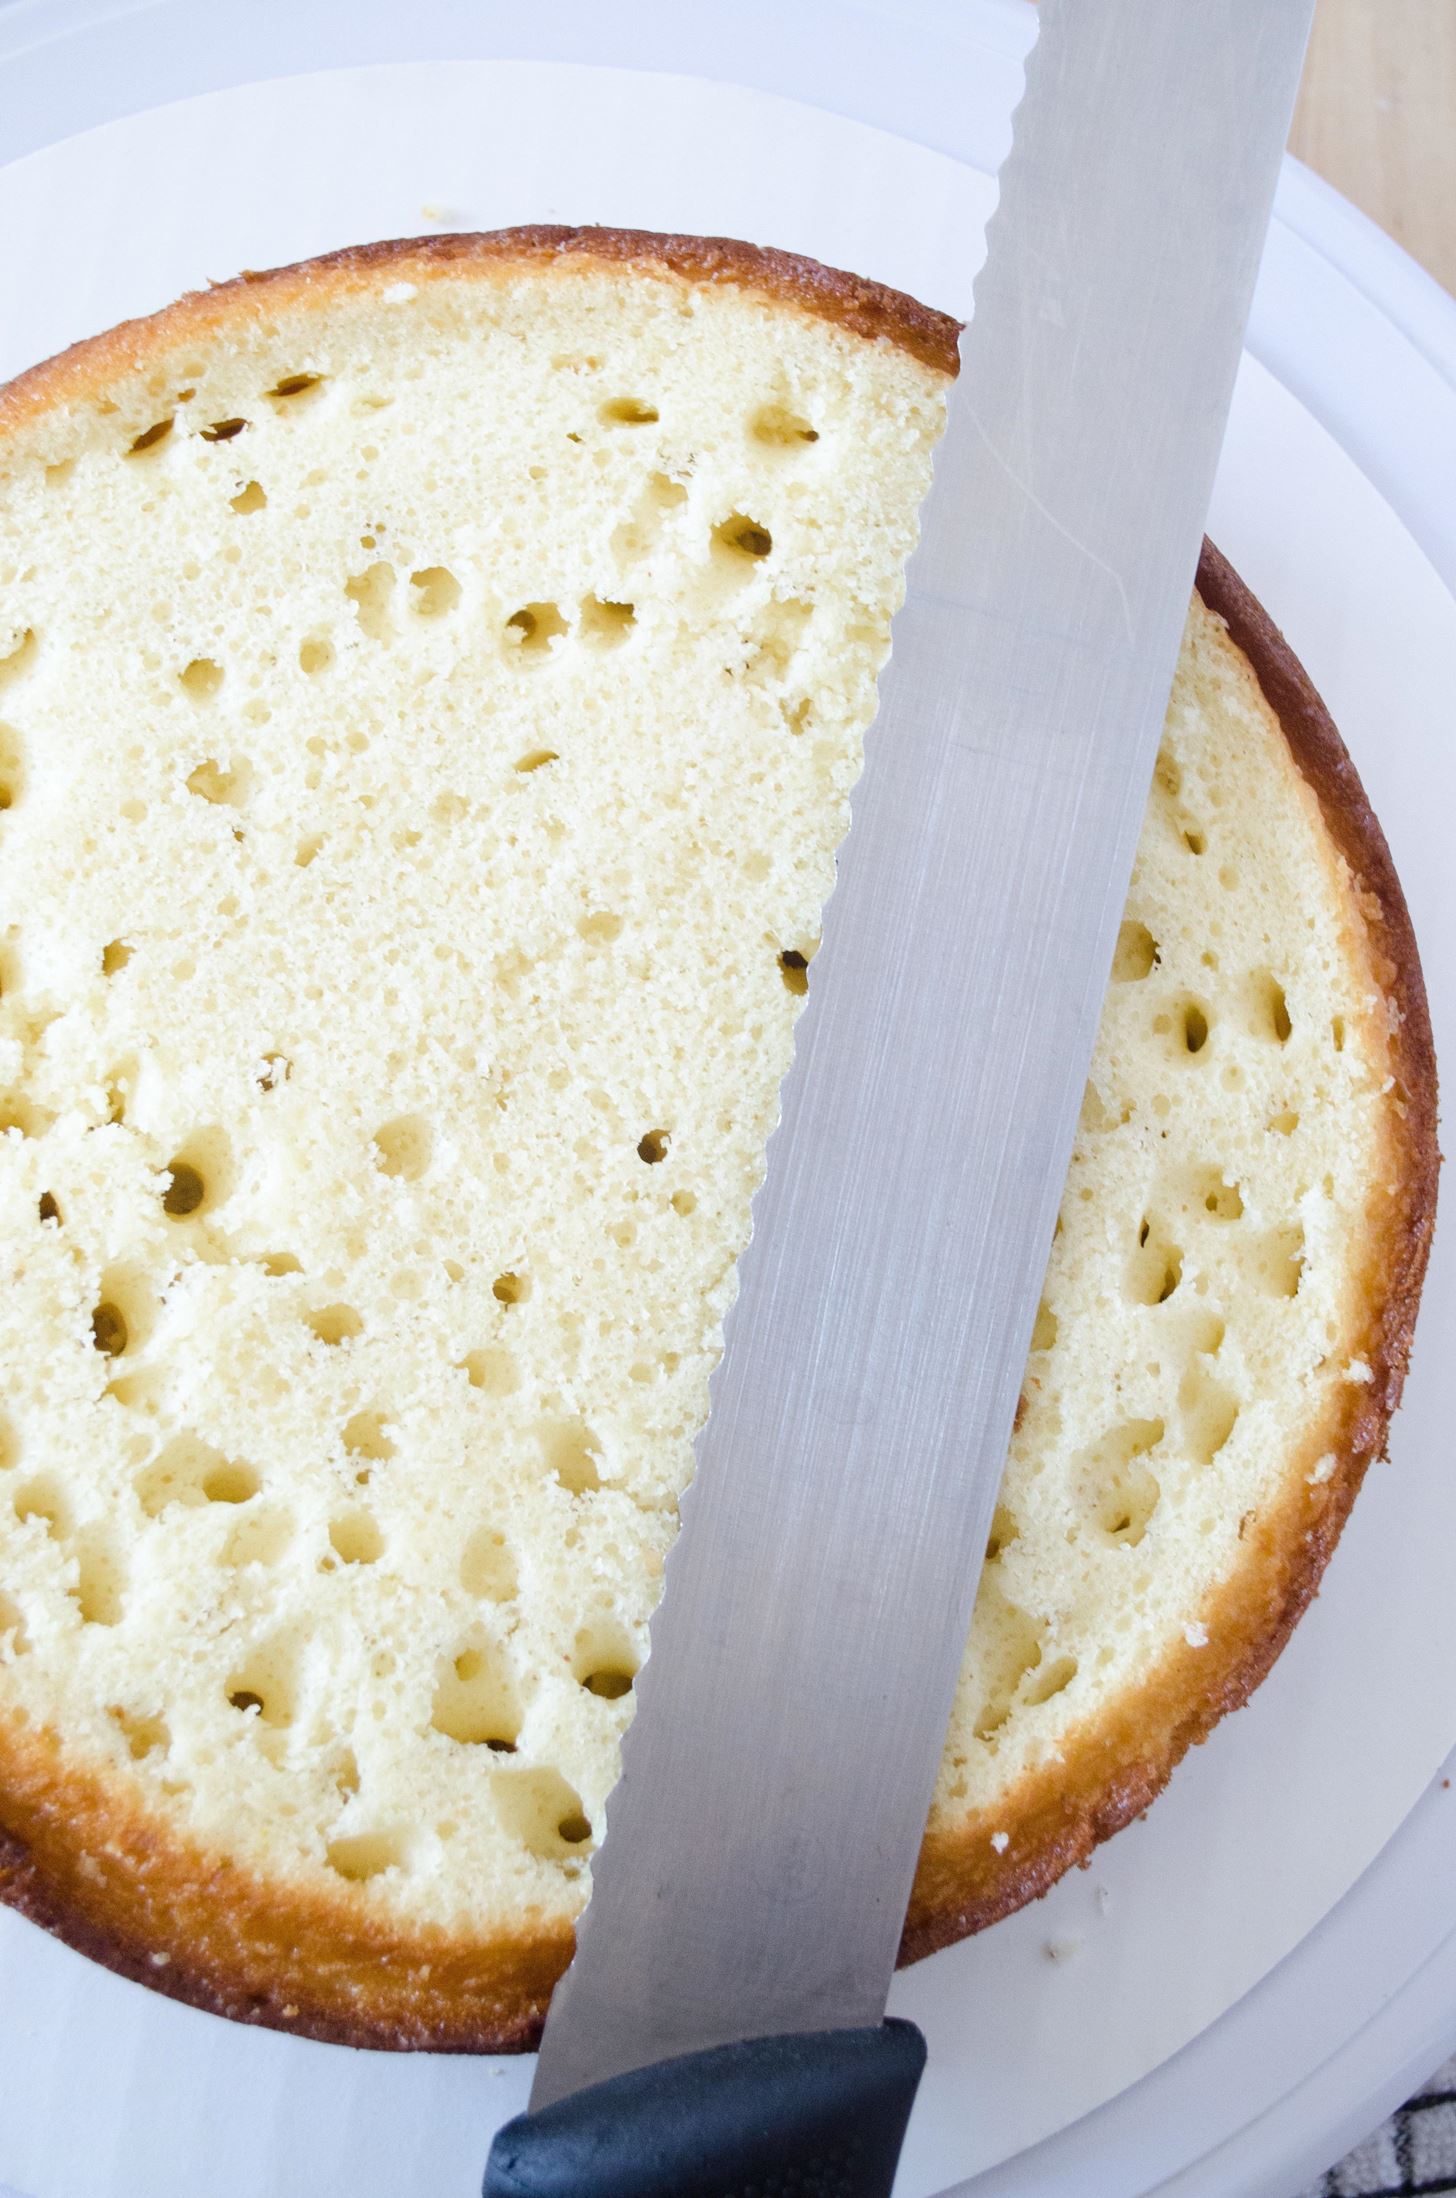
Step 1: Trim the Cake Layers
Trimming the top of the cake is essential to achieving a level and professional appearance. To trim your cake layers, you will need a long serrated knife (also known as a cake or bread knife). It may also be helpful to acquire a cake turntable.
Trim the cake by cutting about 1-inch into it with the knife held flat, parallel to the turntable. Move the knife like a saw, back and forth away from you, while spinning the cake turntable. Once you have turned the cake a full 360 degrees, saw across the rest of the cake to reveal an even layer. If you don't have a turntable, no problem. Just carefully hold the cake with your hand and rotate it yourself.
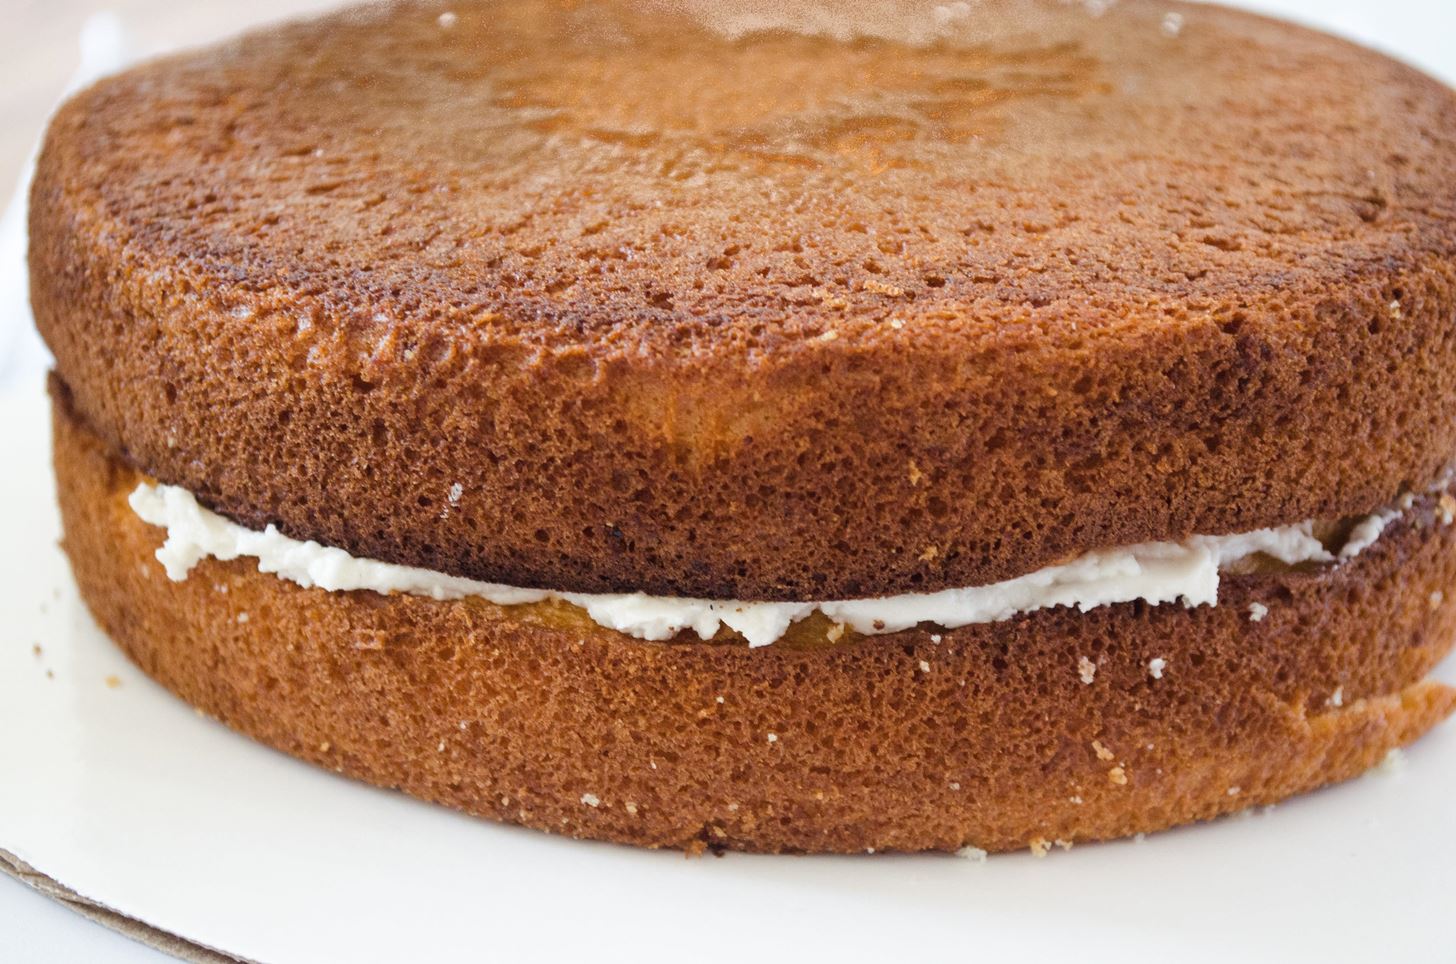
Step 2: Fill & Frost the Cake
Top the first layer with any delicious fruit preserves or cream you'd like, or just use your frosting, as I did. Once this layer is covered, place the second layer upside down on top of it. Frosting the bottom side of the cake will prevent excess crumbs from peeking through the frosting.
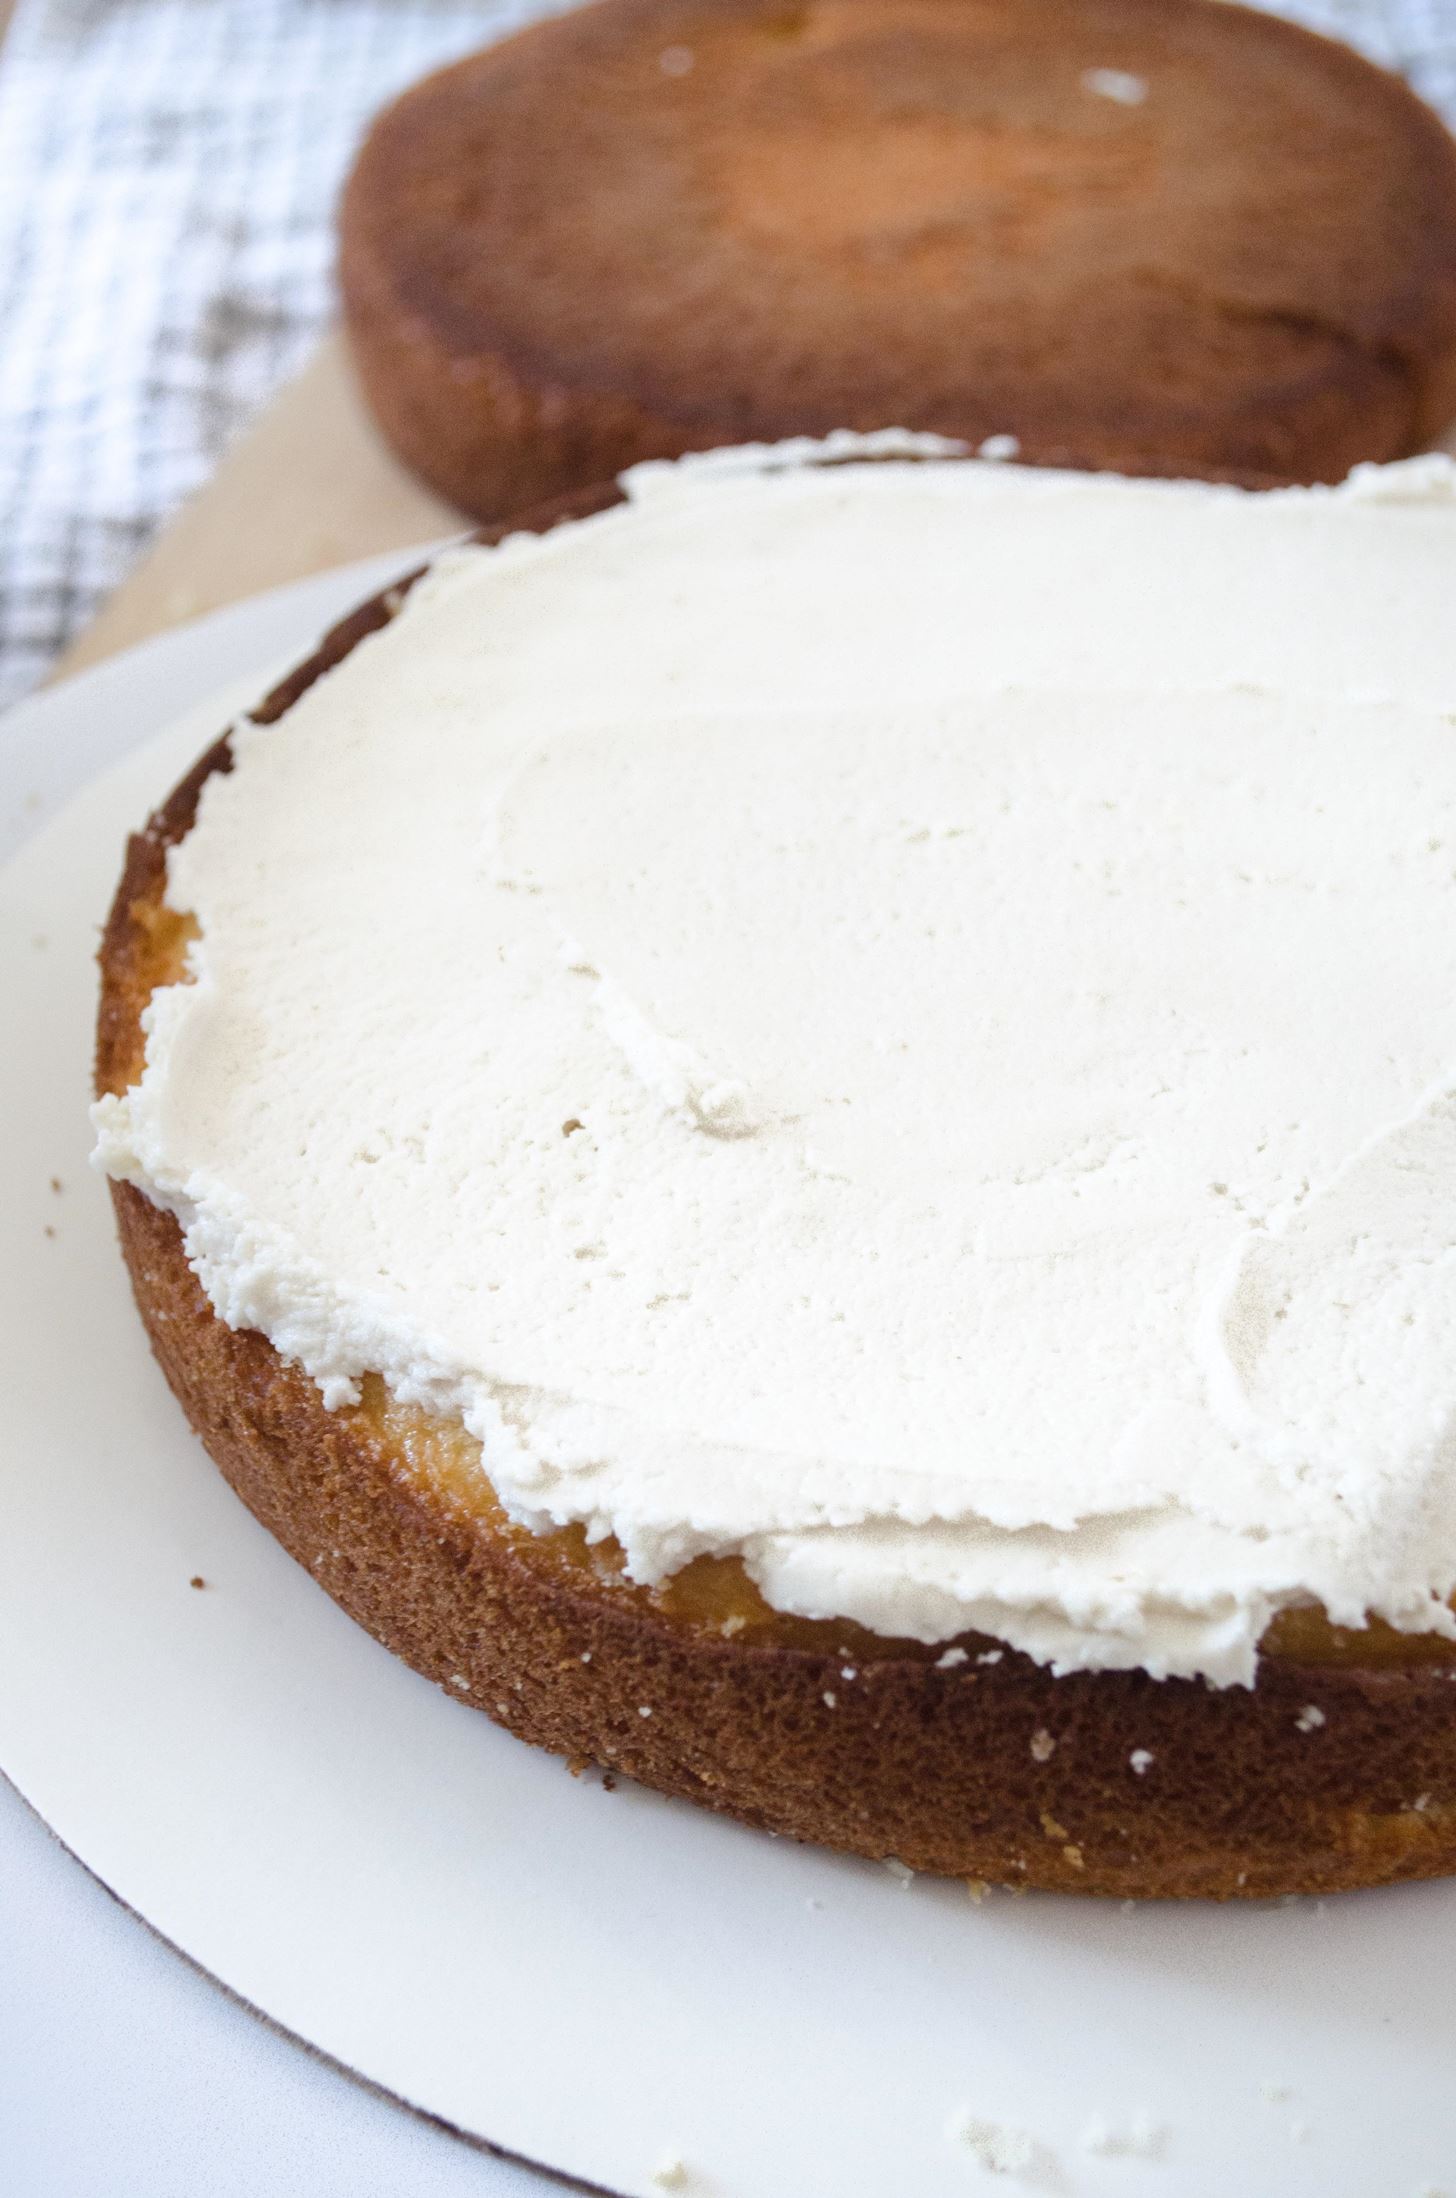
Now start frosting the outside of the cake. Use a spatula to spread an even layer of frosting over the top of the cake.
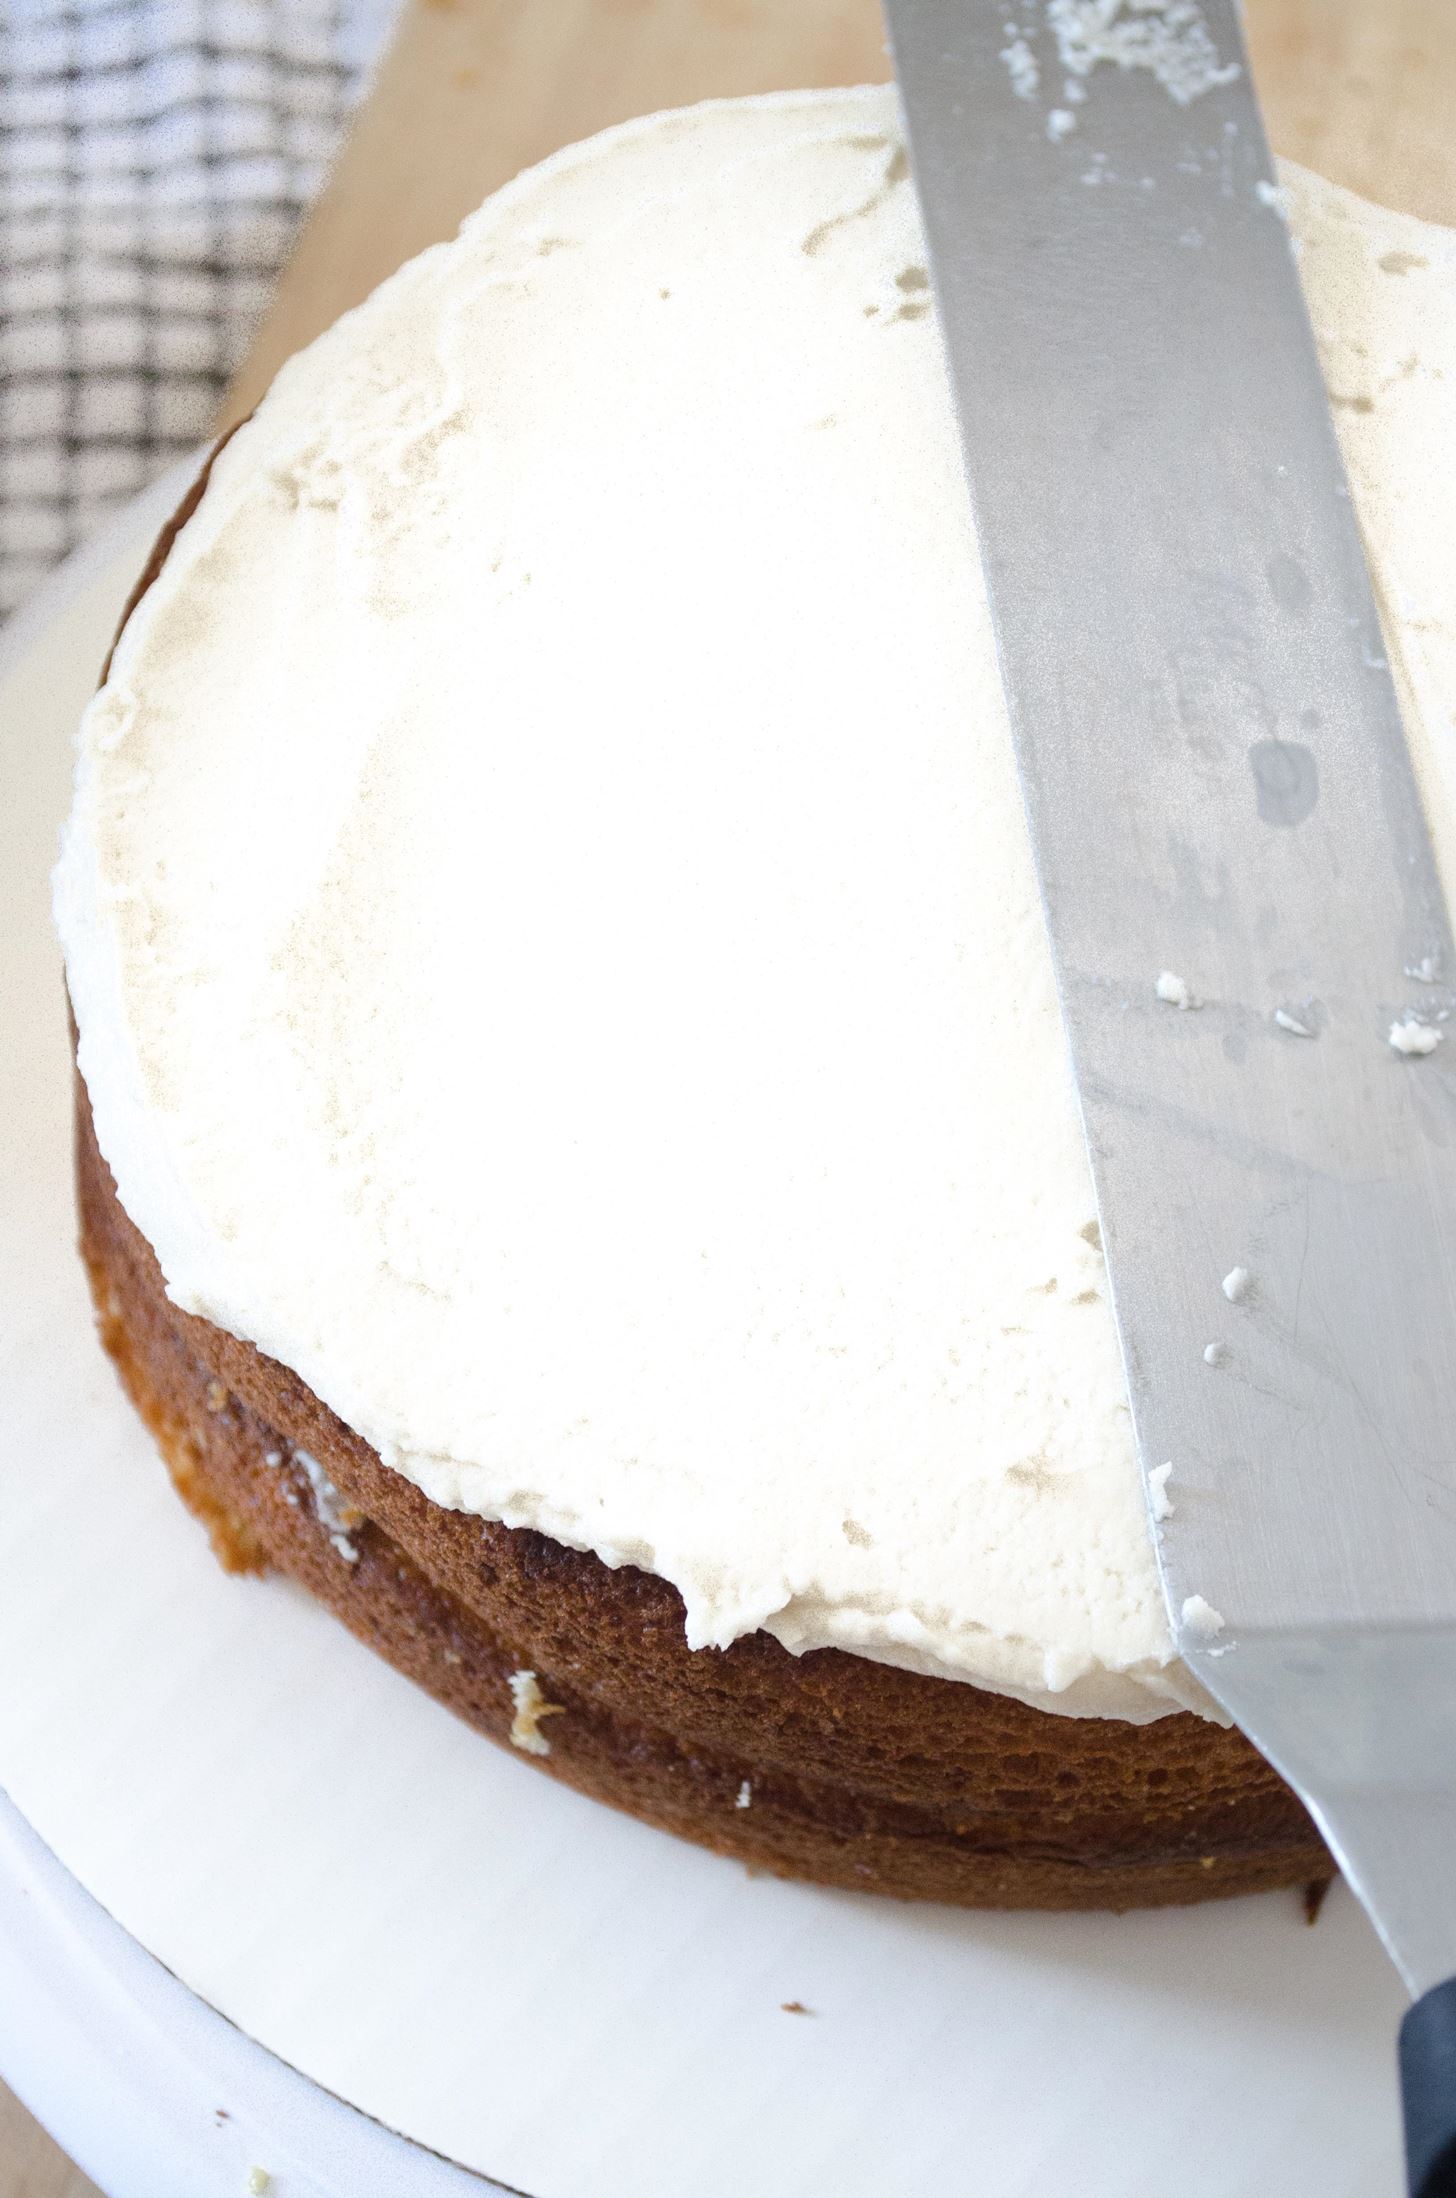
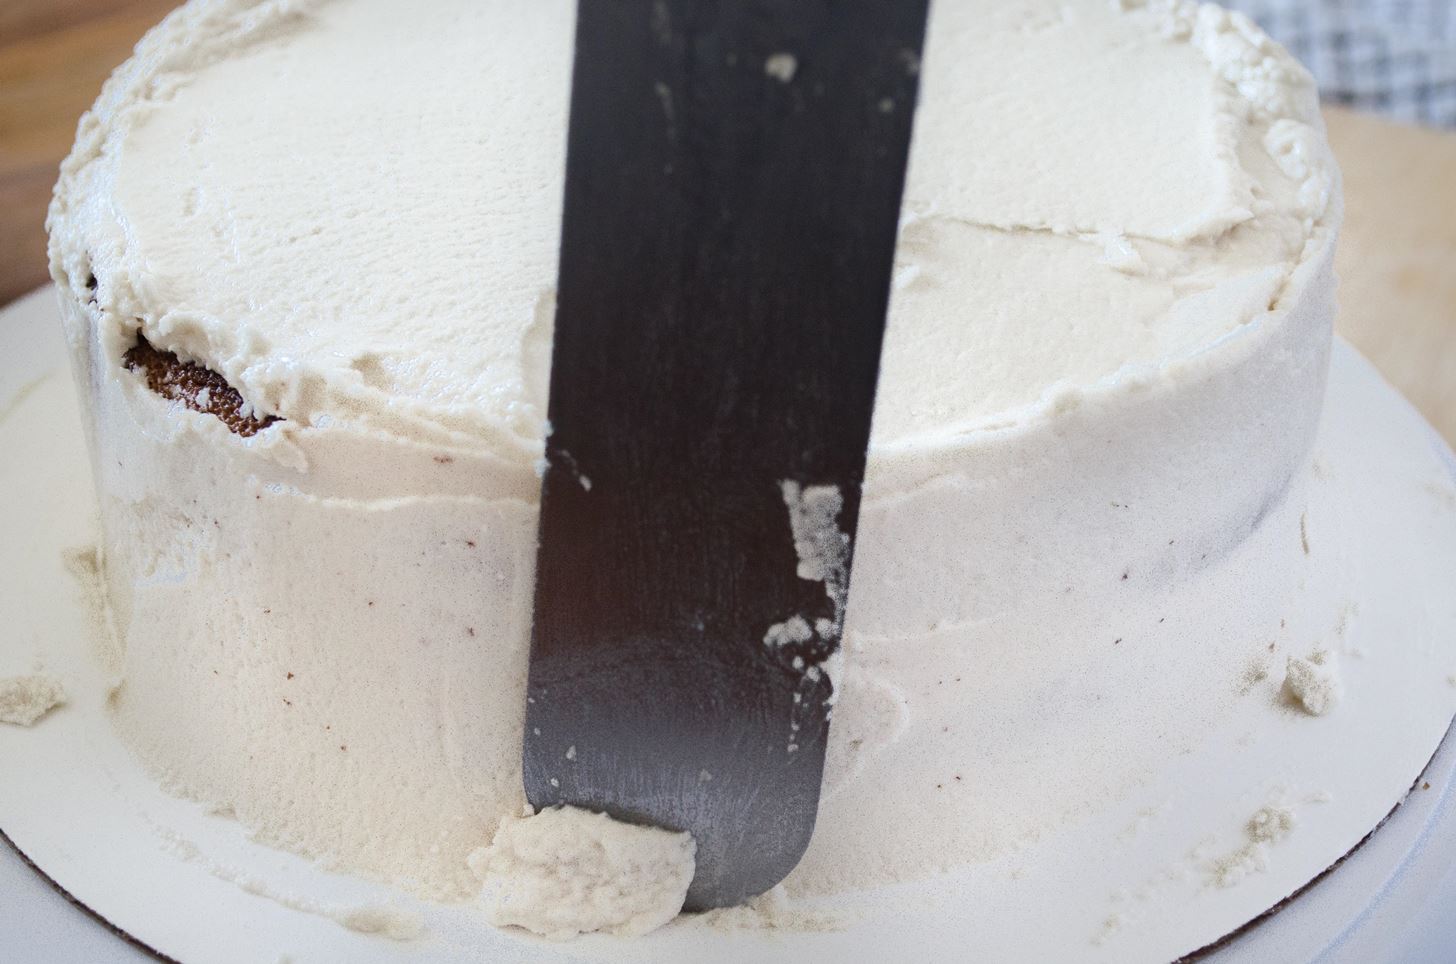
Next, use your spatula to spread frosting evenly around the sides. Press the spatula against the side of the cake and spin your turntable to evenly distribute the frosting. Sweep your spatula across the top of the cake once more to flatten the "ridges" that formed around the edges.
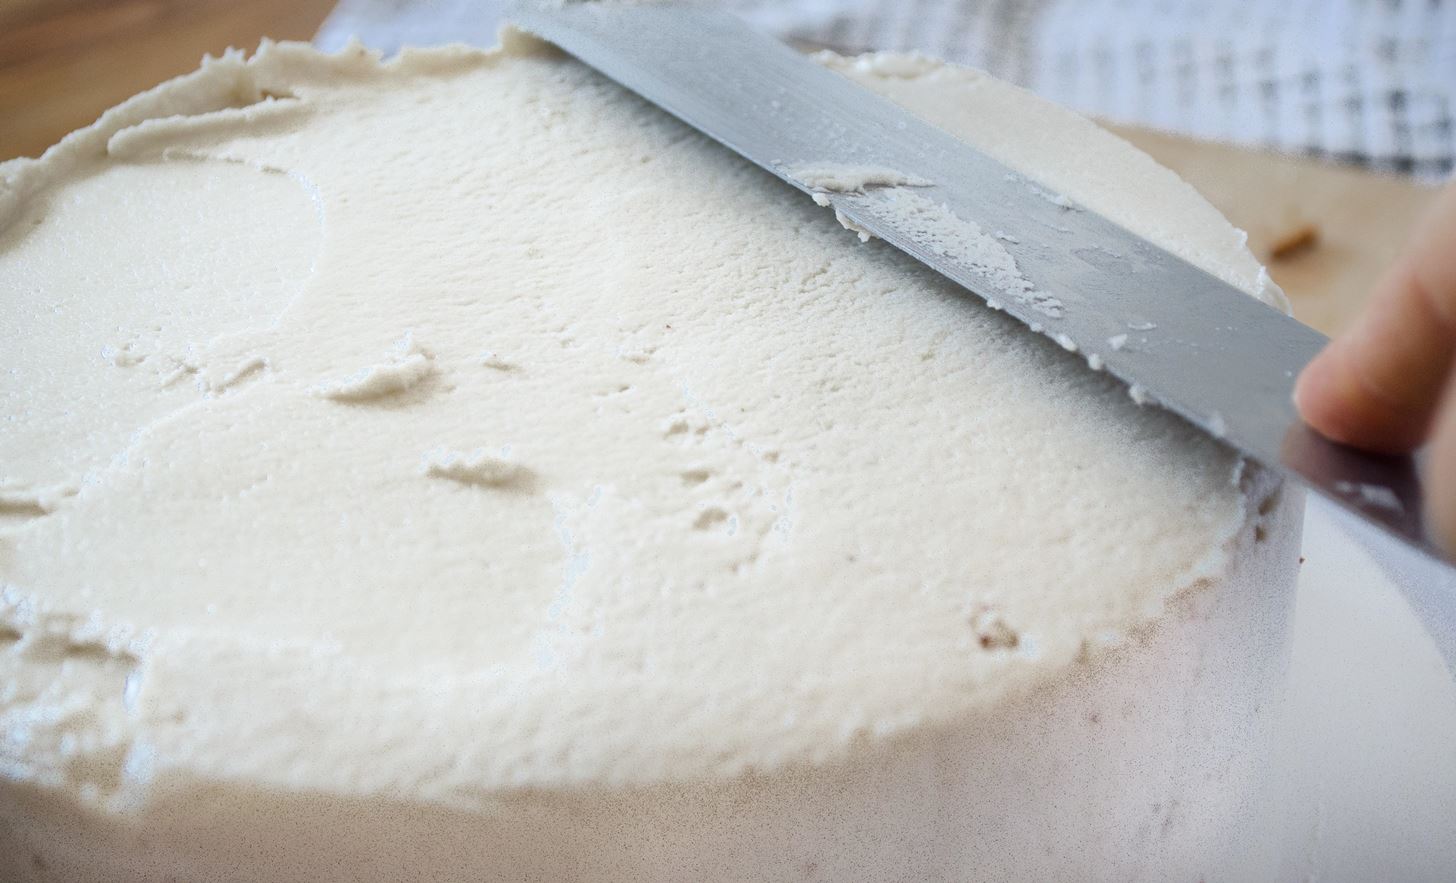
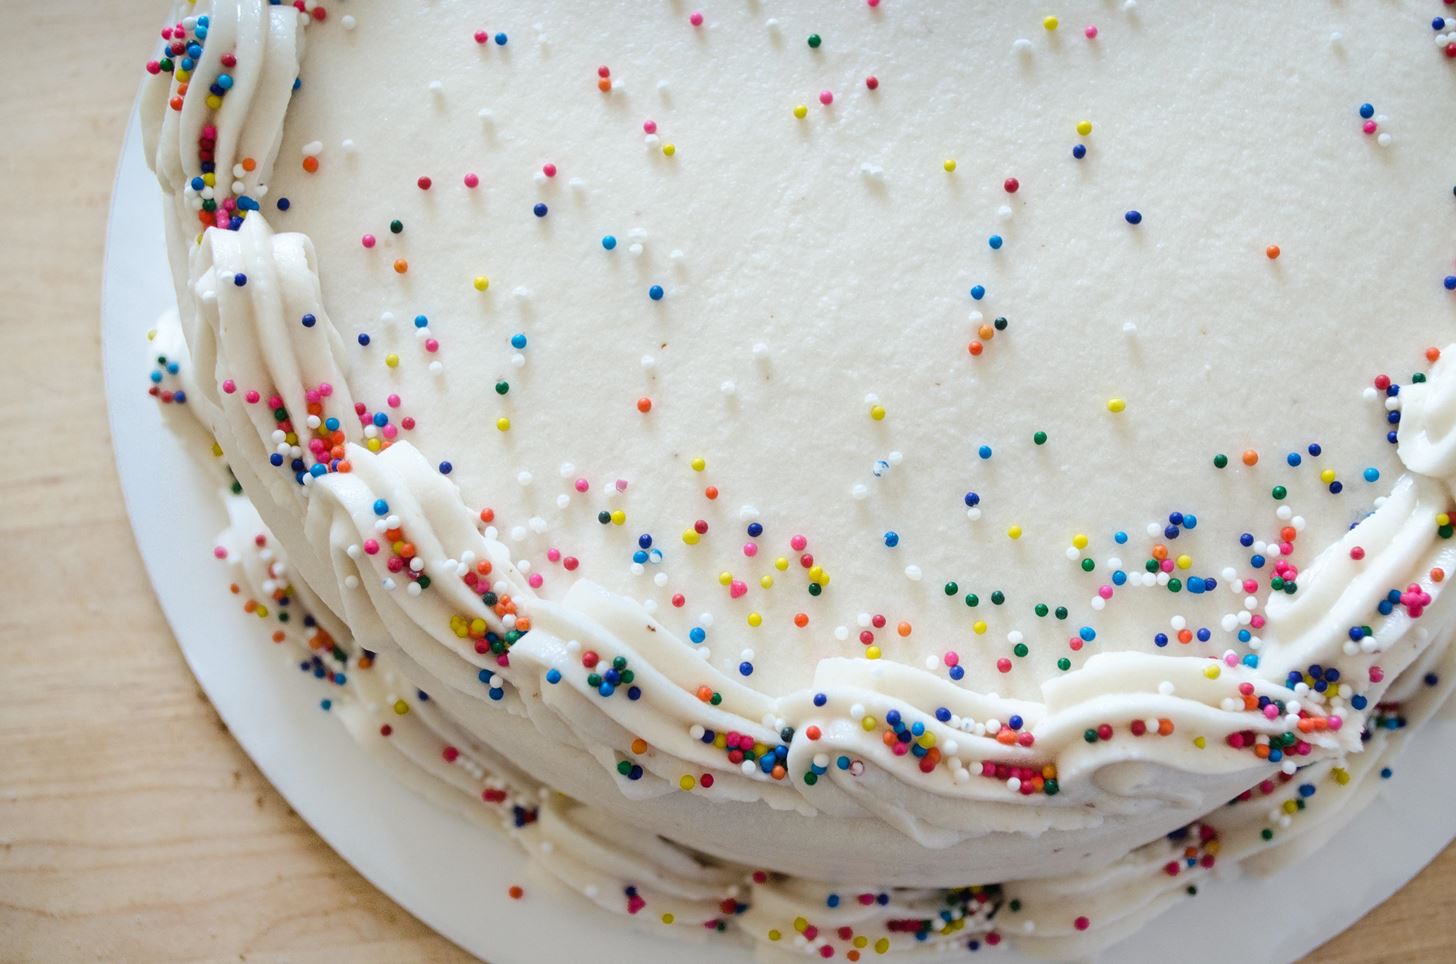
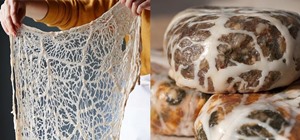
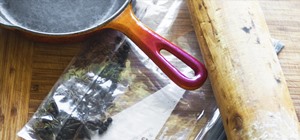
Step 3: Smooth Out with a Viva Paper Towel
Viva brand paper towels are unlike any paper towel I've ever purchased, which is why I specifically endorse their use for this project. They are extremely smooth, soft, and cloth-like... the perfect tool to smooth out your frosting. Just note that these paper towels have two differently textured sides, so make sure you are using the smooth side of the paper towel against your cake.
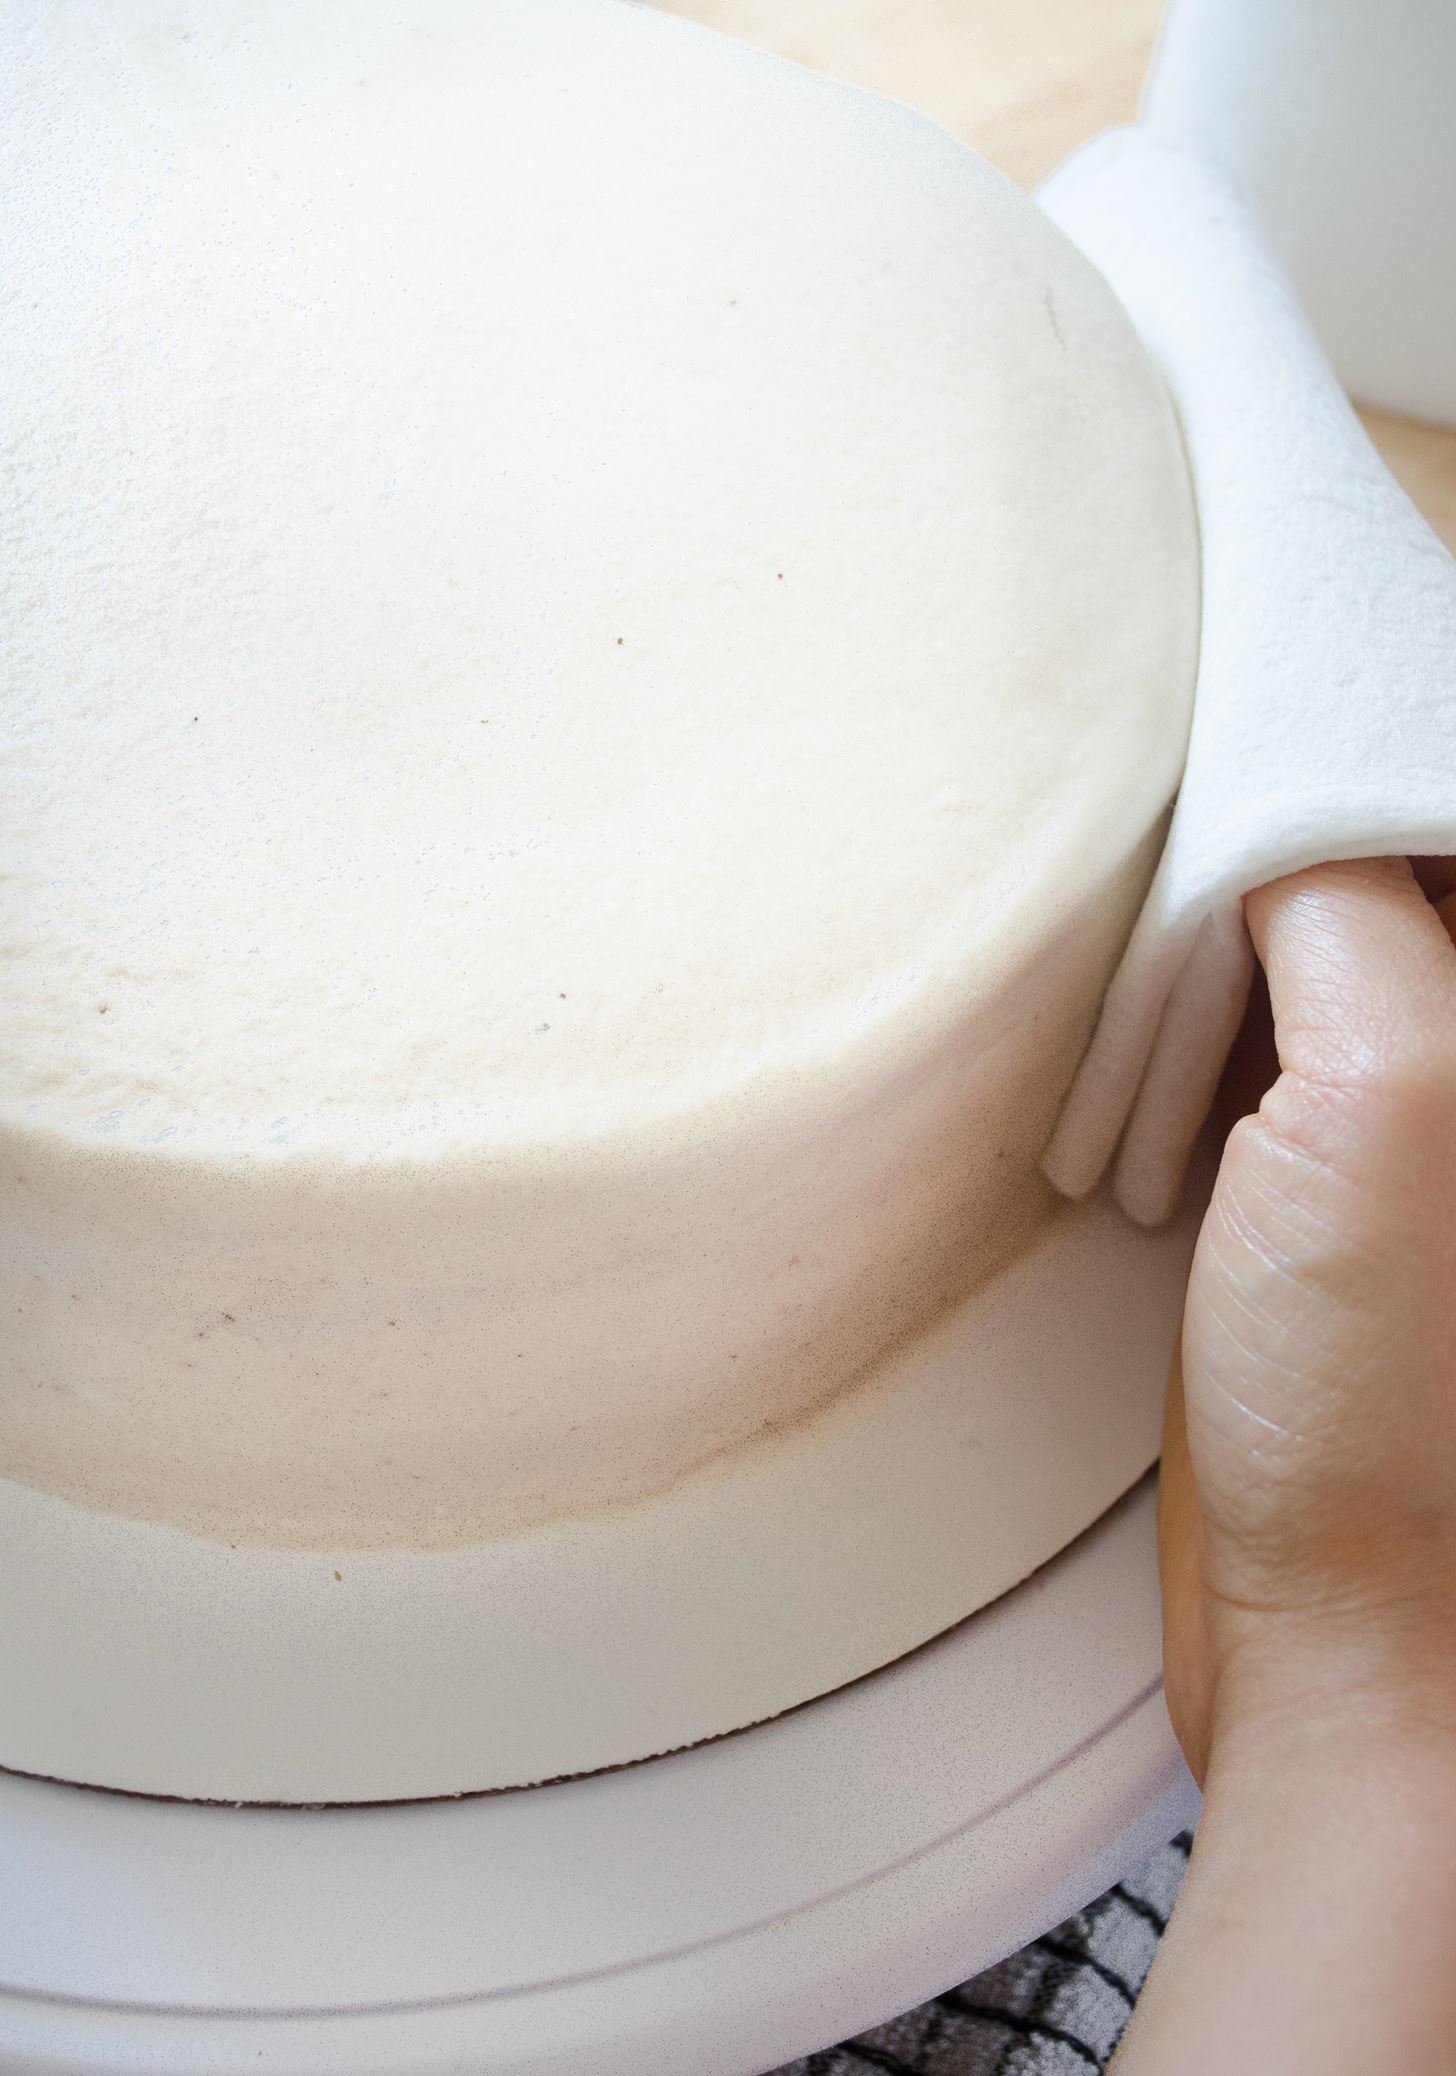
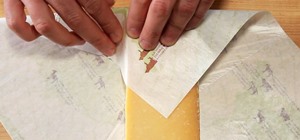
Begin by placing the flat side of the paper towel over the top of the cake. Flatten your hand and smooth out the towel over the cake using light pressure, then carefully lift the paper towel off. As long as you used the shortening-based frosting recipe above, your towel should be clean and free of frosting. More importantly, you will be left with a surface that is so smooth and even that it could easily pass for fondant.

Next, fold the same piece of paper towel into a square and use it to smooth out the sides one section at a time. Rotate the cake on the turntable as you smooth the sides out, and try not to overlap your smoothing sections so that they remain even. After you have smoothed out the entire cake, it will look just like fondant, leaving you with the perfect canvas for cake decorating.
Step 4: Decorate
Go ahead—give your cake some personality! If you're in need of some cakespiration, check out The Cake Blog for decorating ideas.
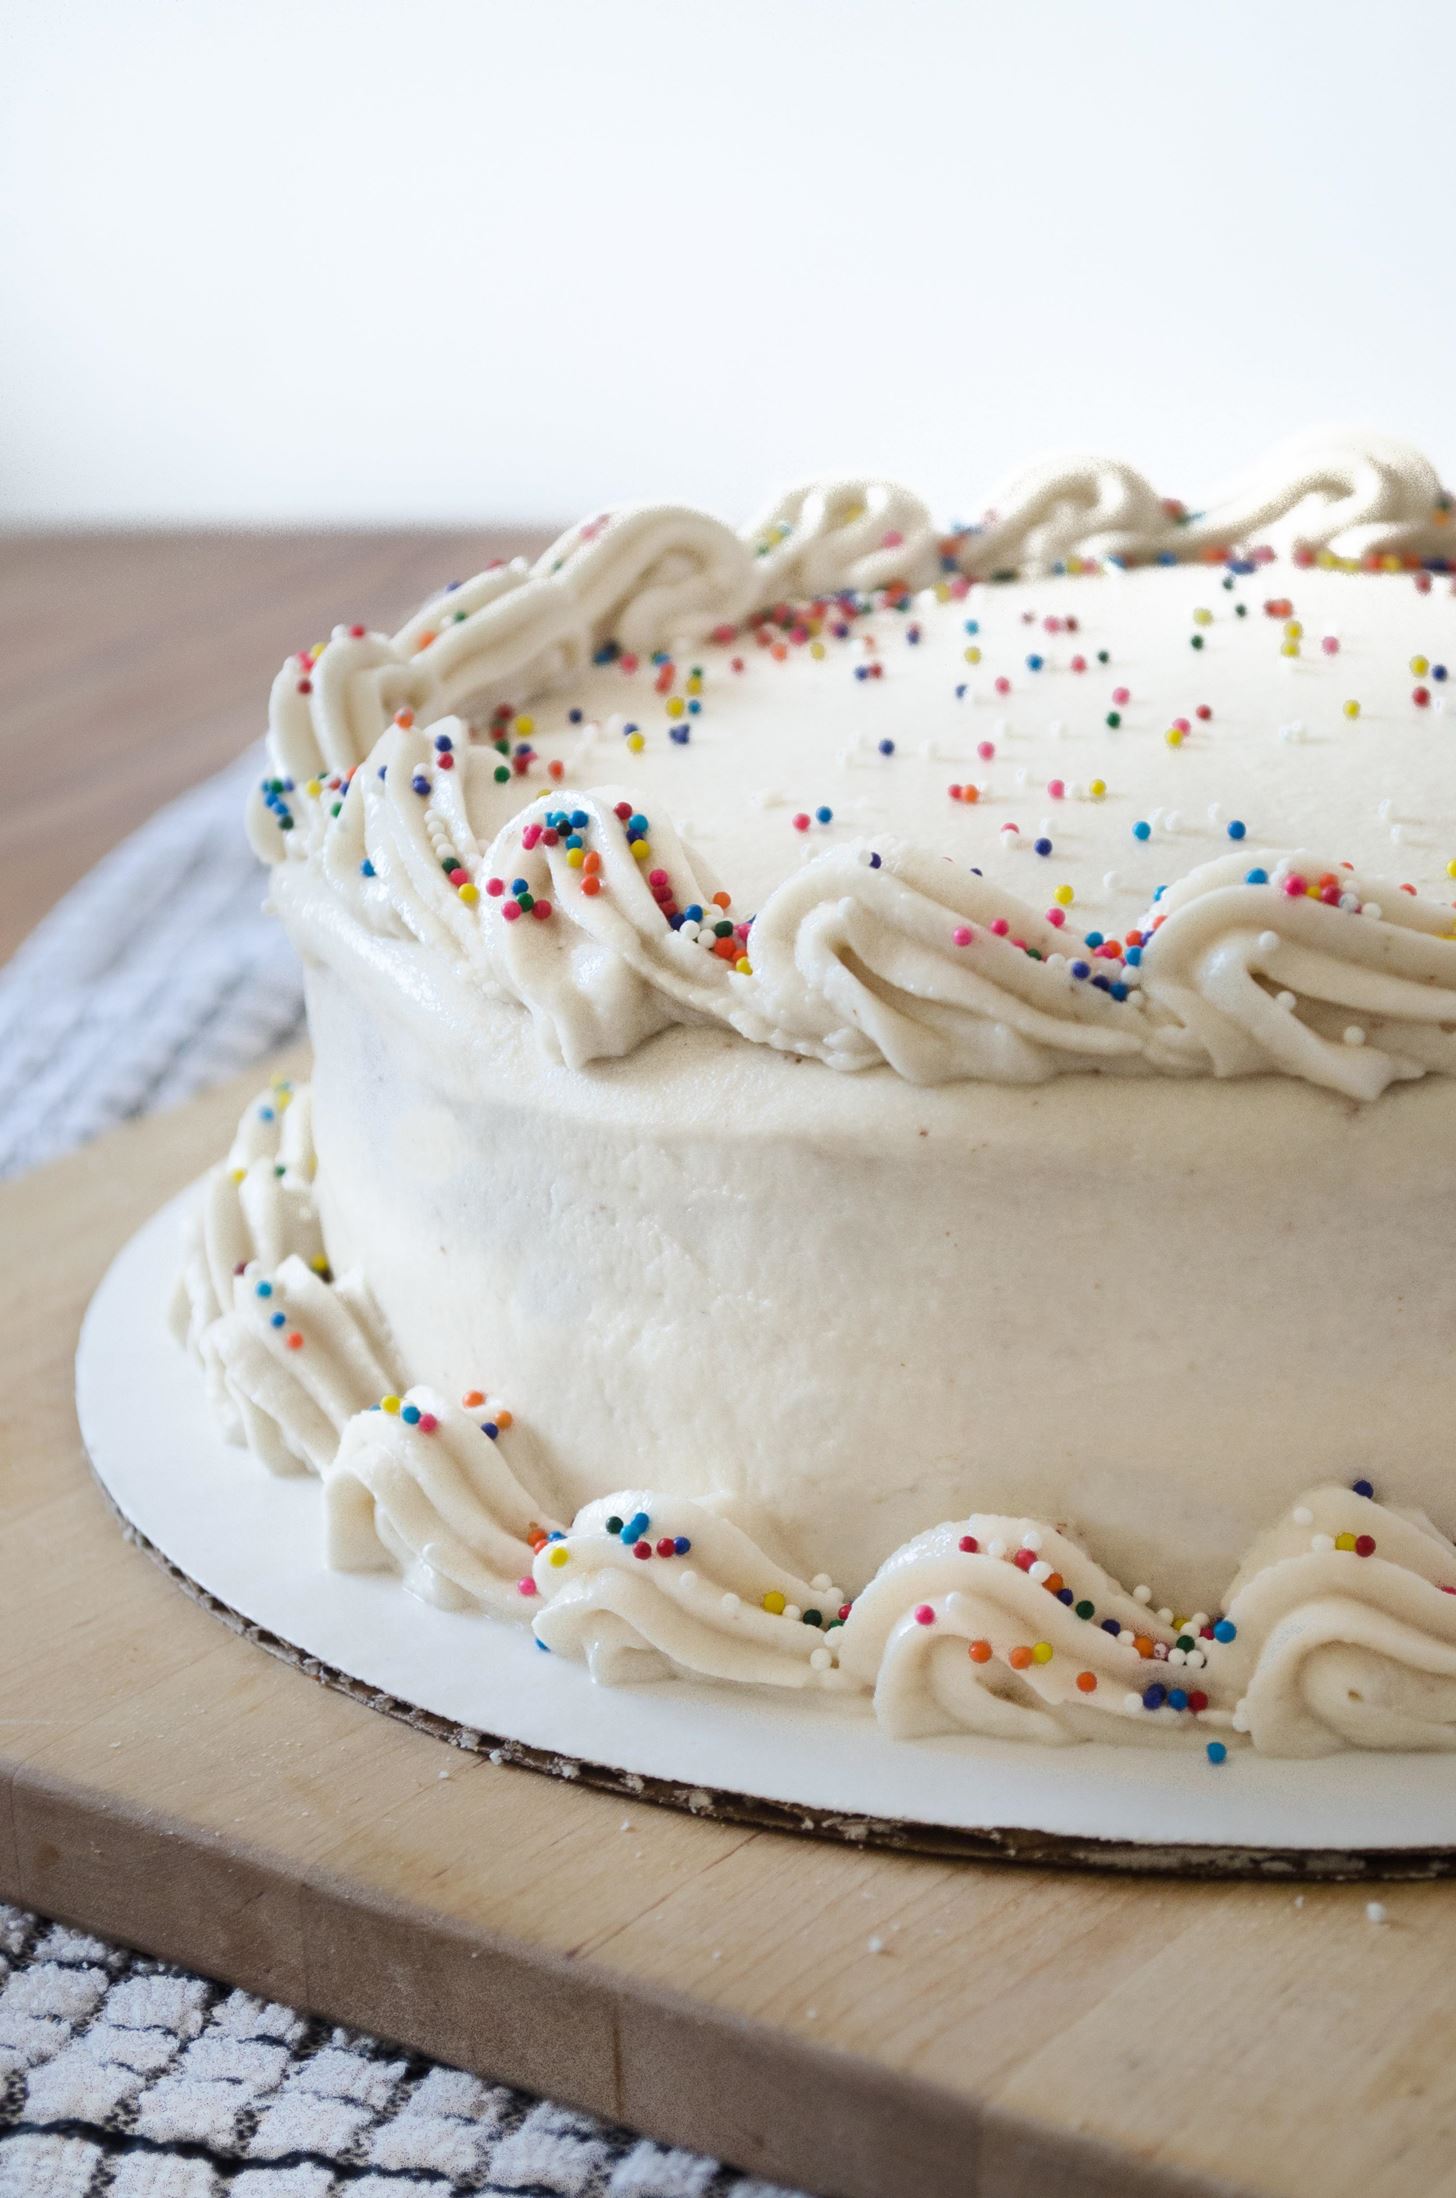
The Most Beautiful (& Delicious) Cake in All the Land
I think we can all agree that homemade frosting tastes much better than store-bought or even homemade fondant. Thanks to this paper towel technique, you don't have to sacrifice flavor for a beautiful appearance. So the next time you plan to decorate a cake, don't forget to add a roll of Viva paper towels to your shopping list. Your friends and family will compliment your cake decorating skills, and you won't have to sadly watch them peel off one bit of fondant.
More Cake Hacks:
Just updated your iPhone? You'll find new emoji, enhanced security, podcast transcripts, Apple Cash virtual numbers, and other useful features. There are even new additions hidden within Safari. Find out what's new and changed on your iPhone with the iOS 17.4 update.


Be the First to Comment
Share Your Thoughts