



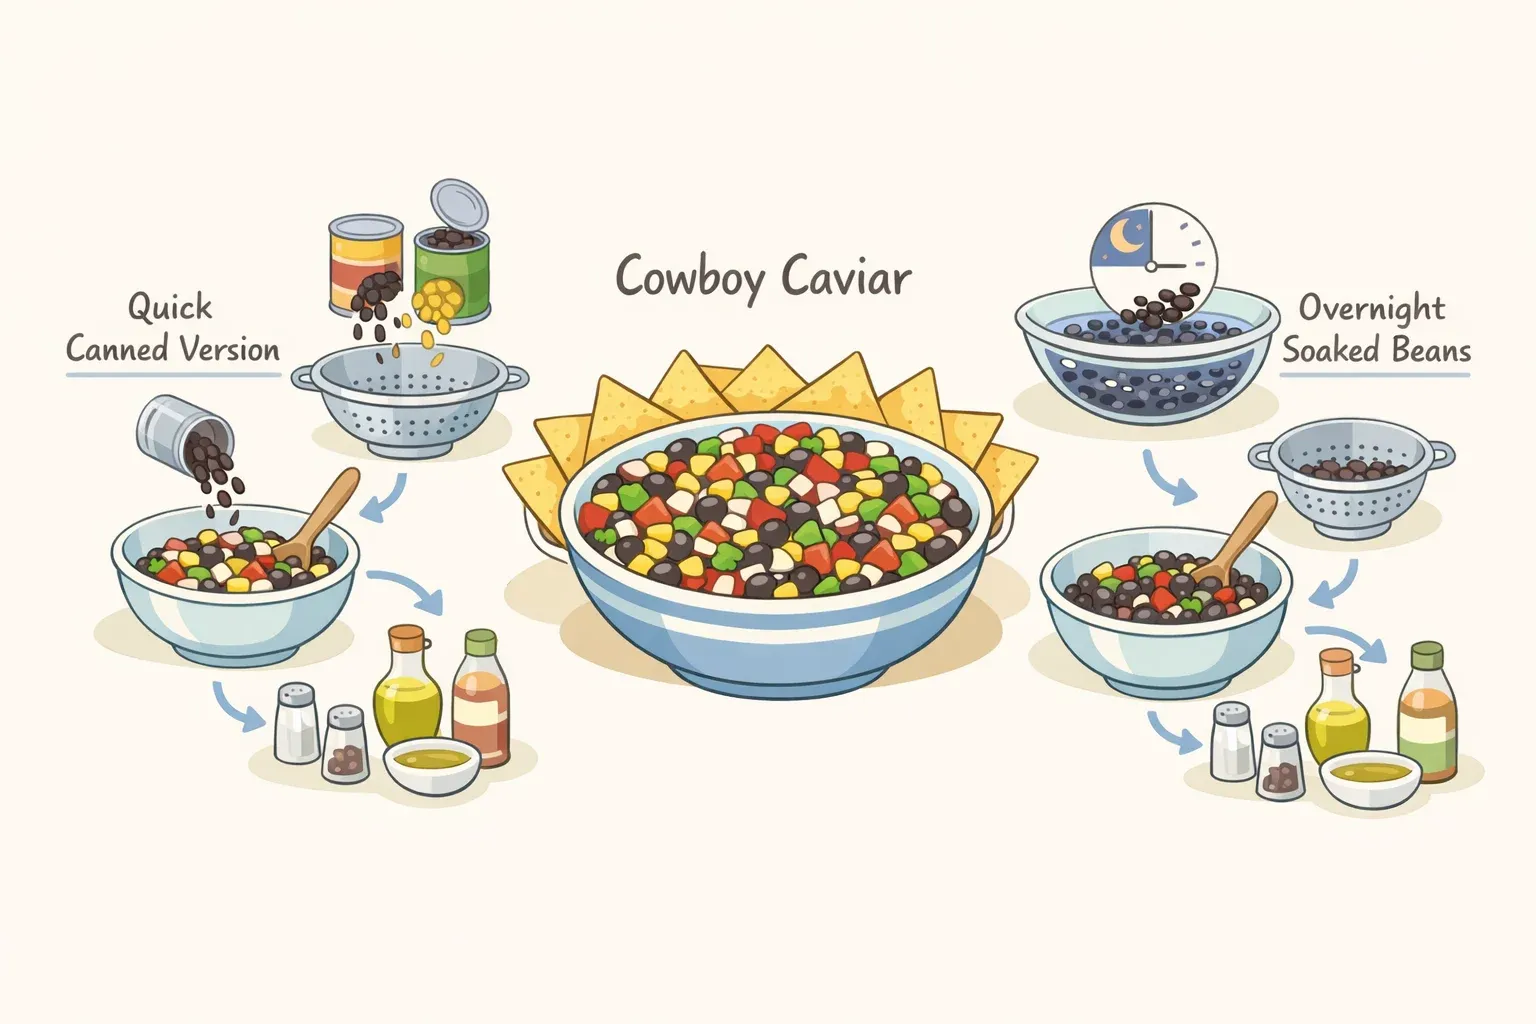
This cowboy caviar recipe gives you two options: a canned version you can make in about 10 to 20 minutes, and a from-scratch version with firmer bean texture that starts with an overnight soak. Choose the canned shortcut for speed, or the dried-bean version for firmer texture.
Prerequisites: A large mixing bowl, a whisk, a sharp knife, and a cutting board. The from-scratch version also needs a saucepan. Plan around the overnight soak if you go that route.
Choose your path before you shop:
Canned shortcut: 10 to 20 minutes total, using canned beans and corn plus fresh vegetables
From-scratch version: Overnight soak plus about 70 minutes of prep, cooking, and cooling time for firmer bean texture
How cowboy caviar gets its flavor and texture
Cowboy caviar is a bean-and-vegetable salad tossed in a vinaigrette-style dressing. Serve it with tortilla chips as a dip, or spoon it alongside grilled meat, tacos, grain bowls, or eggs.
The canned version comes together quickly once the vegetables are chopped. A true pantry version, using canned beans, corn, tomatoes, and chiles, can be made in about 10 minutes.
Black-eyed peas are the traditional base, but modern versions often add black beans, corn, bell pepper, tomato, cilantro, and jalapeño. For this version, keep the black-eyed peas; they give the recipe its Texas caviar backbone.
One practical note on texture: If you are serving this as a dip with chips, chop the vegetables finely so the mixture scoops cleanly. If it is going on the plate as a salad alongside grilled chicken or tacos, rougher cuts are fine.
Fast cowboy caviar with canned beans
Ingredients
Two 15-ounce cans black-eyed peas, or one can black-eyed peas and one can black beans
One 15-ounce can corn
2 large red bell peppers, finely chopped
1 small red onion, chopped
1 large jalapeño, seeded if desired, finely chopped
2 cups cherry tomatoes, quartered
1/2 cup chopped fresh cilantro, plus more for serving
Tortilla chips, for serving
Lime wedges, for serving
Dressing
1/4 cup extra-virgin olive oil
2 tablespoons red wine vinegar
1/4 cup fresh lime juice, plus 2 teaspoons lime zest, from about 2 limes
1 teaspoon ground cumin
1 teaspoon ancho chile powder
1/2 teaspoon garlic powder
1/2 teaspoon honey
1 1/4 teaspoons Diamond Crystal kosher salt, or half that amount if using table salt
Instructions
Drain and rinse the beans and corn. Empty each can into a colander and rinse under cold water until it runs clear. Rinsing canned beans can reduce sodium and keeps the starchy liquid from clouding the dressing. Pat dry if you have a minute; it keeps the bowl from going watery.
Make the dressing. Whisk together the olive oil, red wine vinegar, lime juice, lime zest, cumin, ancho chile powder, garlic powder, honey, and kosher salt until combined. The dressing should taste sharp and a little smoky; it will mellow once it coats the beans.
Chop the vegetables. Finely chop the bell peppers, red onion, and jalapeño. Quarter the cherry tomatoes. Chop the cilantro.
Combine everything. Add the beans, corn, and vegetables to a large bowl. Pour the dressing over the top and toss gently until evenly coated.
Rest before serving. Let the bowl sit at room temperature for at least 15 minutes so the flavors can settle. If you have more time, rest it for up to an hour before serving. Do not leave it out for more than two hours total, or more than one hour if it is outdoors or the temperature is above 90°F.
Taste, adjust, and serve. Check the seasoning before serving; the salt and acid often need a small bump after resting. Garnish with cilantro leaves and lime wedges. Serve with tortilla chips.
Make-ahead cowboy caviar with dried black-eyed peas
Use the same dressing and vegetables as the canned version, but cook dried black-eyed peas and char fresh corn before assembling the dip
Additional ingredients
1 1/4 cups, or 227 grams, dried black-eyed peas
1 teaspoon baking soda
3 teaspoons kosher salt, for soaking
1 tablespoon extra-virgin olive oil
3 cups vegetable broth
2 ears yellow corn
Instructions
Soak the dried black-eyed peas overnight. Combine 1 1/4 cups dried black-eyed peas with 1 teaspoon baking soda, 3 teaspoons kosher salt, and enough cold water to cover the peas by at least 2 inches. Soak 8 to 12 hours at room temperature, then drain and rinse before cooking.
Cook the peas. Heat 1 tablespoon olive oil in a saucepan over medium heat. Add the drained peas and cook, stirring occasionally, until they begin to brown lightly, about 4 minutes. Add 3 cups vegetable broth and bring it just below a simmer, about 180°F. Reduce the heat to low, cover, and cook until the peas are fully tender, 30 to 40 minutes. Drain, then spread the peas onto a sheet pan or large plate and let them cool to room temperature, about 15 minutes. Do not skip the cooling step; carryover heat can make the peas mushy.
Cook the corn. Char 2 ears of corn in a dry skillet over high heat or on a grill, turning until lightly browned on all sides, about 4 minutes. Let the corn sit until it is cool enough to handle, about 10 minutes, then cut the kernels off the cob. If fresh corn is out of season, use drained and rinsed canned corn.
Make the dressing and assemble. Follow steps 2 through 6 from the canned version, using the cooked peas and fresh corn in place of the canned versions.
Fix common cowboy caviar problems
Tastes flat: Add a small squeeze of lime juice and a pinch of salt. Flat usually means the beans and vegetables need more acid, salt, or both.
Too sharp or mouth-puckering: Stir in a small drizzle of honey. Add it a little at a time so the dressing does not turn sweet.
Too watery: Drain off the liquid that has collected at the bottom of the bowl before serving. Next time, pat the canned corn dry and drain the tomatoes briefly before adding them.
Too spicy: Removing the jalapeño seeds and ribs lowers the heat. To tame a finished batch, stir in a spoonful of sour cream or add crumbled cotija at serving.
Which method to use, and when
Potluck or party: Choose the from-scratch version if you can start the night before and want firmer beans. Make it ahead, refrigerate it, then pull it out about 20 minutes before serving and adjust the salt and lime.
Weeknight pantry meal: Use the all-canned approach: beans, corn, tomatoes, chiles, oil, and lime. It takes about 10 minutes and works when you do not have fresh produce.
Peak summer: Use fresh corn and ripe cherry tomatoes. They are worth the extra prep when the produce is at its best.
Serving: Tortilla chips are the default. As a side, serve it with grilled chicken, fish tacos, eggs, or grain bowls. For a looser spoonable topping, add a little extra lime juice just before serving.
Storage: Refrigerate cowboy caviar in an airtight container and use it within three to four days. For parties, return leftovers to the refrigerator within two hours, or within one hour if the dish is outdoors or the temperature is above 90°F. If you add avocado, do it right before serving because it browns and softens quickly.
Why cowboy caviar is also called Texas caviar
Cowboy caviar is also known as Texas caviar. The dish is commonly traced to Helen Corbitt, who created a pickled black-eyed pea salad in Texas more than 80 years ago. Modern versions are more colorful, often adding corn, tomatoes, bell peppers, black beans, cilantro, jalapeños, avocado, and other mix-ins.














Comments
Be the first, drop a comment!