


Knowing how to grill steak perfectly comes down to two decisions made before the steak hits the grates: which method matches your cut's thickness, and what temperature to pull it at. Remove the guesswork about doneness, and you remove the main way a steak goes wrong. Miss the target temperature by even 5-10 degrees, and no amount of resting or technique recovers it.
By the end of this guide, you'll know which grilling method to use based on steak thickness, what internal temperature to target on the grill, and which widely repeated rules you can safely ignore.
What you need before starting:
An instant-read meat thermometer. The entire method depends on it; a finger-press test cannot replicate what a probe measures
A grill capable of producing two heat zones (gas or charcoal); setup specifics are covered below
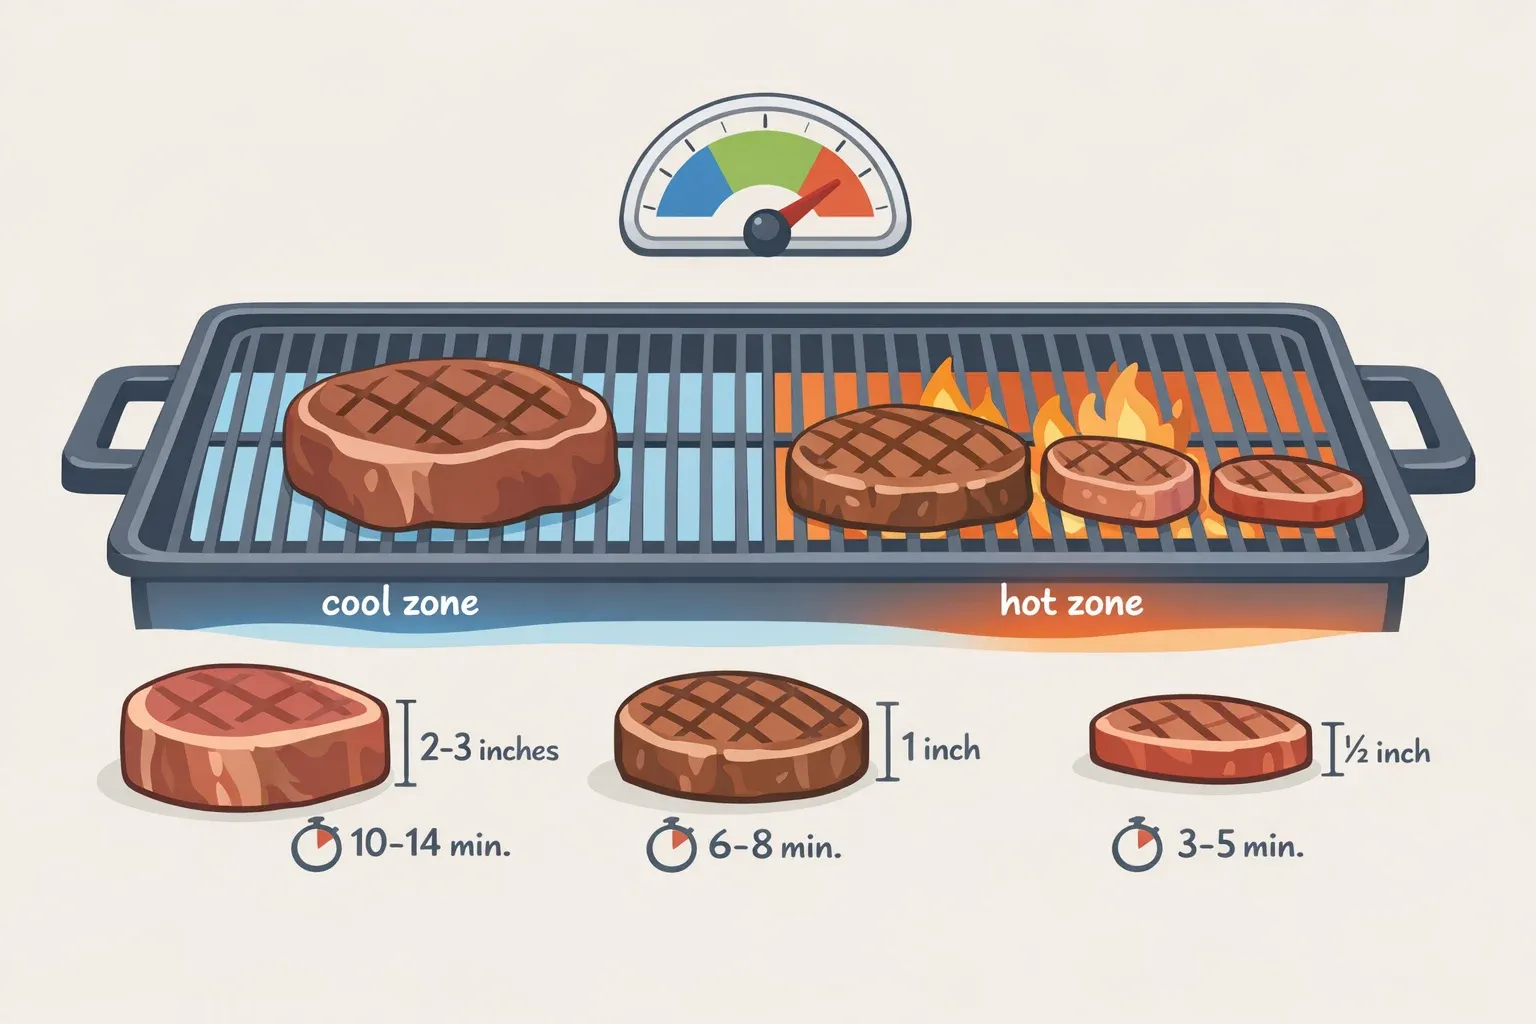
Your steak. Know whether it's under 1 inch, roughly 1-1.5 inches, or 1.5 inches and above before you start
Before you cook: grill setup
Preheat the grill for 10-15 minutes with the lid closed. You want the grates fully up to temperature before anything goes on them. Brush the grates clean, then oil the steak itself rather than the grates.
Two-zone setup for gas: Turn one or two burners off. The lit side is your searing zone (targeting 450-600°F); the unlit side is your indirect zone (targeting 250-325°F).
Two-zone setup for charcoal: Bank all the coals to one side. Same principle: hot side for searing, coal-free side for indirect cooking.
Lid position: Keep the lid closed during the indirect phase on thick steaks to maintain steady ambient heat. During the final sear, open or closed both work; open gives you more control.
Step 1: Choose the right method for your steak's thickness
The right method follows from physics, not preference. How heat moves through meat is determined by how much meat there is.
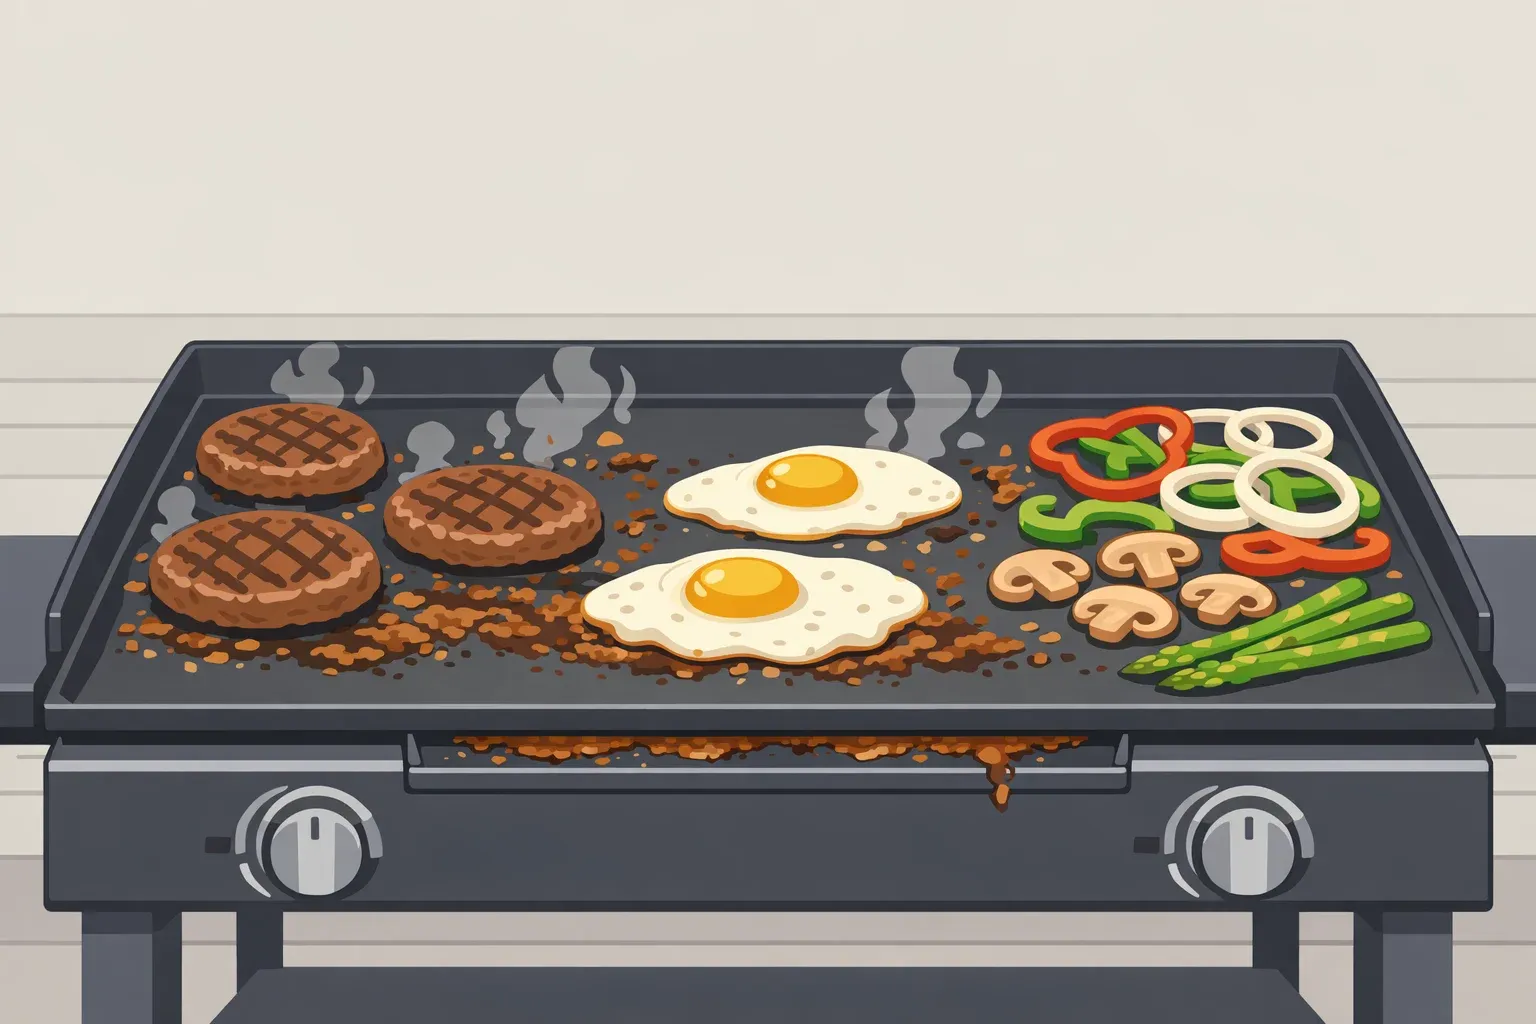
Under 1 inch thick: direct high heat
Thin steaks cook fast enough that there's no significant temperature gradient to manage. The center reaches doneness before the outer layers have time to overshoot, so a two-zone setup offers no real advantage for cuts this thin, according to The Grilling Science.
Target 450-600°F at the searing surface
Flip once, at the midpoint. Constant flipping prevents crust formation and makes it harder to track progress. If the steak is sticking, it's not ready; a proper crust releases from clean, hot grates on its own.
1.5 inches and above: two-zone indirect-to-sear
Two-zone cooking means starting the steak on the cooler indirect side first, then moving it to the hot searing zone to finish. Thick steaks cooked entirely over high heat develop a gray, overcooked ring 5-10mm deep before the center reaches temperature, meaning 25-40% of the steak exceeds your target doneness. Starting on the indirect side (250-325°F) brings the whole cut up gently; almost the entire steak stays below 140°F, the threshold where protein contraction accelerates moisture loss, until the final sear over high heat.
The 1-1.5 inch middle ground
Either method works. If your grill runs hot or zone control is unreliable, treat the steak as thick and use indirect heat first; it's the more forgiving option. If your grill is well-calibrated and the steak is closer to 1 inch, direct heat is fine. When in doubt, go two-zone.
Step 2: Know your pull temperature before the steak hits the grill
The pull temperature is what you control. Everything after you remove the steak from heat is physics working on its own.
Why you pull early
Steak keeps cooking off the heat because the hotter outer layers continue transferring energy toward the cooler center. Plan on 3-5°F of rise for thinner steaks over high heat, and 10-15°F for larger cuts cooked more gently. Higher cooking temperatures increase carryover, which is exactly why pull temps differ between methods: a thin steak blasted over maximum heat carries over more than the same steak cooked at moderate heat.
Steak internal temperature grill reference: pull temps by doneness
Use these numbers, not the clock:
Rare
Thin steak / high heat: pull at 115–120°F
Thick steak / moderate-to-high heat: pull at 120–125°F
Medium-rare
Thin steak / high heat: pull at 120°F
Thick steak / moderate-to-high heat: pull at 125–130°F
Medium
Thin steak / high heat: pull at 130°F
Thick steak / moderate-to-high heat: pull at 135–140°F
Medium-rare lands at 130-135°F at the table. For fattier cuts like ribeye, some cooks prefer finishing at 135-140°F to give the intramuscular fat more time to render.
Safety floor
Avoid pulling whole muscle steaks below 120°F. Finishing below 125°F at the table can pose health risks, particularly for mechanically tenderized meat where surface bacteria may be pushed into the interior. "Rarer is better" has a limit.
How to read the thermometer
Insert the probe horizontally through the side of the steak into the thickest part, then draw it slowly back toward you, watching the reading as you go. The lowest number is the one that matter.
Probing the meat does not drain it. Testing found the juice loss from a probe insertion is below what tasters can detect; overcooking is what actually dries a steak out, not the thermometer. Use it without hesitation.
Step 3: Execute the cook, then rest
Thin steaks (direct heat)
Place on the hot, clean grate. Leave it alone until a crust forms; it will release on its own when ready
Flip once at the midpoint
Start probing as soon as the first side is well-seared; pull at your target temperature
Rest at least 5 minutes before cutting
Thick steaks (two-zone)
Place on the indirect side. Plan to start checking temperature after the first 15 minutes
Check regularly once the center is within about 15°F of your pull temperature; that's the signal to move it
Transfer to the direct searing zone. Because the surface dried out during the low-heat phase, browning starts almost immediately, producing a deep crust in roughly 45 seconds versus 90 or more seconds on a steak that starts wet
Flip once during the sear; probe each steak as you flip. Pull the moment the thermometer hits your target, not when the timer says it should be done
Rest 7-10 minutes for thick cuts
On resting
The main purpose of resting is to let carryover finish and internal temperature stabilize, not to "reabsorb" anything. When final internal temperature is precisely controlled, rested and unrested meat loses similar amounts of juice. Rest because it keeps carryover from overshooting your target; that's the actual benefit.
Two steak myths worth dropping
These persist because they sound plausible. Neither holds up to testing.
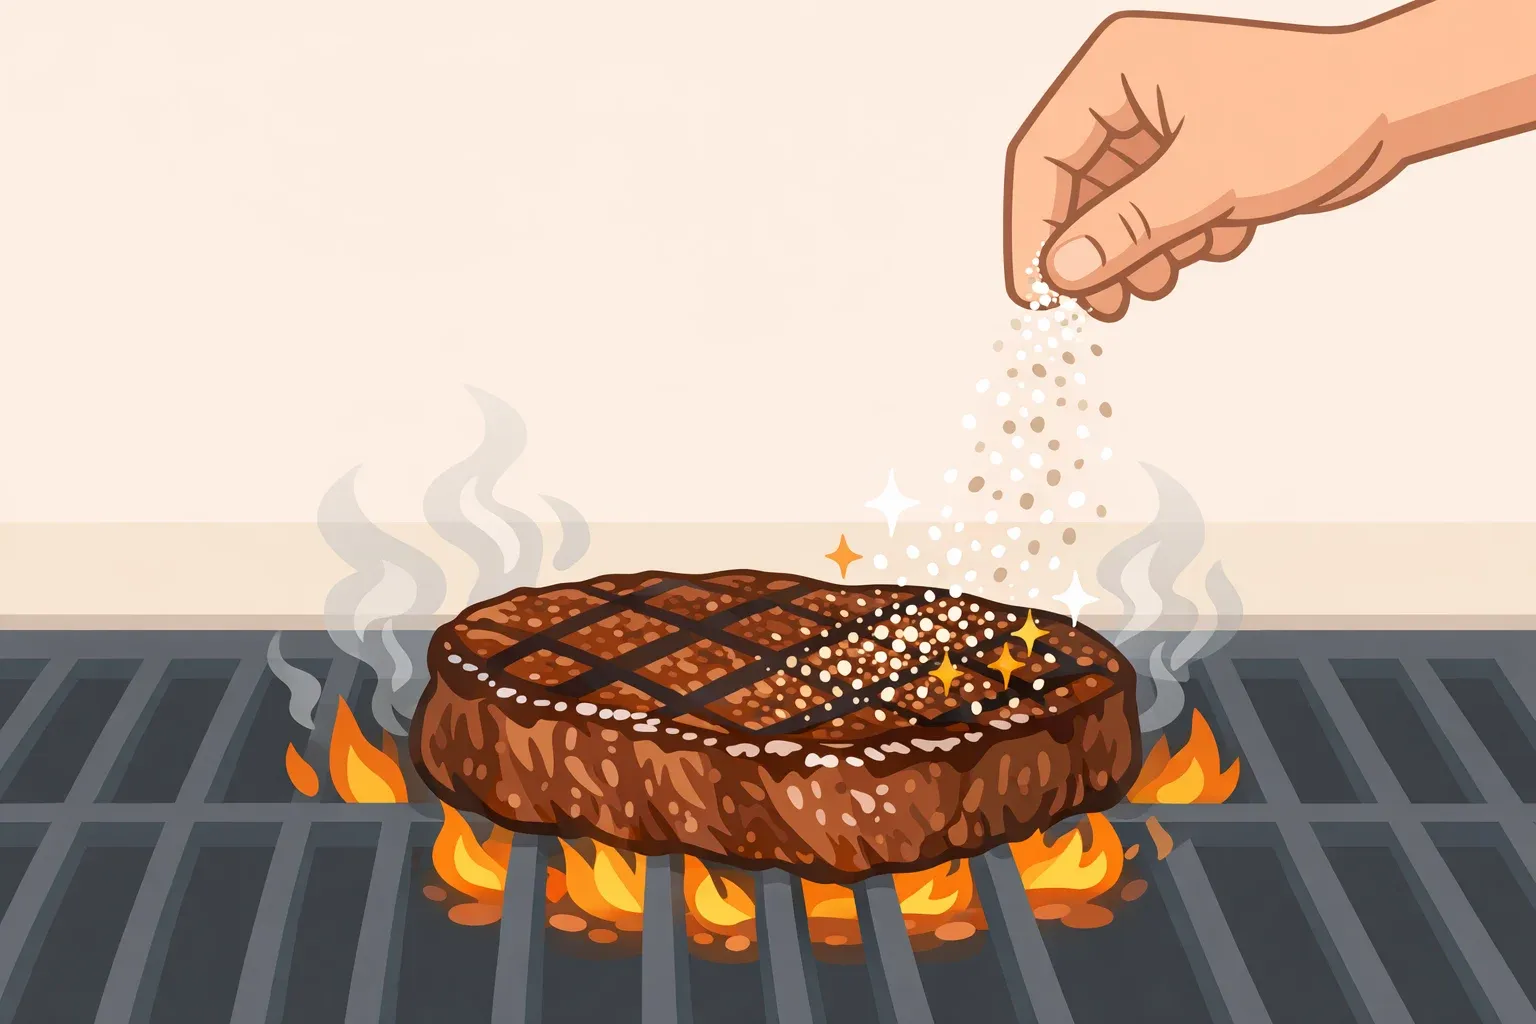
Searing "locks in" juices. It cannot. A seared surface is not a physical seal. What searing does is drive the Maillard browning reaction, which builds the savory crust and flavor complexity that defines a good steak. Sear for taste, not for moisture.
Always start with maximum heat. For thick steaks, that approach produces the worst outcome: a wide gray band of overcooked meat and an uneven interior. Starting low and finishing with a quick sear on a pre-dried surface yields a better crust in less time with far more even doneness throughout.
Three things to check before the next steak goes on
The Ina Garten "foolproof" framing is useful for one reason: it treats grilling as a system with predictable inputs and outputs, not intuition. Thickness determines your method. Pull temperature determines when to leave the heat. Get both right, and the margin for error is narrow.
Before the next cook, run through these:
Thermometer in hand and pull temperature confirmed before the grill is lit
Grill preheated, grates brushed clean, steak oiled
Steak thickness measured and method chosen accordingly; two-zone for anything 1.5 inches and above
The carryover math scales to other cuts. Pork chops, lamb chops, anything where thickness varies and doneness matters follows the same logic: 3-5°F of rise for thin cuts over high heat, 10-15°F for larger ones cooked more gently. Only the target numbers change.


Comments
Be the first, drop a comment!