



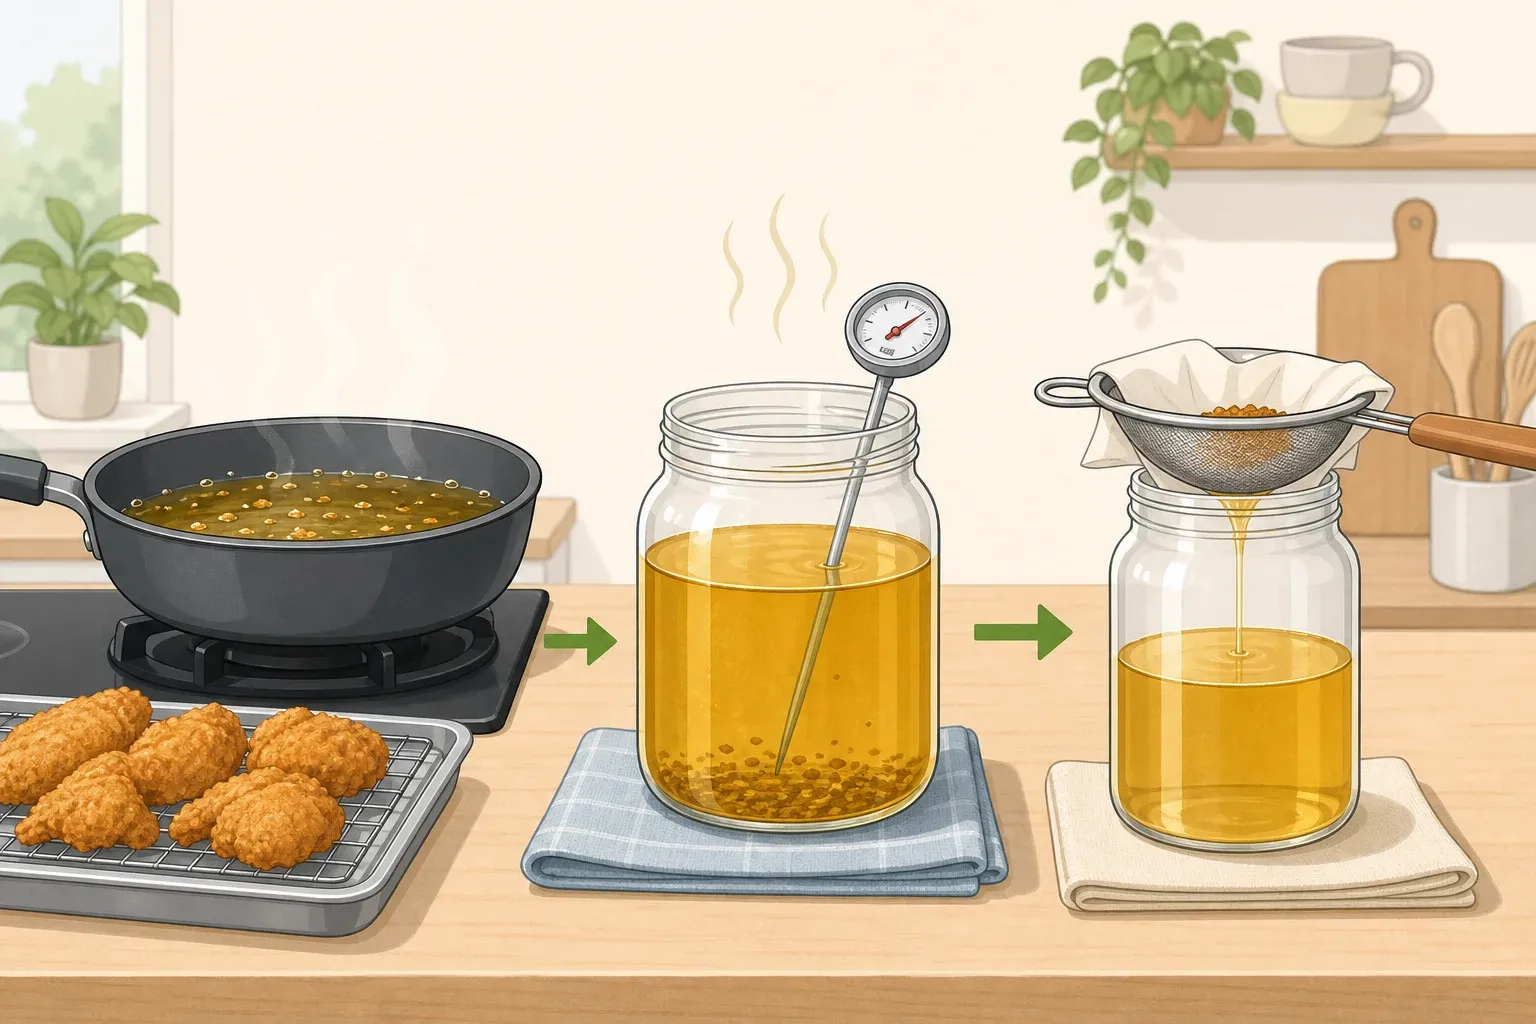
How to reuse frying oil safely and know when to toss it
Frying oil is expensive, and pouring out a fresh batch after just one round of chicken or doughnuts feels wasteful. But cooks who keep reusing the same oil without ever checking on it usually end up with rancid flavors, oil that smokes too soon, or food that turns soggy no matter how hot the pan gets. The fix is a short, repeatable routine: cool the oil, strain it, store it correctly, and stop at the first clear warning sign. That's the core of how to reuse frying oil safely, and it's simple enough for a beginner cook to follow every time.
What you fry determines how much life is left in a batch. Breaded, battered, and high-sugar foods leave behind more burnt particles than a plain fry, and those leftover bits keep cooking every time the oil goes back on the heat, food scientist Kelly Pallian explains in EatingWell. A batch of funnel cakes wears out oil faster than a batch of french fries, even if both look fine going in. That's worth knowing before deciding how many times to push a given batch, a question this guide answers in detail further down.
What you'll need before you start
Gather these before your oil finishes cooling:
- A fine-mesh strainer
- Cheesecloth or coffee filters to line it
- A funnel
- A deep-fry or candy thermometer
- An airtight, opaque storage container
Epicurious and EatingWell both recommend lining the strainer with cheesecloth or filters so fine debris doesn't slip through.
Oil choice matters before you even heat the pot. The best oil for reusing after frying is a neutral, high-heat option such as peanut, canola, avocado, or vegetable oil, with a smoke point above 400°F. Serious Eats and Epicurious both point to these as the ones that hold up best across multiple reheats. Oils higher in polyunsaturated fat, like soybean or sunflower, break down faster than more saturated oils such as coconut oil, according to Pallian's comments in EatingWell, so they're a weaker bet if you're planning several rounds.
One safety note before you touch a strainer: never filter hot oil. Epicurious warns that a splash while filtering can cause a serious burn, so let the oil cool completely in the frying vessel before moving it anywhere. Cooks confident about a steady pour can strain oil once it's just warm, per Pallian's advice in EatingWell, but only over a large heatproof bowl or straight into a clean container. If you're not sure about your pour, wait for a full cool-down instead.
This is a beginner-friendly kitchen habit. The steps are simple, but skipping the cooling time or eyeballing the temperature instead of using a thermometer is where results start to slip.
Protect the oil while you fry
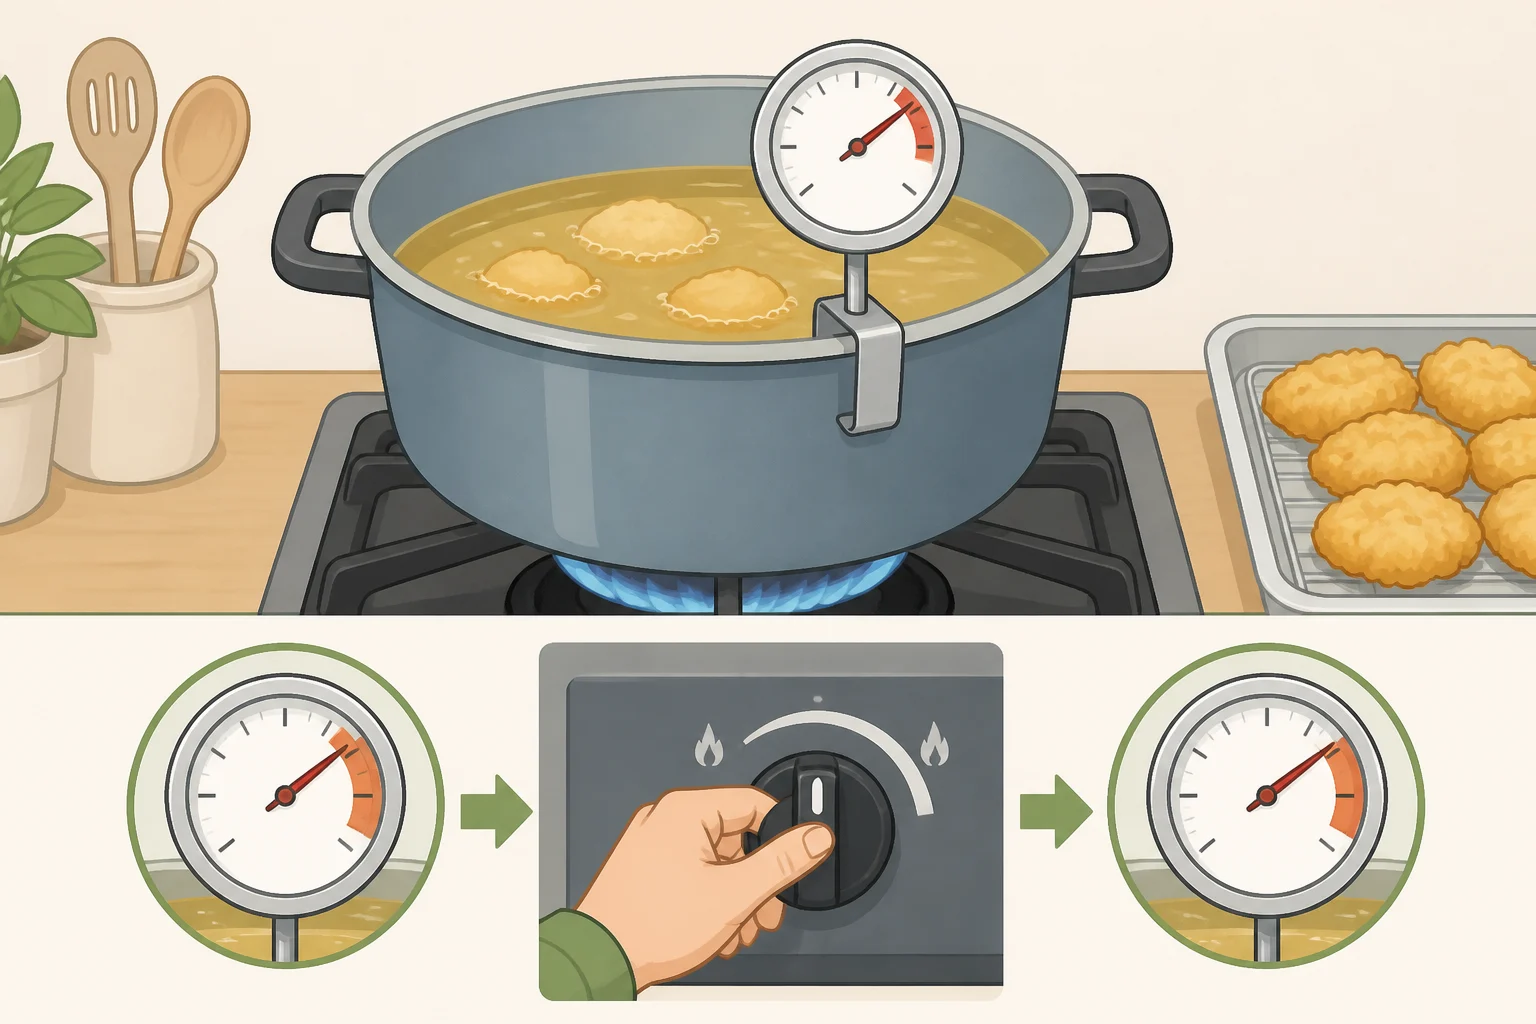
Reuse success gets decided while you're frying, not just after. A few habits during the cook keep the oil in reusable shape:
- Watch the temperature. Keep a thermometer in the oil and hold it between 350°F and 375°F. EatingWell calls this range the sweet spot for both food quality and oil longevity.
- Stay under the smoke point. Exceeding it speeds up the oil's breakdown and permanently lowers its smoke point for the next fry, according to Serious Eats. Cross that threshold and the oil also releases acrolein, the compound that gives burnt food its bitter taste, per Epicurious.
- Pat food dry before it hits the oil. Serious Eats cites Koichi Endo, a tempura specialist at the Michelin-starred Tempura Matsui, who recommends this step to cut down on splatter.
- Skim as you go. Pull loose crumbs and batter bits out between batches instead of waiting until you're done. The more particles left in the oil, the faster it breaks down, Serious Eats notes, since leftover bits keep frying every time the oil is reheated.
How to strain and store frying oil
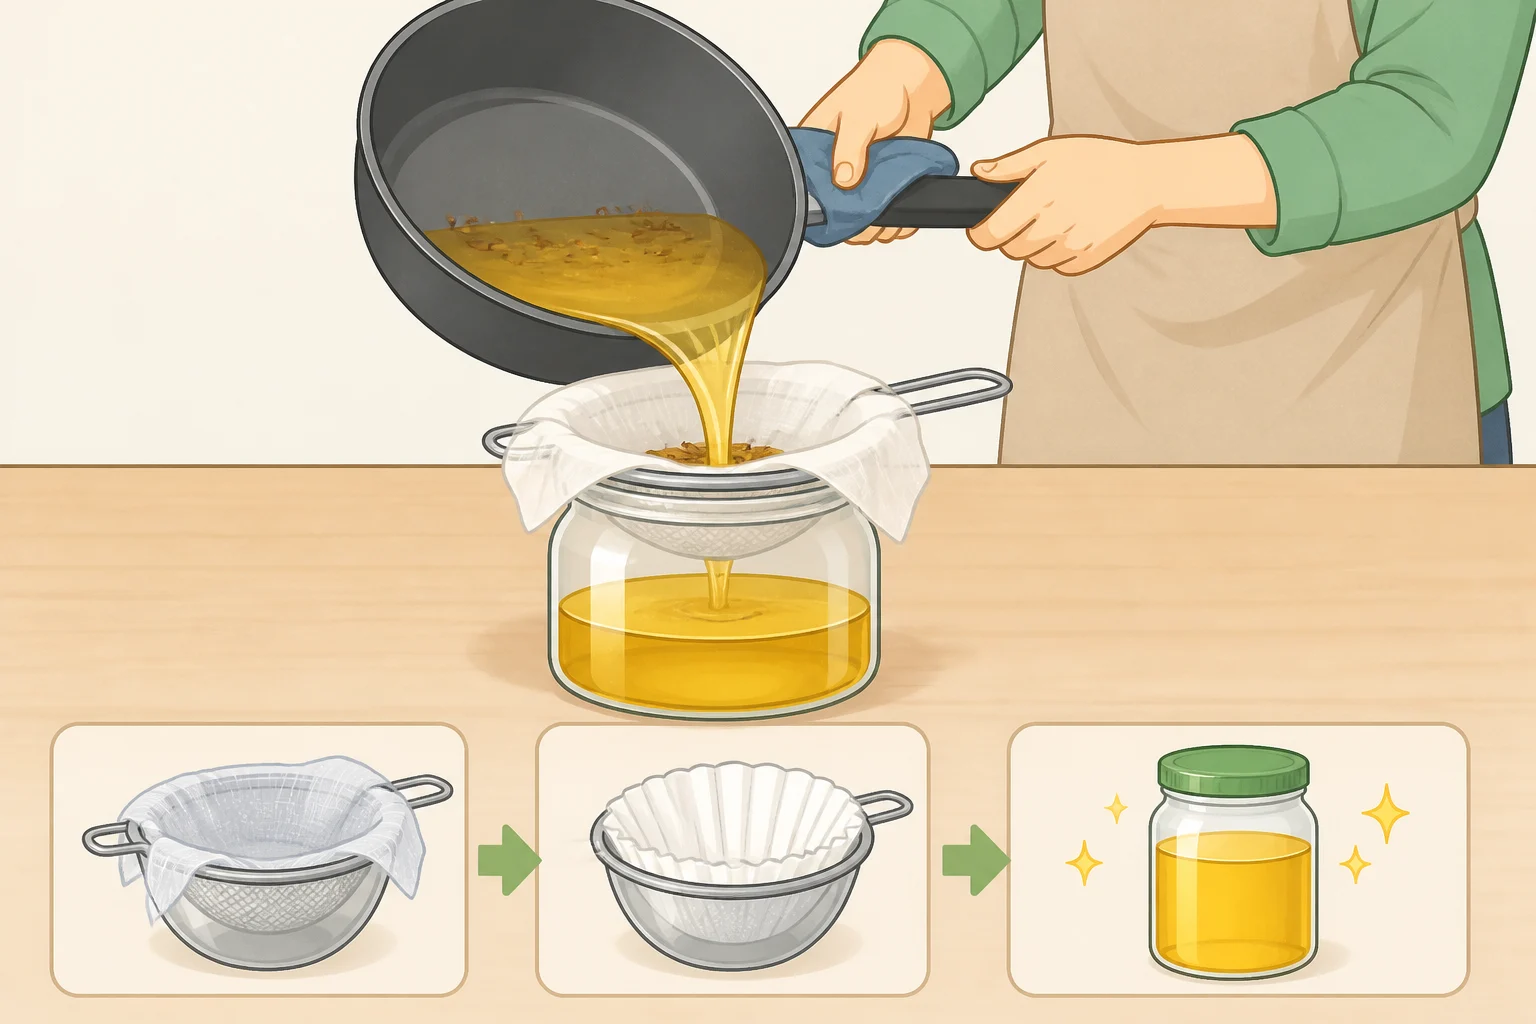
Once the last batch is out, the next few minutes decide whether that oil is worth keeping. Here's the routine for how to strain and store frying oil so it's ready for round two:
- Let the oil cool completely in the frying vessel. King Arthur Baking recommends cooling it right where you fried, which cuts down on spills and burns.
- Strain it through cheesecloth or a coffee filter set inside a fine-mesh strainer. Serious Eats and Epicurious both back this method. Pour slowly through a funnel, a step King Arthur Baking recommends, into a clean container.
- Check the pour. If specks are still visible after one pass, run it through again. EatingWell recommends a second strain whenever debris is visible.
- Label the container with the date, what you fried, and how many times the oil has been used. Both King Arthur Baking and EatingWell flag this as the easiest way to track age and avoid mixing flavors.
- Store it airtight and in the dark. A pantry, fridge, or freezer all work. Serious Eats notes that freezer storage slows oxidation and can meaningfully stretch how long the oil stays usable.
- Keep the container away from the stove. Heat nearby speeds up rancidity, according to Serious Eats.
When you reuse cooking oil after frying, keep the next food compatible with the first one. Oil holds onto whatever it fried initially: King Arthur Baking notes that oil used for fish probably won't work for crullers next, though cruller oil is fine for something savory afterward. EatingWell gives the same warning for strongly flavored foods and suggests setting that oil aside so it doesn't end up in a neutral batch by accident.
How many times can you reuse frying oil
Treat three uses as your conservative default. Epicurious recommends stopping there even when the oil looks and smells fine, and Pallian's comments in EatingWell warn that heating oil more than four or five times depletes nutrients and builds up compounds you don't want in your food.
That said, three isn't a hard ceiling for every setup. King Arthur Baking puts the practical range at two to eight uses, and Serious Eats reports a dozen or more is possible under ideal conditions. Read those higher numbers as what's achievable with strict straining and temperature control, not a promise for every kitchen. If you're not consistently hitting the steps above, don't count on stretching past three or four.
Storage time has its own limit, separate from use count. Epicurious advises against reusing oil that's sat for more than one to two months, the safer bet for most home cooks. Serious Eats notes that refrigerated oil stays usable for several months, and that freezing slows oxidation even further, but check for spoilage signs before frying with oil that's been sitting a while.
Topping up is a maintenance move, not a way to reset the clock. Adding a splash of fresh oil after frying restores lost volume and helps dilute some of the breakdown compounds that build up, according to EatingWell and the Singapore Food Agency. It only works on oil that already passes your quality checks; it won't rescue oil that's already dark, sticky, or foul-smelling.
When to throw away used frying oil
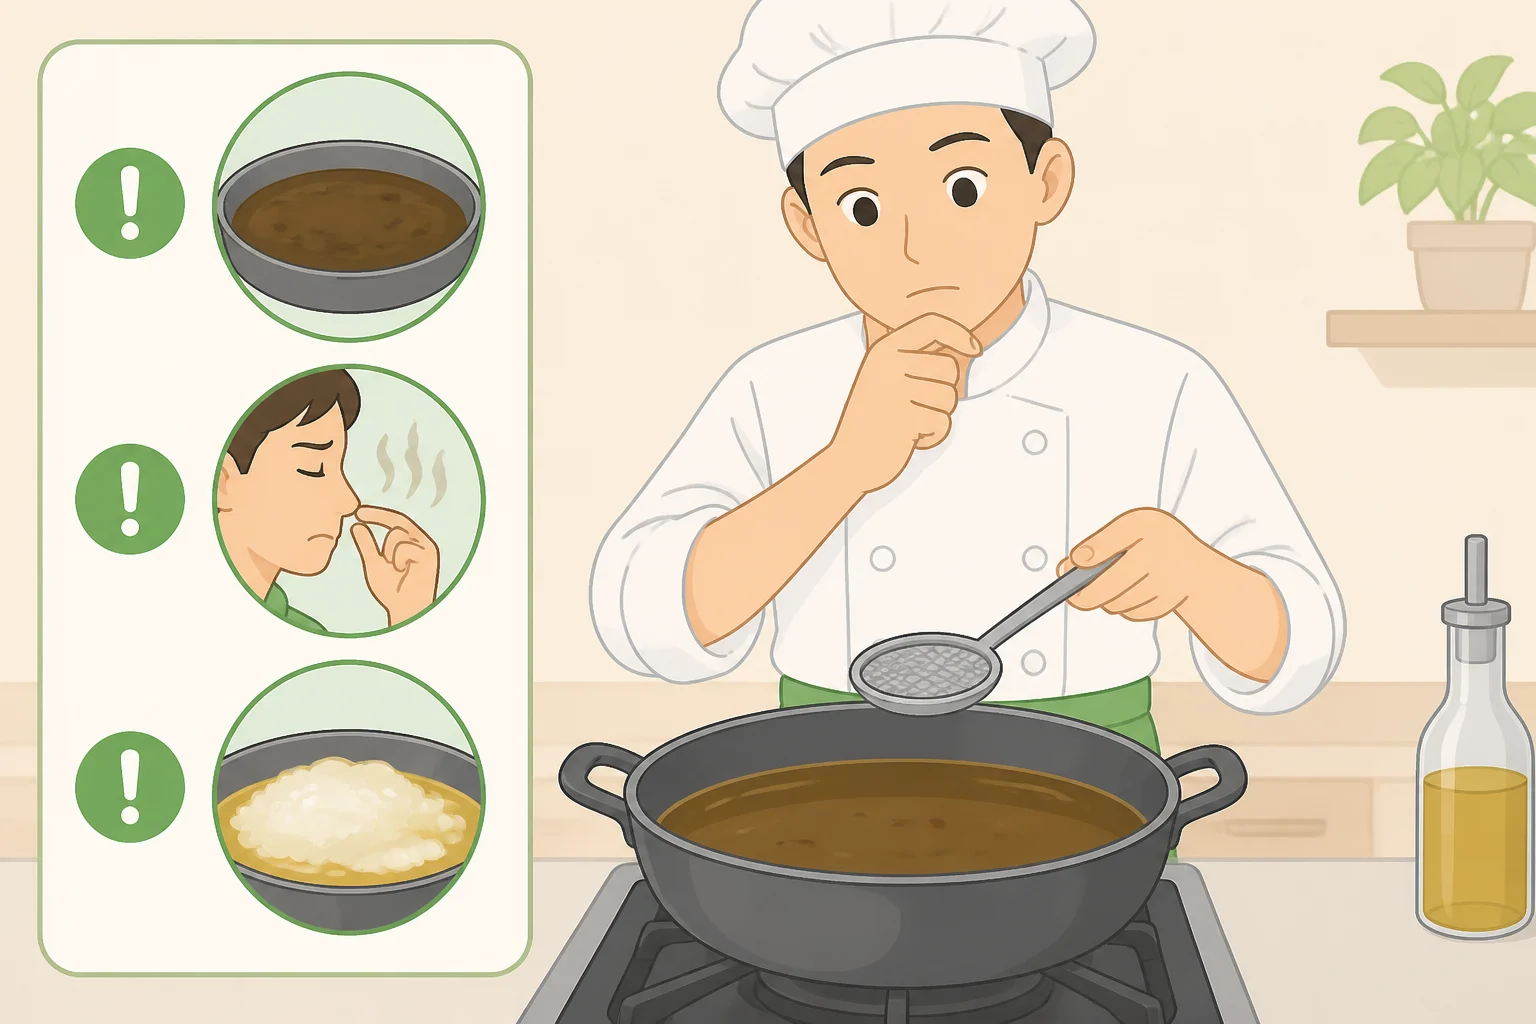
Stop reusing the moment any of these show up, regardless of how many times you've fried with it:
- Dark, sticky, or gummy texture, or foaming when heated. Serious Eats, EatingWell, and the Singapore Food Agency, updated three months ago, all flag these as reliable end signals.
- Persistent cloudiness. EatingWell notes that oil straight out of the fridge often looks cloudy and clears once it warms back up, which is normal. Cloudiness that doesn't clear at room temperature, or that shows up alongside a bad smell or sticky feel, means the oil is actually spent.
- A rancid, sour, or burnt smell, or smoke at a lower temperature than usual. EatingWell calls these dependable cues to toss the batch instead of pushing through one more fry.
- Food turning soggy instead of crisp, even at the right temperature. As oil breaks down it becomes less able to repel water, and past a certain point it loses that ability almost entirely, according to Serious Eats. If that's happening, the oil is done even if it still looks okay.
Repeated high-heat reuse forms polycyclic aromatic hydrocarbons and aldehydes, compounds tied to higher cancer and cardiovascular disease risk, according to the Singapore Food Agency. That's the real cost of pushing a batch past its limit.
Once oil is actually spent, get rid of it the right way:
- Never pour it down the drain. Serious Eats, Epicurious, EatingWell, and King Arthur Baking all warn that it congeals in pipes and causes clogs.
- Solidify it. Mix cooled oil with an absorbent material like paper towels, coffee grounds, or cat litter, or use a commercial solidifier such as FryAway, then bag it and toss it with the trash, per EatingWell and King Arthur Baking.
- Or seal it in a disposable container. The original jug it came in works fine for this, according to King Arthur Baking, then throw it away with regular household trash.
- Look for a local recycling option. Some municipalities collect used cooking oil and turn it into biodiesel or soap, per EatingWell; King Arthur Baking points to Earth911's drop-off locator as a starting point for finding one.
- Skip the yard. Dumping it outside can attract pests and harm plants, according to EatingWell.
Finish line
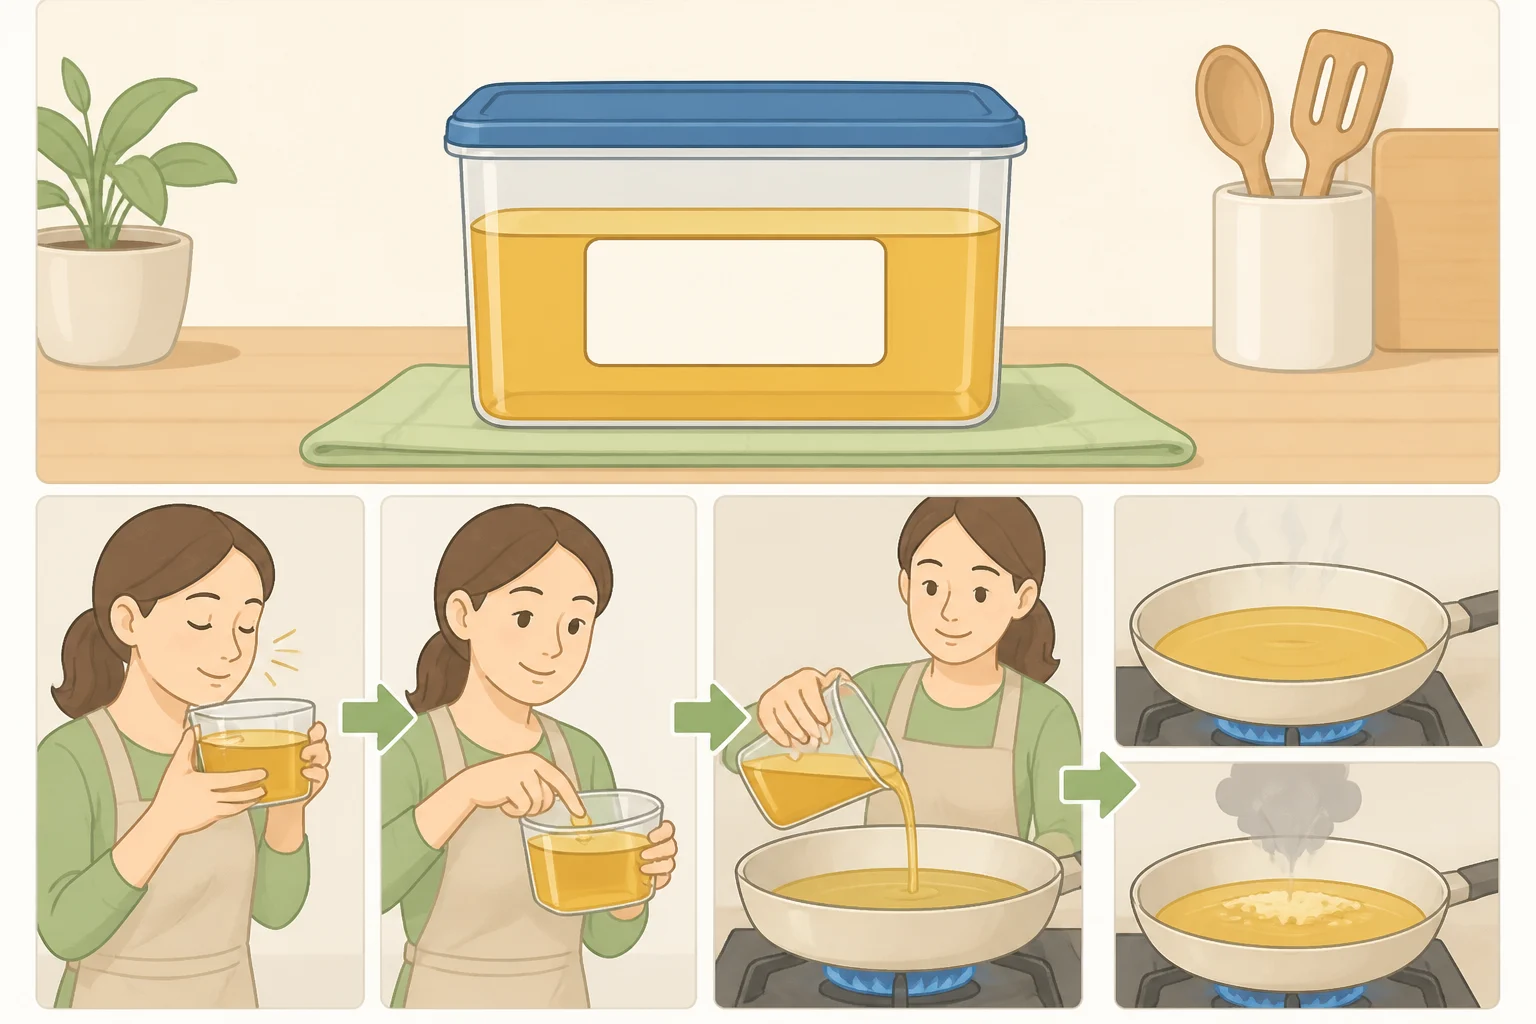
Before your next fry, bring chilled oil to room temperature, smell it, and check that it's not sticky or persistently cloudy. If it passes, heat it up gradually with the thermometer in place, a step the Singapore Food Agency recommends, and watch for smoke or foam earlier than expected. Either one means stop, even mid-batch.
Label the container every time you reuse a batch, keep it in the fridge or freezer between fries, and stick to compatible foods so a doughnut never comes out tasting like last week's fish fry. Once the oil fails any of the checks above, or it's been sitting in storage longer than the one-to-two-month window Epicurious recommends, solidify it or bag it for the trash, or look up a local recycling drop-off. Start the next fry with a fresh batch instead of pushing an old one past its limit.











Comments
Be the first, drop a comment!