



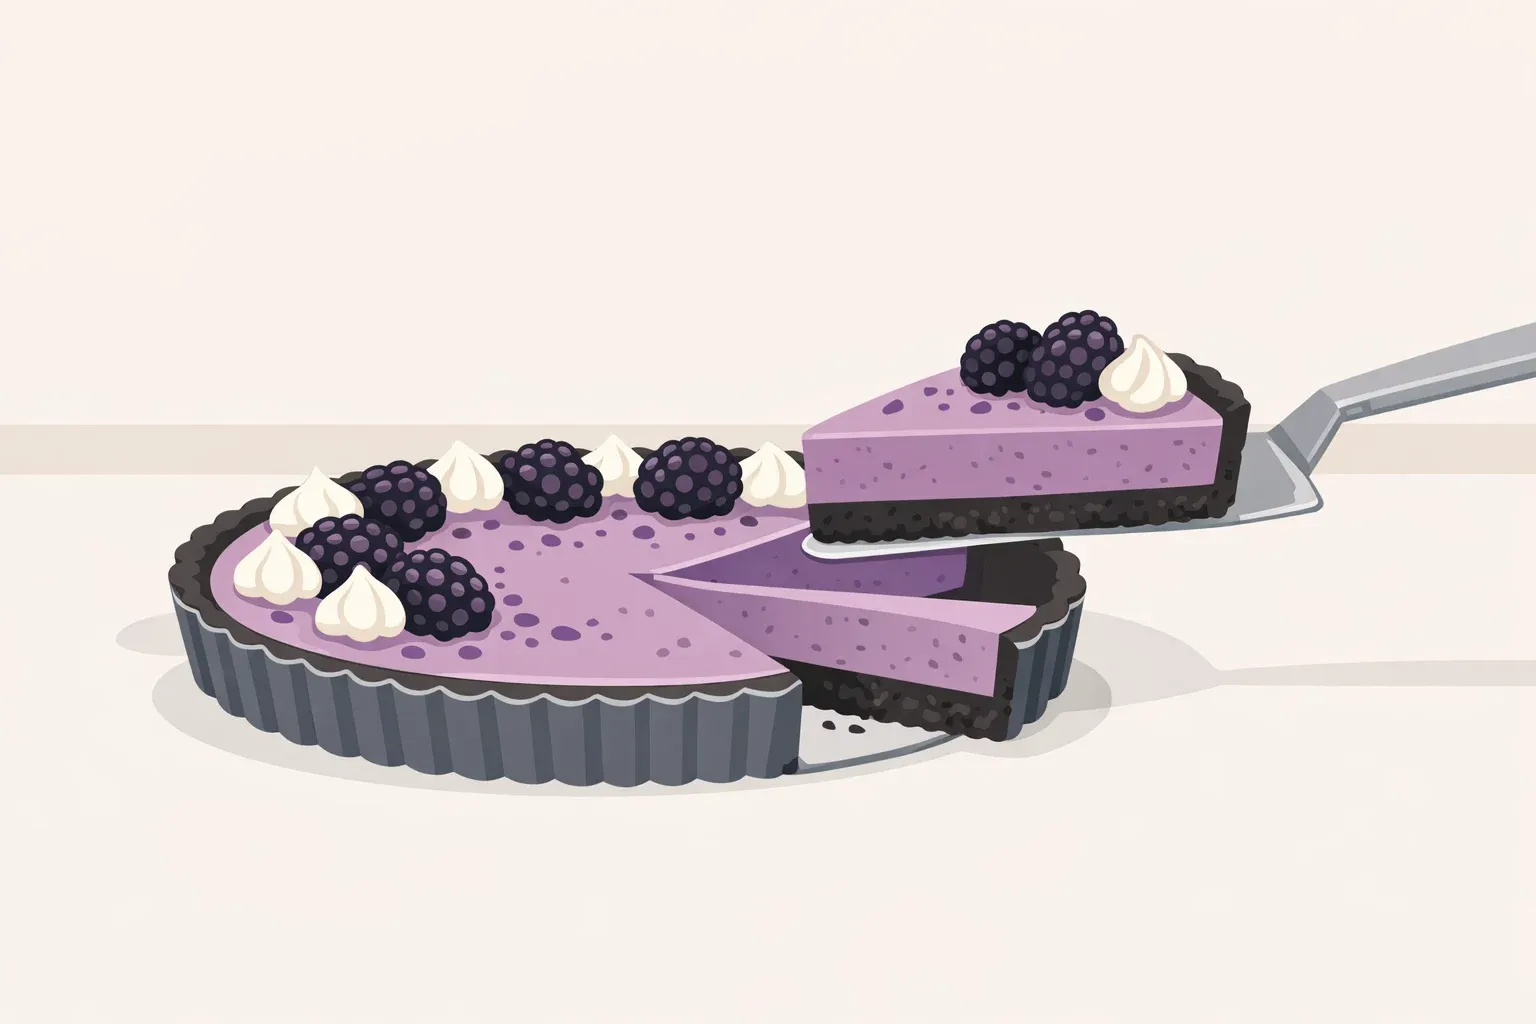
No-Bake Blackberry Oreo Tart Recipe: How to Cut Clean Slices
This no-bake blackberry Oreo tart recipe skips the oven entirely. The Oreo crust firms up in the freezer, and the blackberry filling sets with gelatin in the fridge. Getting a clean slice instead of a puddle on the plate comes down to order: fresh berries, fully dissolved gelatin, and a full chill before you cut, following the Delish recipe, updated this week.
The Delish Test Kitchen-approved version makes 8 servings, with about 40 minutes of active prep and 1 hour 40 minutes total once chilling is factored in (Delish). This walkthrough follows that fresh-berry, gelatin-set version exactly as written, explains why frozen blackberries aren't a drop-in swap for it, and covers how to fix the most common ways this easy no-bake blackberry dessert can go wrong before it reaches the table.
What you'll need for this no-bake blackberry Oreo tart recipe
Tools:
- 9-inch tart pan (removable bottom recommended)
- Blender
- Fine-mesh sieve
- Stand mixer or handheld mixer
- Small saucepan
(Delish)
Ingredients:
- 24 Oreos, finely crushed (about 9.5 oz.)
- 5 Tbsp. unsalted butter, melted and cooled
- 1/2 tsp. kosher salt, divided
- 1 (1/4-oz.) packet gelatin
- 17 oz. fresh blackberries (about 3 cups), divided
- 1 Tbsp. orange juice
- 2/3 cup heavy whipping cream
- 2/3 cup condensed milk
- 6 oz. mascarpone, room temperature
- 1/4 cup mini Oreos (optional)
(Delish)
This tart is beginner-friendly and entirely oven-free, but it isn't a last-minute dessert. Between the freezer step, the gelatin, and the fridge set, total time runs close to 1 hour 40 minutes, so plan around that window rather than trying to squeeze it in an hour before guests arrive (Delish). Gather everything before you start, since once the gelatin is on the stove, you'll be moving straight into blending and whipping.
Before you start:
- A tart pan with a removable bottom makes unmolding a chilled, unbaked crust much easier than a solid one. If yours doesn't have one, that's fine too; for easier serving, run a thin knife around the edge before lifting out slices, or serve straight from the pan.
- Clear flat fridge space for the pan ahead of time. The filling needs at least an hour to chill.
- Set the mascarpone out to reach room temperature, as the recipe calls for, so it folds in smoothly instead of leaving lumps in the filling (Delish).
- Melt the butter and let it cool before mixing it into the crumbs; the recipe lists it as melted and cooled, not warm (Delish).
- The 1/2 tsp. of salt is used in two places: 1/4 tsp. goes into the crust, and the remaining 1/4 tsp. goes into the blackberry purée later. The 17 oz. of blackberries are split three ways too: 15 oz. get blended into purée, 1 tablespoon of that purée is set aside for the swirl topping, and the last 2 oz. are halved and left whole for the top (Delish).
- Rinse the fresh blackberries and pat them dry before blending, to avoid adding unnecessary water to the purée.
Making the Oreo crust and blackberry-mascarpone filling
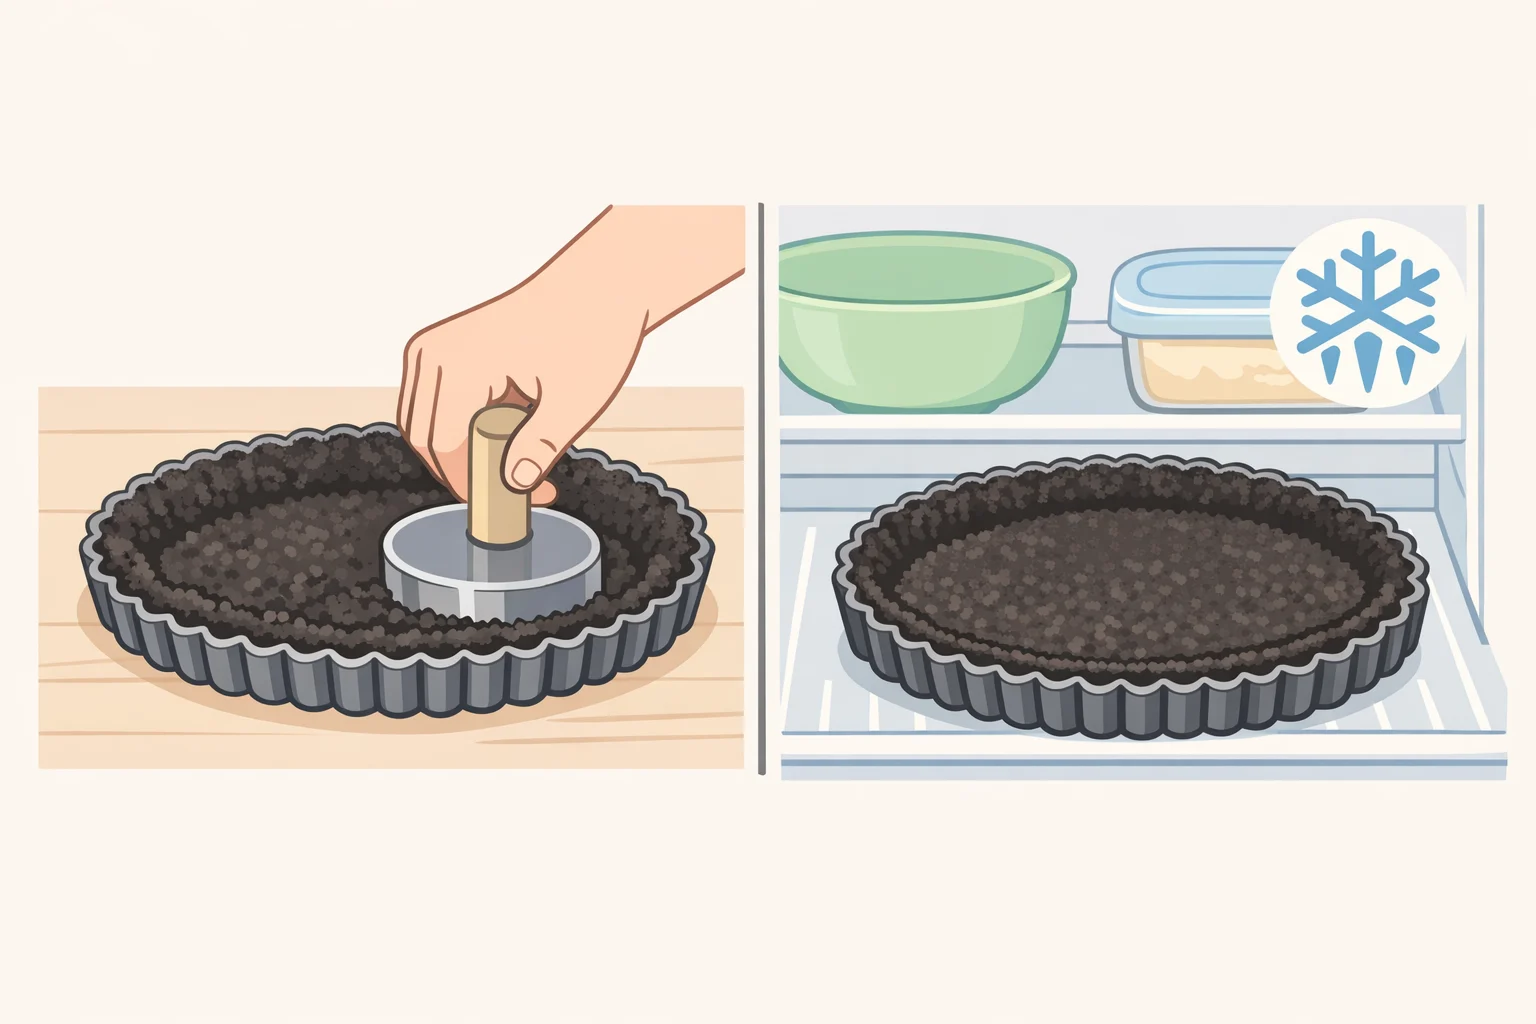
Step 1: Build the crust. Crush the Oreos into fine crumbs; a food processor works, or you can crush them in a sealed bag with a rolling pin. Mix them with the melted, cooled butter and 1/4 tsp. salt in a large bowl. As a quick check, press a bit of the mixture between your fingers; if it clumps together instead of falling apart, it's ready (Delish). Press it firmly into the bottom and up the sides of the tart pan using the bottom of a measuring cup, then freeze about 20 minutes until firm.
Press a finger lightly against the side of the crust once it's out of the freezer. It should feel solid, not crumbly. If it still gives easily, freeze it a few more minutes before filling.
Step 2: Cook the gelatin. In a small saucepan over medium heat, whisk the gelatin packet with 3 tablespoons of water until the mixture turns completely clear and liquid, about 1 minute, then take it off the heat and let it cool slightly before using it, exactly as the recipe directs (Delish). Keep whisking over the heat if you still see any grainy bits.
General gelatin guidance suggests letting the dissolved gelatin cool closer to room temperature before it meets a cold mixture, since gelatin can start to firm up again below roughly 95°F. Adding it while it's still hot can cause uneven, localized setting where it hits the cooler cream, which shows up as streaks or small lumps later. That guidance comes from broader gelatin testing, not from testing this specific tart, so treat it as a reason to let the pan sit a minute or two longer off the heat rather than a strict rule (Ovenlytic).
Step 3: Purée the blackberries. Blend 15 oz. of the fresh blackberries into a smooth purée, then strain it through a fine-mesh sieve into a bowl, pressing with the back of a spoon to work the purée through and leave the seeds behind. You should end up with about 1 1/2 cups of purée (Delish). Reserve 1 tablespoon for the topping, then stir the orange juice, cooled gelatin, and remaining 1/4 tsp. salt into the rest. If the strained purée still looks gritty, run it through the sieve a second time.
Step 4: Build the cream base. Whip the heavy cream to stiff peaks, then slowly add the condensed milk. Some deflating here is normal; the gelatin holds everything together once the tart chills, so don't try to re-whip it back to stiff peaks (Delish). Reserve 5 oz. of this cream for the topping, then fold in the mascarpone and blackberry mixture on low speed until no white streaks remain. Folding with a wide spatula, scraping up from the bottom of the bowl rather than stirring in circles, makes it easier to spot streaks as they disappear. Once no streaks remain, the filling is ready to pour.
How to tell when the tart is set and cut it clean
Step 5: Fill and chill. Pour the filling into the crust and refrigerate for at least 1 hour, up to 2, per the tested recipe (Delish). Cover it loosely with plastic wrap while it chills; this keeps the surface from drying out and stops it from picking up fridge odors.
Check doneness by pressing lightly on the surface near the edge. A set filling feels firm to the touch rather than jiggling like loose pudding. If it's still soft or wobbly, it hasn't finished setting; put it back in the fridge and check again rather than assuming something went wrong.
When it's time to cut, work with the tart cold, straight from the fridge. Run a knife under hot water, dry it off, make one clean cut, then wipe the blade before the next one. A warm, dry blade tends to glide through the chilled layers more cleanly than one that's already picked up purée from the last slice.
Step 6: Make the swirl topping. Fold the reserved 1 tablespoon of blackberry purée into the reserved 5 oz. of whipped cream just until streaks of both are visible (Delish). Stop as soon as you see distinct ribbons of purple and white; keep folding past that point and it turns into one flat pink color instead of a swirl.
Step 7: Finish and serve. Dollop the swirled cream in the center of the tart. Halve some of the remaining blackberries and arrange the halved and whole berries on top, with mini Oreos if using (Delish). A similar no-bake berry dessert warns that cut fruit left sitting on a chilled filling can bleed color over time and recommends adding the topping no more than an hour before serving to keep the swirl looking clean (Dessert Now Dinner Later). Delish doesn't specify an exact timing window for this particular tart, but that same one-hour buffer is a reasonable precaution here too.
Unmold the tart only once it's fully chilled and firm; a filling that hasn't finished setting may not hold its shape once the pan's sides come away. If your tart pan has a removable bottom, set it on a can or a small bowl and let the outer ring drop, then slide the tart onto a serving plate. Keep it refrigerated until shortly before serving.
Substitutions, storage, and troubleshooting for this Oreo cookie crust tart
Substitutions that hold up: cream cheese can stand in for mascarpone if it's not in the budget or not on the shelf (Delish). Agar agar works as a vegetarian substitute for the powdered gelatin, but check the product's own ratio guidance first, since it isn't a 1:1 swap, and Delish hasn't tested this specific tart with agar agar in place of gelatin. Treat it as an adjustment you're making on your own, not a proven swap.
Don't substitute frozen berries directly. This recipe's raw purée is built around fresh fruit. Delish's Test Kitchen advises against frozen blackberries here because they come out too waterlogged for an uncooked filling, and they need time to thaw first (Delish). A separate no-bake filling recipe from It's Raining Flour works around that problem by simmering frozen blackberries into a cooked compote for a cream-cheese filling, but that's a different formula with different ratios and a different way of setting; it isn't a version of this Oreo cookie crust tart. If frozen is all you have, that cooked-compote method is the better fit rather than forcing frozen fruit into this one.
Storage: the crust alone can be made ahead and kept in the fridge for up to 3 days, or wrapped tightly in plastic and foil and frozen for up to 3 months (Delish). For the best texture once it's filled, eat the assembled tart within Delish's 2-to-3-day window; the crust starts to get soggy past that point. Keep it covered and refrigerated at 40°F/4°C or below the entire time, which lines up with general USDA guidance for gelatin-based dairy desserts, as summarized by Ovenlytic.
Troubleshooting:
- Gelatin looks lumpy or streaky in the filling. It likely wasn't fully dissolved before it went in, or it was still warm when it hit the cold cream mixture. There's no fix once the tart has set; note it for next time and give the cooked gelatin a little longer to cool before folding it in.
- Filling is still loose after the full chill time. Under-dissolved gelatin may not distribute evenly, so the filling can stay loose or develop streaks even after chilling. Give it more time in the fridge and recheck with the press test, but keep in mind that a gelatin mixture that didn't fully dissolve before assembly may not fully set no matter how much longer it sits.
- Crust turns soggy. Check whether the tart sat past the 2-to-3-day window after filling; Delish notes that's when the crust starts to soften. Skipping the freezer step before filling may also leave the crust softer, though that specific cause isn't confirmed by testing; freezing it the full 20 minutes is still the safer bet.
- Topping bled into the filling. The berries went on too far ahead of serving. Add the fresh topping within an hour of plating, as in Step 7.
Once you've sliced it, serve the tart cold, straight from the fridge, and finish the berry topping close to serving time using that one-hour window as a guide. Refrigerate any leftovers right away, covered, and plan to finish the tart within Delish's 2-to-3-day window since the crust, not spoilage, is what limits how long it keeps. If you want to get ahead of it, make and freeze the crust on its own up to three months in advance, then fill, chill, and top it the day you plan to serve.









Comments
Be the first, drop a comment!