



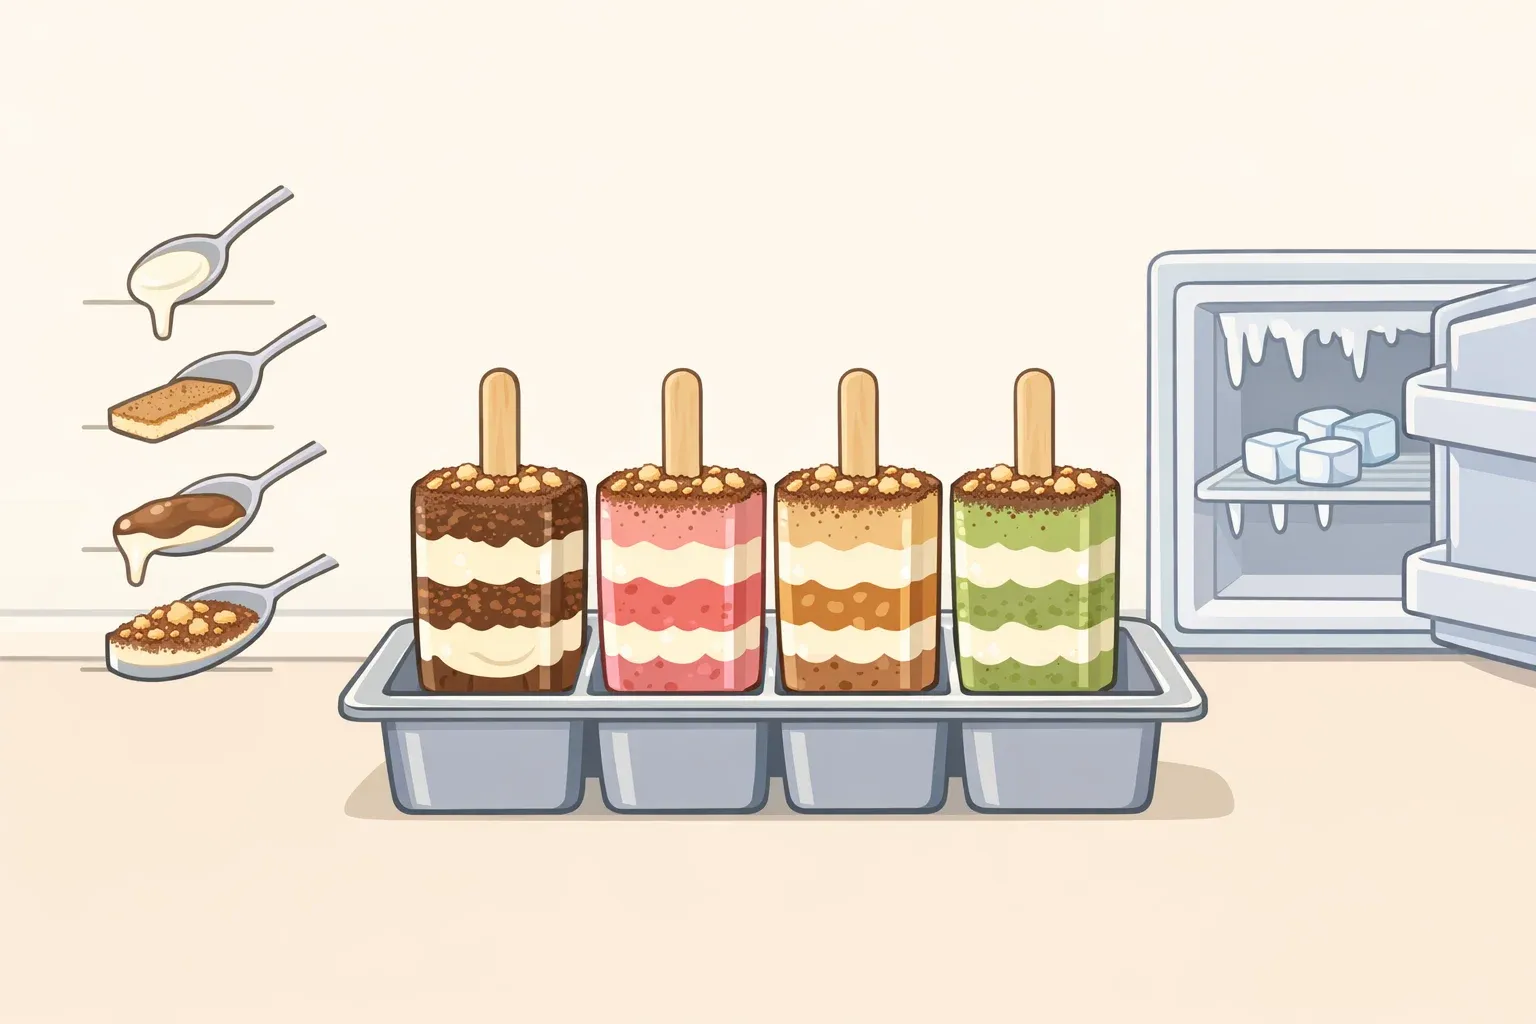
This three-ingredient tiramisu pops recipe yields 16 frozen pops across four flavors with 15 minutes of active prep, according to Delish. Total time is 8 hours 25 minutes once freezing is factored in, and each pop comes in at about 87 calories.
These aren't traditional tiramisu in the classic Italian sense. Recipes from Italy describes the traditional version as a layered dessert built around coffee-soaked ladyfingers, mascarpone cream, and cocoa. These pops borrow that flavor logic — creamy filling, ladyfinger crumbs, and a coffee or dessert-style flavoring — and compress it into a frozen handheld format. The result is a firm, creamy pop, not a silky layered dessert.
This guide covers what to buy, whether to make one flavor or all four, the master layering method, how each flavoring behaves during prep, which flavor to start with, and storage.
Ingredients, equipment, and the one-vs.-four-flavors decision
The base is identical across all four flavors: 12 tablespoons Cool Whip and 2 crushed ladyfingers per batch of four pops. The only variable is the flavoring: 8 teaspoons of one ingredient per batch.
The four flavorings are brewed coffee (classic), limoncello (citrus), pistachio cream spread (pistachio), and strawberry jam (strawberry). Coffee, limoncello, and strawberry jam are standard grocery items. Pistachio cream is a different product from pistachio butter; it's a sweet, spreadable paste. It may require a specialty grocer or an online order.
Equipment per batch of four pops: four 3-oz. Dixie cups and four popsicle sticks. Making all four flavors at once means 16 cups and 16 sticks.
The limoncello version contains alcohol, and because the pops are frozen rather than cooked, that alcohol remains in the finished dessert. Keep that in mind when deciding who will be eating them.
One batch or all four?
A single batch makes sense for a first attempt or a small household. That means four pops, one flavoring ingredient, and minimal cleanup. Going bigger makes sense for a party or a batch-prep session ahead of a hot weekend. The shopping list grows by only three additional ingredients, the method is identical for each flavor, and the pops keep for up to three weeks in the freezer.
One note before starting: don't grind the ladyfingers to a powder. Coarse crumbs are what you want, small enough to fit on a teaspoon, large enough to register as texture in the finished pop.
The master method: how to layer and freeze the pops
Each flavor follows the same sequence, according to the Delish recipe.
Step 1. Crush 2 ladyfingers into coarse crumbs and set aside. If using pistachio cream as your flavoring, give it a stir to loosen it before you start; dense paste is harder to distribute evenly across a small cup.
Step 2. Set four 3-oz. Dixie cups on a flat, freezer-safe surface you can slide into the freezer without disturbing.
Step 3. Into each cup, layer: 1 tablespoon Cool Whip, then 1 teaspoon ladyfinger crumbs, then 1 teaspoon of your flavoring ingredient.
Step 4. Repeat that sequence in the same order: Cool Whip, crumbs, flavoring.
Step 5. Finish each cup with a final tablespoon of Cool Whip on top. This top layer helps hold the pop together. It's what the popsicle stick sets into and what holds the layers together during unmolding.
Step 6. Insert a popsicle stick straight down into the center of each cup, pressing to the bottom. Do this after filling the cups, not before.
Step 7. Transfer to the freezer. Freeze flat until fully solid, at least 8 hours. Don't stack or crowd the cups before they've set.
Step 8. To unmold, run the outside of the cup briefly under warm water, then peel away the paper.
How each flavor behaves during prep
All four follow the master method above. Per batch of four pops, the ratios are fixed: 12 Tbsp. Cool Whip, 2 crushed ladyfingers, and 8 tsp. of flavoring. What differs is the physical handling of each flavoring.
Classic (coffee). Brewed coffee is a liquid, so it layers into the cups without any preparation beyond brewing. Use strong coffee; weak coffee loses presence once frozen.
Limoncello. Also a liquid; it layers in cleanly with no additional prep. Because limoncello contains alcohol and stays in the finished pop, this version isn't appropriate for everyone at the table.
Pistachio. Pistachio cream spread is the thickest of the four flavorings. Stir it until smooth and slightly loose before layering, or it will clump in one spot rather than distributing across the cup. Sourcing pistachio cream may require an extra stop or an advance online order, so factor that in if you're making this version for a specific occasion.
Strawberry. Strawberry jam spoons directly into the cups. Use a jam with real fruit content rather than a syrup-heavy variety; thin jam bleeds into the Cool Whip layers instead of holding its position.
Which tiramisu pop flavor should you make first?
Each flavor fits a different use case.
Start with classic if this is a first attempt. Coffee and ladyfingers are the original tiramisu pairing, and brewed coffee is the simplest flavoring to work with; it's a liquid with no prep beyond brewing.
Make pistachio when you want to impress and have time to source the ingredient. It's the most involved flavor to track down but the most complex-tasting pop of the four.
Choose strawberry for a crowd that includes kids or anyone who'd rather skip coffee and alcohol entirely. It's the most accessible of the four and the simplest to execute.
Save limoncello for an adult gathering where you want something with an edge. It is sharp and citrus-forward, and the alcohol stays in the pop. Delish suggests lemonade as a nonalcoholic substitute if you need a citrus version that's appropriate for all ages.
Making all four flavors produces 16 pops, with most of the total time spent waiting for them to freeze. With a three-week storage window, that's a reasonable investment before a summer of entertaining.
Storage, make-ahead planning, and serving
Finished pops keep in the freezer for up to three weeks if wrapped or covered to prevent freezer burn. Leave them in the Dixie cups until the moment before serving. The cups protect the layers during storage and make unmolding cleaner.
For a dinner party or backyard gathering, make them at least the night before. The full 8-hour freeze ensures the layers are properly set; pops pulled earlier may still be soft at the center.
Once unmolded, serve immediately. The pops soften at room temperature, so pull them from the freezer, peel, and hand off. Don't unmold them and leave them on a platter to wait.
For a larger crowd, keep the pops in their cups and unmold them in small groups as guests are ready to eat.
One thing worth knowing about the texture before serving: because these are built with Cool Whip and ladyfinger crumbs rather than a juice or water base, expect something creamier than a hard ice pop. The crumbs may soften as the pops freeze, which is part of the tiramisu-inspired format rather than a flaw.
What you've got and where to take it
The formula is simple enough to run without a recipe card after one attempt: Cool Whip, crushed ladyfingers, and one flavoring, layered twice in a 3-oz. cup, frozen overnight. Fifteen minutes of prep, up to three weeks of results.
The four flavors cover a useful range: strawberry is the most family-friendly, coffee is the closest to classic tiramisu, pistachio brings more complexity, and limoncello delivers a citrus edge for adults after dinner. Make all four once and you'll quickly learn which one your household actually finishes.
The 8 teaspoons of flavoring is the only real variable in the whole formula. Once the method is familiar, it stops being a recipe and starts being a template. Espresso and cardamom, mango jam, and hazelnut spread are personal experiments rather than recipe-tested variations, so treat them as starting points rather than guaranteed one-to-one swaps.


















Comments
Be the first, drop a comment!