



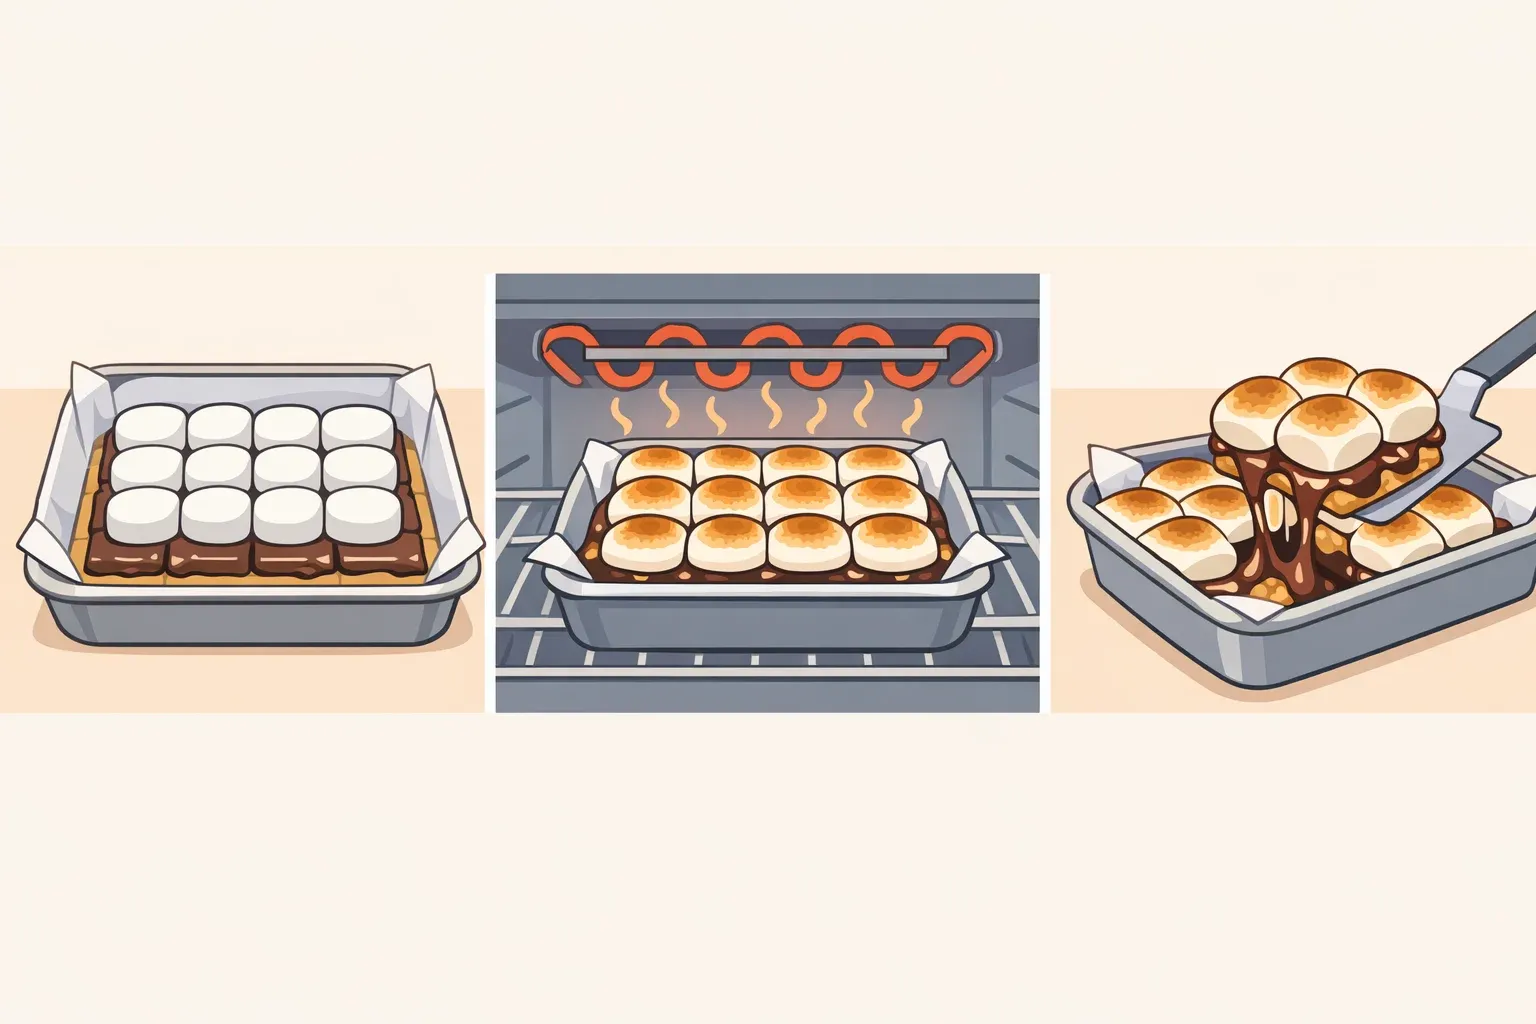
This guide walks you through making easy s'mores bars with a graham cracker crust, buttery crumb base, melted milk chocolate, and toasted marshmallows in about 20 active minutes. The trickier part isn't the assembly. It's the cutting. A warm pan of s'mores bars is essentially a chocolate-marshmallow disaster waiting to happen, and understanding why is what separates a clean plate of squares from a sticky mess.
The layered-crust version covered here comes together in roughly 20 minutes total, including broiling time. That's about half the time of the cookie-bar format, which requires 25–30 minutes in a 350°F oven. The tradeoff is texture: the layered-crust bar is softer, more freeform, and doesn't slice as cleanly. The method matters, so pick the right one before you start.
Easy s'mores bars or cookie bars? Pick the right style first
Both versions share the same three classic components: graham cracker, milk chocolate, and marshmallow. Beyond that, they're different desserts.
The layered-crust bar, the one this guide covers, starts with graham crumbs mixed with melted butter and pressed into a lined pan. Chocolate goes on top, then marshmallows, then the whole thing goes under the broiler for a few minutes. No mixer, no dough, no oven bake on the base. Baking A Moment puts total time at 20 minutes. The result is soft, gooey, and closest in character to an actual campfire s'more.
The cookie bar is a different construction. Graham crumbs fold into a butter-sugar dough with flour, egg, and vanilla, then the whole pan bakes at 350°F for 25–30 minutes. Some versions use marshmallow crème instead of whole marshmallows, which produces a creamier, less toasted result. Cookie bars are chewier, more structured, and sturdier for transport.
Fastest prep, serve same day: Layered crust
Transporting to a party or picnic: Cookie bar
Classic campfire texture and look: Layered crust
Cleanest slices out of the pan: Cookie bar
Minimal equipment, no mixer: Layered crust
The rest of this guide covers the layered-crust method in full. Where the cookie-bar process differs in a way that's worth knowing, it's noted.
How to make s'mores bars with a graham cracker crust
Equipment: 8x8 or 9x9 baking pan, parchment paper, oven with broiler setting (or a kitchen torch). No mixer required.
Ingredients (for a 9x9 pan, 16 squares):
1½ cups (126g) graham cracker crumbs
¼ cup loosely packed light brown sugar
¼ tsp ground cinnamon
⅛ tsp kosher salt
¾ cup (170g) unsalted butter, melted
18 oz milk chocolate chips, or 3–4 full-size milk chocolate bars (such as Hershey's), broken into segments
10 oz marshmallows (whole or mini)
Steps:
Line your pan with parchment paper, leaving an inch or two of overhang on two opposite sides. Lightly grease the parchment. That overhang is your handle for lifting the whole slab out later. Don't skip it.
Mix the crust. Combine the graham cracker crumbs, brown sugar, cinnamon, and salt in a large bowl and whisk briefly. Pour in the melted butter and stir until combined.
Press the crust into the pan in an even, firmly packed layer. The flat bottom of a measuring cup works well for this. Uneven thickness leads to uneven results under the broiler, so take a minute to get it right.
Add the chocolate. Scatter the chips across the crust in an even layer, or lay bar segments directly on top. You don't need to pre-melt anything; the broiler heat in the next step will soften the chocolate.
Add the marshmallows. Arrange them in a single layer across the chocolate. Whole marshmallows give more height; mini marshmallows cover more evenly and brown faster. Either works.
Toast under the broiler. Move an oven rack to the upper position and switch to broil. Slide the pan in and watch it continuously; broiler temperatures vary widely. Pull when the marshmallow tops are golden brown with some darker spots. This will take a few minutes, but start checking early. Do not walk away; marshmallows scorch fast.
If using a kitchen torch instead, work in short passes across the surface.
Cool completely, then chill. Set the pan on a wire rack and let it reach room temperature. This step isn't optional. Marshmallow straight from the broiler is nearly liquid, and cutting into it warm produces the sticky mess everyone complains about. Cutting while warm means a "very soft and messy" marshmallow layer. Once the pan is at room temperature, refrigerate for 30 minutes before slicing for the cleanest results.
In a real kitchen, full room-temperature cooling typically takes 45 minutes to an hour, depending on your kitchen's ambient temperature. Plan accordingly.
Slice with an oiled knife. Coat a sharp knife blade lightly with neutral oil. Cut with a single downward press rather than sawing. Wipe and re-oil between each cut. The Bake School recommends this specifically for cutting through sticky marshmallow without tearing. A 9x9 pan yields 16 squares.
One honest note: even with chilling and an oiled knife, these aren't going to be rigid, edge-perfect squares. That's the nature of this format. If presentation is the priority, the cookie-bar is the cleaner option.
If you're making the cookie-bar version instead: The process diverges at step 2: you're building a dough, not a crumb mixture. That means creaming softened butter with sugar, adding egg and vanilla, then folding in graham crumbs and flour. The pan goes into a 350°F oven for 25–30 minutes. Pull bars when the edges are just barely golden, and the center still looks slightly underdone, which keeps the interior gooey rather than cakey. Cool completely before cutting; a 30-minute fridge chill helps here too.
Make-ahead, storage, and variations
Make-ahead (cookie-bar only): The dough can be mixed up to two days ahead and kept covered in the refrigerator. Allow about 15 minutes at room temperature before pressing into the pan for easier, more even spreading.
Room temperature storage: Sources disagree on shelf life, ranging from a couple of days to well over a week. Because these bars are marshmallow-heavy, this guide follows the shorter window: airtight container at room temperature for up to 2–4 days.
Freezer: Cut into individual squares, layer between parchment, and freeze in an airtight container for up to 3 months. Thaw at room temperature.
Scaling: Use a 9x13 pan and double the ingredients proportionately.
Serving: Room temperature is ideal. For extra gooeyness, microwave individual bars for 10 seconds before serving.
Troubleshooting:
Marshmallows scorched before the chocolate softened: The rack was too close to the broiler element, or the broiler runs hot. Move the rack down one position and start checking sooner next time.
Bars too soft to lift cleanly: The pan didn't chill long enough. Return it to the refrigerator for another 20–30 minutes before trying again.
Crust crumbling when you cut: It wasn't pressed firmly enough during assembly, or it didn't cool long enough for the butter to re-solidify. A longer chill usually fixes this.
Variations:
Dairy-free: Swap in dairy-free milk chocolate chips and vegan butter at a 1:1 ratio. The layered-crust version is naturally egg-free, which makes dairy swaps straightforward. For fully vegan bars, use gelatin-free marshmallows.
Dark chocolate: Replace milk chocolate with bittersweet or dark chocolate for a richer, less sweet result. No technique adjustment needed.
Gluten-free (layered-crust only): Substitute certified gluten-free graham crackers for the crumbs. The source suggests this as a straight swap for the crumb-and-butter crust; it hasn't been documented for the cookie-bar format, so keep this substitution to the featured recipe only.
The dark chocolate swap is the simplest upgrade same method, noticeably different flavor profile. The tahini version is a genuinely different recipe: dairy-free, cookie-bar style, and worth trying on its own terms once you've made the classic.
Total active time: about 20 minutes. The cooling is where people get impatient, and impatience is what turns a good pan of bars into a chocolate-marshmallow smear. Give it the time it needs.

















Comments
Be the first, drop a comment!