



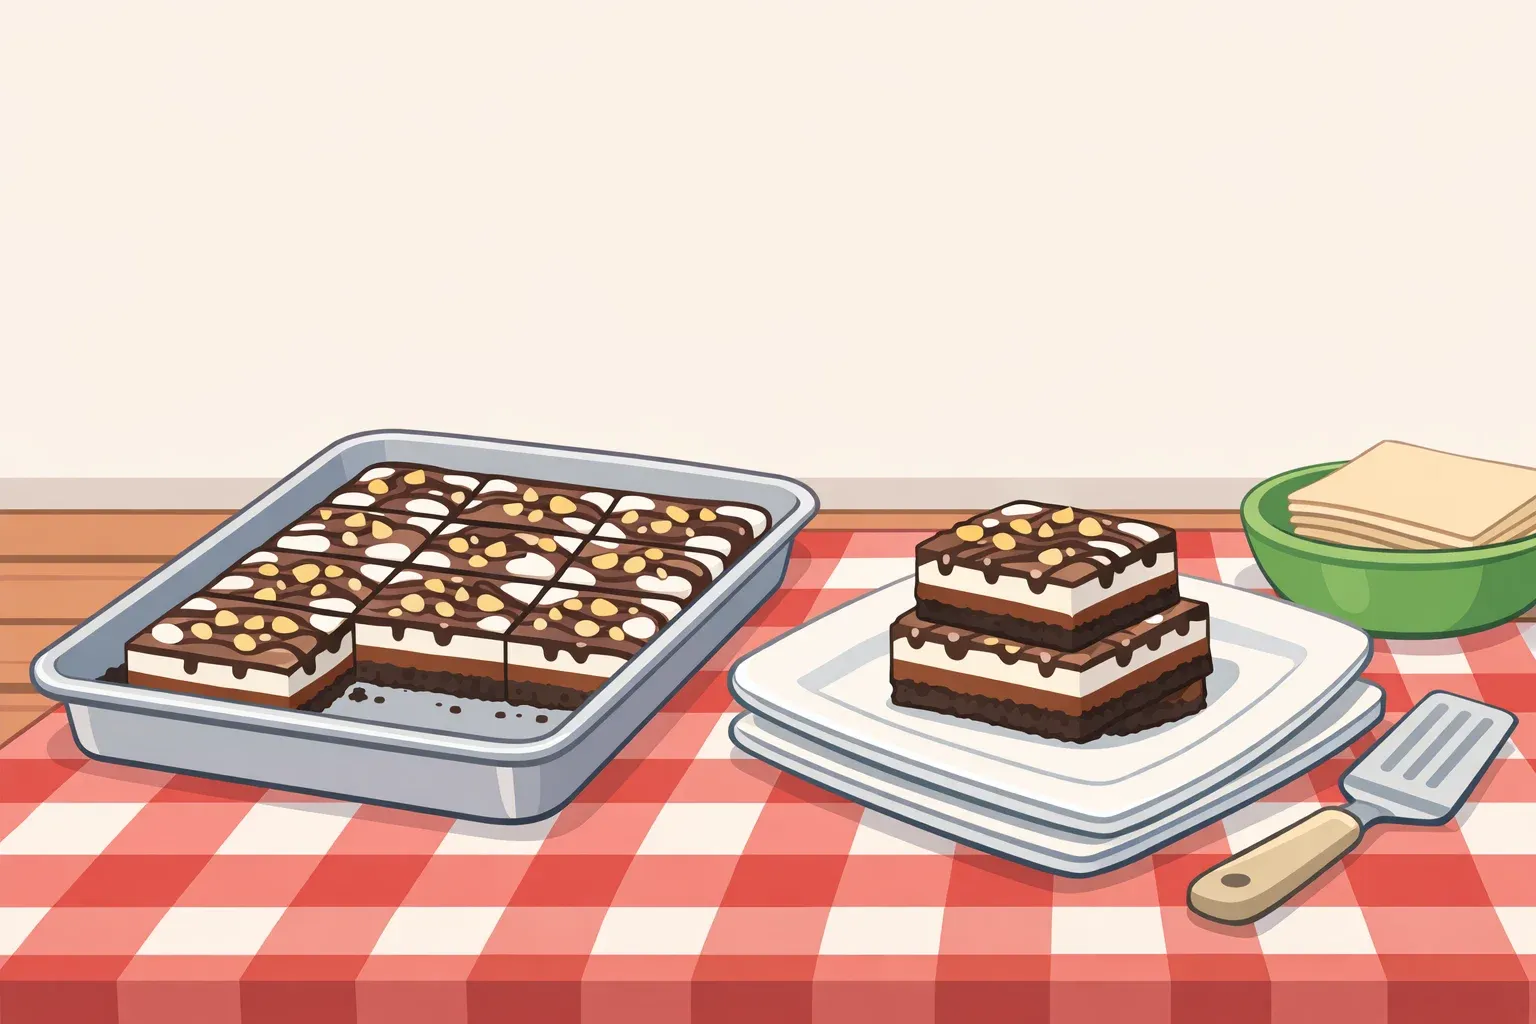
Frozen Mississippi mud bars solve a summer problem that Mississippi mud pie never could. The pie is magnificent, but it belongs in the refrigerator. It requires a pie plate, a server, and eight people arriving in sequence. The bar format fixes all of that: same three layers (crunchy chocolate cookie crust, fudgy brownie center, chocolate pudding on top), built in a 9x13 pan, frozen solid, lifted out by parchment, and sliced into rectangles that hold their shape long enough to survive outdoor service.
This guide covers how to build each layer using techniques drawn from the Serious Eats Mississippi mud pie recipe, which ingredient choices matter most for frozen texture, and how to time the whole process. Quantities below are adapted for a 9x13 pan rather than a pie plate; the layer techniques and baking times follow the original recipe, while freezing instructions and bar yield reflect this adaptation rather than Serious Eats' tested results.
At a glance:
Format: Baked, then frozen. Not no-bake.
Difficulty: Moderate. Three separate layers, each with a technique that matters.
Active time: About 55 minutes total (25 minutes prep, 30 minutes baking)
Inactive time: 2 hours cooling, then a full freeze before slicing
Plan to start the day before you intend to serve
Equipment required: A food processor is essential for both the crust and the pudding. Serious Eats uses the processor blade for the pudding because it keeps the mixture in constant motion, guaranteeing full chocolate incorporation. You'll also need a hand mixer, a 9x13 baking pan, and parchment paper with enough overhang on the long sides to grip.
Before you start: three ingredient decisions that affect frozen texture
These are worth knowing before you shop. Each one directly affects how the bars behave after freezing.
1. Bar chocolate, not chips, for the pudding layer. Chocolate chips contain stabilizers like soy lecithin that prevent full melting under heat. Serious Eats flags this directly: those stabilizers are useful in cookies, actively harmful in pudding, where incomplete melting produces a gritty texture. Use a bar in the 64-70% cacao range. Valrhona and Guittard both work. The price difference is small; the texture difference is not.
2. Cocoa powder alongside melted chocolate, for the brownie layer. Cocoa powder contains more cocoa solids per ounce than any other chocolate form. Three tablespoons deepens flavor without adding density, which matters here: a brownie that's too dense becomes very difficult to cut once frozen.
3. Equal parts butter and vegetable oil, for the brownie layer. Serious Eats tested the fat ratio and found that a roughly 1:1 split of saturated fat (butter) to unsaturated fat (vegetable oil) produces a brownie soft enough to run a fork through at refrigerator temperature. At freezer temperature, that same balance keeps the layer chewy rather than rigid. All butter makes it hard; all oil makes it greasy.
Ingredient quantities for this adaptation (9x13 pan):
Crust: ~24 chocolate sandwich cookies, pinch of salt, 6 tablespoons melted butter
Brownie: 4 oz bar chocolate, 4 tablespoons butter, 4 tablespoons neutral vegetable oil, 3 tablespoons cocoa powder, 3 eggs, 1 cup sugar, 1 teaspoon vanilla, 1/2 teaspoon salt, 1/2 cup flour
Pudding: 6 oz bar chocolate, 2 tablespoons cornstarch, 1/4 cup sugar, pinch of salt, 3 egg yolks, 2 cups heavy cream (divided)
Topping (add at serving only): 1 cup heavy cream, 1 tablespoon sugar, 1/2 teaspoon vanilla
Note: Scaled for a 9x13 pan from the Serious Eats pie recipe, which serves 8 from a standard pie plate. Layer techniques and baking times follow the original; freezing instructions and bar yield (approximately 16-20 pieces depending on cut size) reflect this adaptation and are not drawn from the source.
How to make frozen Mississippi mud bars that slice cleanly
Preheat the oven to 350°F. Line the 9x13 pan with parchment, leaving about 2 inches of overhang on both long sides. That overhang is how the frozen slab lifts out intact for slicing. Don't skip it.
Step 1: Press and bake the cookie crust.
Process the chocolate sandwich cookies with a pinch of salt in the food processor until fine, uniform crumbs form, about 30 seconds. Add melted butter and pulse until the mixture holds together when pressed between your fingers. Transfer to the pan and press firmly and evenly across the bottom. The flat base of a measuring cup packs it tight.
Bake 10-12 minutes, until the edges look set and dry. Press the center gently; it should feel firm, not soft.
What to look for: A matte, uniform surface with no wet or glossy patches.
Set the pan on a wire rack and start the brownie batter while the crust cools.
Step 2: Make and bake the brownie layer.
The egg-whipping step is what keeps this layer from turning into a rubber slab once frozen. Melt the bar chocolate, butter, and vegetable oil together, then set aside to cool slightly. In a separate bowl, beat the eggs, sugar, vanilla, and salt with a hand mixer on medium-high until the mixture turns pale yellow and triples in volume, about 5 minutes. It should look thick, airy, and very pale, with the texture of runny marshmallows. That air is what you're protecting for the rest of this step.
Fold the whipped egg mixture into the chocolate base, then add the flour and cocoa powder and fold until just combined. No aggressive stirring. The volume collapses fast, and once it's gone, it's gone.
Pour the batter over the cooled crust and spread evenly. Bake until a toothpick inserted in the center comes out with a few moist crumbs attached, about 18 minutes. Wet batter means underdone; a clean toothpick means overbaked.
Cool on the wire rack for 1 hour, then refrigerate for another hour. The brownie must be completely cold before the pudding goes on. Warm brownie plus warm pudding blurs the boundary between layers, and a clean, distinct line is part of what makes these bars slice well.
Step 3: Make the pudding layer in the food processor.
Skip the stovetop whisk. Serious Eats builds the pudding in a food processor instead: the blade keeps everything in constant motion and guarantees every bit of chocolate blends into the mixture for the smoothest result possible. It's also faster and less prone to scorching.
Add the bar chocolate pieces, cornstarch, sugar, salt, egg yolks, and a small splash of cold cream to the processor. Pulse a few times to combine. Bring the remaining cream to a boil in a small saucepan over medium heat, stirring constantly.
With the processor running, pour the hot cream slowly through the feed chute over about 35 seconds. Stop once to scrape down the sides. The finished pudding should be glossy and completely smooth. Visible chocolate streaks mean it needs another 10 seconds.
Pour over the cold brownie layer and spread with an offset spatula, working from the center outward.
Gotcha: Don't tap or tilt the pan to level the pudding. That disturbs the brownie surface underneath and the layer boundary you worked to keep clean. The spatula does the job without the disruption.
Step 4: Freeze until firm.
Press plastic wrap directly against the pudding surface before covering the pan with foil. Direct contact prevents a skin from forming on top. Freeze until the slab is firm enough to lift and slice without the pudding layer collapsing. Overnight is the most reliable approach: the pudding takes longer to set than the brownie, and cutting too early produces a clean-looking surface over a soft middle.
Slicing: Lift the slab out using the parchment overhang and set it on a cutting board. Let it rest at room temperature for about 5 minutes, just enough to take the hard edge off without softening. Slice with a sharp chef's knife using a single downward press per cut. Sawing drags the layers. Wipe the blade between cuts for clean edges.
Step 5: Add toppings at serving.
Whipped cream doesn't survive the freezer; it breaks and weeps. Beat heavy cream with sugar and vanilla to medium-stiff peaks immediately before serving, and add it then. Flaky salt, crushed cookies, or warm chocolate sauce all work, and all are better applied fresh.
Serving and storage
When frozen, the pudding layer transforms from its original creamy, spoonable consistency into something closer to a set ganache. This is what gives the top layer enough body to slice without cracking and enough substance to hold the bar's shape at room temperature for the few minutes between plate and fork. After a 5-minute counter rest, it softens just enough to yield cleanly. That's the window.
The original Serious Eats recipe specifies up to 2 days in the refrigerator. Freezing extends the make-ahead window, though how long depends on how tightly the slab is wrapped and how consistently your freezer holds temperature. Cut bars should be transferred to an airtight container in a single layer, with parchment between any stacked layers, and refrozen immediately. Once topped with whipped cream, serve them. They don't refreeze cleanly.


















Comments
Be the first, drop a comment!