



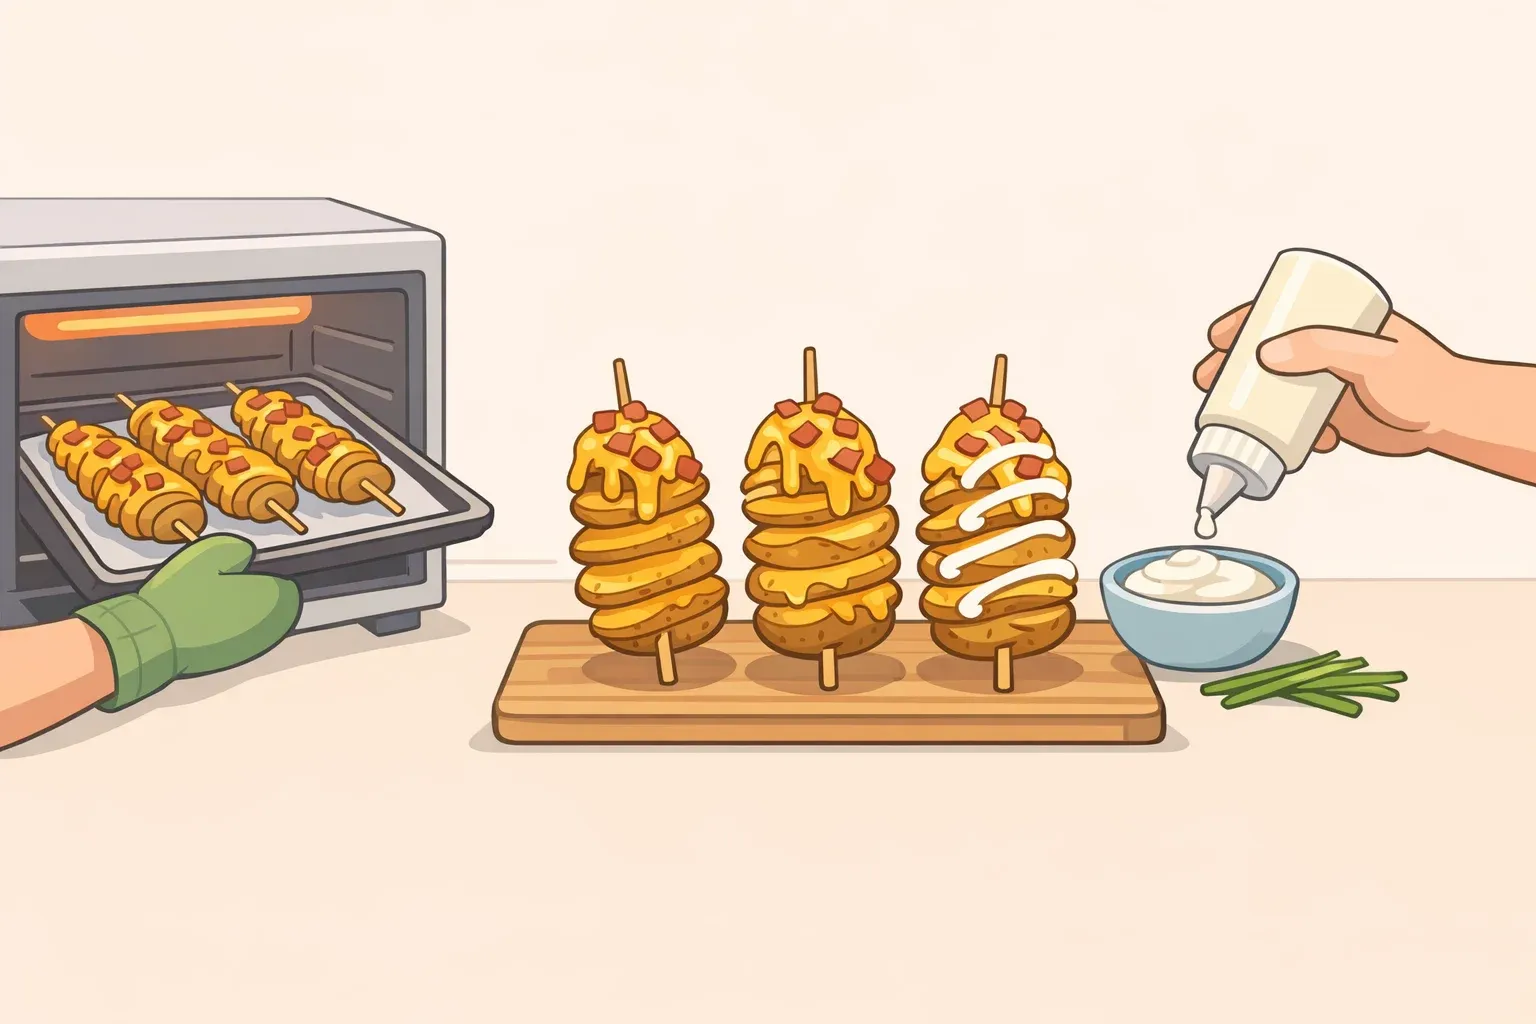
Fully Loaded Tornado Potatoes Recipe With Bacon and Cheddar
The spiral isn't decorative. That's the thing most people miss when they first encounter a tornado potato they see a neat visual trick and assume the shape is the point. It isn't. The spiral is a delivery mechanism. It multiplies surface area so that oil coats every face, seasoning reaches every crevice, and cheese melts down into the gaps instead of pooling on top. A standard baked potato can't do any of that. This fully loaded tornado potatoes recipe is built around that structural insight, and by the end of this guide, you'll have a fully assembled, fork-and-knife tornado potato with sharp cheddar, thick-cut bacon, and a lemon-spiked sour cream drizzle.
The format comes from South Korean street food, where vendors spiral-cut whole potatoes onto skewers and fry them until the outside is crispy and the inside stays fluffy, per Cooking with Conan. From there, the shape spread to food carts and festivals around the world, which is why it travels under a dozen different names. The version here takes that same skewered spiral and finishes it as a loaded baked potato, oven-roasted instead of fried, per Delish. Prep runs about 15 minutes; total time is roughly an hour, and the recipe serves four.
This guide covers par-cooking the potato, executing the spiral cut with two different methods, roasting and finishing the loaded toppings, and troubleshooting the parts that typically go wrong.
What you'll need before you start
Equipment
All you need is a cutting board, a wooden skewer, and a sharp chef's knife no mandoline, no spiralizer. Also have a fork on hand for piercing, two baking sheets, and foil for the bacon.
Optional for beginners: two chopsticks. They act as depth guides during cutting and are covered in full in the next section.
Potato selection
Use russet potatoes in the 6–8 oz range. Their high starch content the same quality that makes them good for French fries produces crispy edges during roasting while keeping the center fluffy, per Delish. For the fully loaded oven version, that size matters. Chili to Choc uses 3 oz potatoes for air-frying a fine approach for that method, but smaller potatoes won't give you the surface area or structural depth that the loaded toppings need. Stick with the larger size here.
Ingredients (Delish, serves 4):
- 4 russet potatoes, 6–8 oz each
- 2 tbsp extra-virgin olive oil
- 2 tsp gochugaru or crushed red pepper flakes
- 1½ tsp kosher salt, divided
- 2 slices thick-cut bacon
- 4 oz sharp cheddar, finely shredded
- ¼ cup sour cream
- 1 tbsp fresh lemon juice
- 2 scallions, thinly sliced
On gochugaru: Korean red pepper flakes carry a mild smokiness that standard crushed red pepper doesn't replicate. Worth tracking down at an Asian grocery if you can. Crushed red pepper works as a substitute just expect a sharper, less nuanced heat.
Par-cook the potatoes first
Pierce each potato all over with a fork, place on a heatproof plate, and microwave for about 3 minutes until just softened. The potato should give slightly when pressed but still push back. There should be resistance when you poke it with a skewer if there isn't, it's overcooked for this stage. No microwave? Par-boil briefly instead and let cool until handleable.
This step is what makes the loaded version work. A slightly softened potato is pliable during cutting and won't crack when you stretch the spiral open. A raw russet at this size is dense enough to snap the spiral under the tension of stretching.
One practical note: the potato will be hot after microwaving, so use a folded towel when pushing the skewer through. Let it rest a minute or two before cutting if needed, but don't let it sit long enough to firm back up.
How to make fully loaded tornado potatoes: the spiral cut
This is the technical core of the recipe. Two methods work well; pick the one that matches your comfort with a knife.
Method 1: The rotating spiral cut
- Push a skewer lengthwise through the center of the par-cooked potato, from bottom to top.
- Hold the potato flat on a cutting board. Angle a chef's knife at roughly 45 degrees to the potato's axis and begin cutting a groove around the outside, rotating the potato in the opposite direction as you go. Cut all the way down to the skewer with each pass. Keep the slices as thin and consistent as possible uneven thickness is the primary cause of breakage, per Cooking with Conan and Chili to Choc.
- Gently pull the layers apart along the skewer. The potato should fan out like a coiled spring being stretched. Work slowly. If sections resist, ease them open rather than forcing.
Method 2: The chopstick guide method
Place the potato between two chopsticks lying flat on the cutting board. Make a series of straight vertical cuts along one side, stopping each time the knife blade contacts the chopsticks this prevents cutting all the way through. Flip the potato. Make diagonal cuts on the opposite side at a crossing angle. The two cut patterns intersect to free the spiral. Insert the skewer, then stretch gently. This approach, used by Chili to Choc, gives first-timers better control over cut depth.
On breakage
Both Cooking with Conan and Chili to Choc point to the same culprit: varying slice thickness. Thick sections hold; thin sections snap under tension. Cut deliberately, with consistent pressure. If a small section breaks during stretching, press it back into position on the skewer the oven will set it. If the spiral won't open at all, the potato wasn't par-cooked enough. Don't force it.
Seasoning
Once stretched, lay the spirals on a baking sheet and brush with olive oil, gochugaru, and 1 teaspoon of the salt, working the seasoning into the crevices rather than just coating the surface. The olive oil also keeps the potato from sticking to the pan important, because the spiral is structurally fragile at this stage and tears easily if you have to pry it free.
Roasting, loading, and finishing
Step 1: Set up the oven. Arrange one rack in the upper third and one in the lower third. Preheat to 425°F.
Step 2: Roast the potatoes on the bottom rack. Place the seasoned spirals on a baking sheet on the lower rack. Roast for 45 minutes to 1 hour, until a knife inserted into the thickest part of the spiral meets no resistance. Start checking at 40 minutes. If the edges are browning before the center has softened, tent loosely with foil and continue roasting.
Step 3: Roast the bacon simultaneously. Lay two slices of thick-cut bacon flat on a foil-lined baking sheet on the upper rack. At 425°F, they'll go golden and crispy in 20–25 minutes. Pull them when done, let cool on the pan, then crumble by hand into bite-size pieces.
Step 4: Add cheese and broil. Sprinkle finely shredded sharp cheddar over the top of each potato and push some down into the crevices with your fingers or a spoon. Switch the oven to broil. Watch closely: the cheese needs just 2–3 minutes to melt, and it should look fully melted and just starting to blister at the edges when it's ready. Walk away and it burns. If the cheese slides off rather than settling into the gaps, the shreds may be too coarse use finely shredded cheddar and press it into the crevices rather than sprinkling from above.
Step 5: Make the sour cream drizzle. Stir together the sour cream, lemon juice, and the remaining ½ teaspoon of salt. The lemon juice does two things: it thins the sour cream enough to drizzle, and it cuts through the richness of cheese and bacon with a clean acidic note.
Step 6: Assemble and serve. Arrange the finished potatoes on a platter, drizzle with the sour cream mixture, then scatter crumbled bacon and sliced scallions over the top. Serve straight away. The sour cream softens the crispy edges quickly, so if you're feeding a group, keep the assembled potatoes in a warm oven and add the cold toppings per portion as you plate.
Bacon can be roasted up to a day ahead and refrigerated. Scallions can be sliced and kept covered. The spiral-cut potatoes themselves should be cooked and finished fresh.
Variations and troubleshooting crispy tornado potatoes
Flavor variations
- Parmesan crust: Before roasting, coat the seasoned spiral in melted butter, then press on a mixture of panko breadcrumbs, finely grated Parmesan, garlic powder, and a pinch of cayenne. Roast as directed. This skips the loaded toppings entirely and leans into crunch instead.
- Smoky BBQ build: Swap gochugaru for smoked paprika and a barbecue seasoning blend before roasting, per Cooking with Conan. As a suggested adaptation, finish with shredded smoked cheddar and replace the sour cream with a drizzle of your preferred barbecue sauce.
- Street-food style: Skip the loaded toppings. Season the hot spiral immediately out of the oven with paprika, garlic powder, salt, and grated Parmesan seasoning adheres best to a hot surface. Serve with spicy mayo or garlic aioli for dipping.
Troubleshooting
- Spiral won't open: the potato wasn't par-cooked enough, or the slices are too thick. Don't force it you'll snap sections. Give the potato a bit more time in the microwave and try again once it softens further.
- Edges burning before the center softens: tent the potato loosely with foil and continue roasting at the same temperature. Larger potatoes may need a bit more par-cook time upfront.
- Cheese won't stay in the crevices: use finely shredded cheddar rather than block-cut, and press it into the gaps rather than sprinkling from above. The broil will lock it in.
- Potato sticking to the pan: olive oil helps prevent this, and it's important because once spiralized, the potato is fragile. Brush generously before roasting.
Leftovers
Store cooled potatoes in an airtight container and refrigerate. Delish gives a window of up to 3 days; Cooking with Conan puts it at 2 days. Two is the safer target. Reheat in a 350°F oven or in an air fryer both restore some crispness. Freezing is not recommended; the texture degrades.
What comes next
The spiral is the technique worth learning here. Once it's comfortable, the format opens up: keep the loaded toppings and work this recipe as written, strip it back to the Korean street-food original with a simple seasoning and a quick fry, or take it in a completely different direction with the Parmesan crust or BBQ build. The cutting method is the same across all of them. A knife, a skewer, and a cutting board are genuinely all the equipment required and the chopstick method from Chili to Choc means the learning curve for first-timers is mostly just patience with the knife. The loaded oven version is the richest expression of the format. It's not the only one worth making.


















Comments
Be the first, drop a comment!