



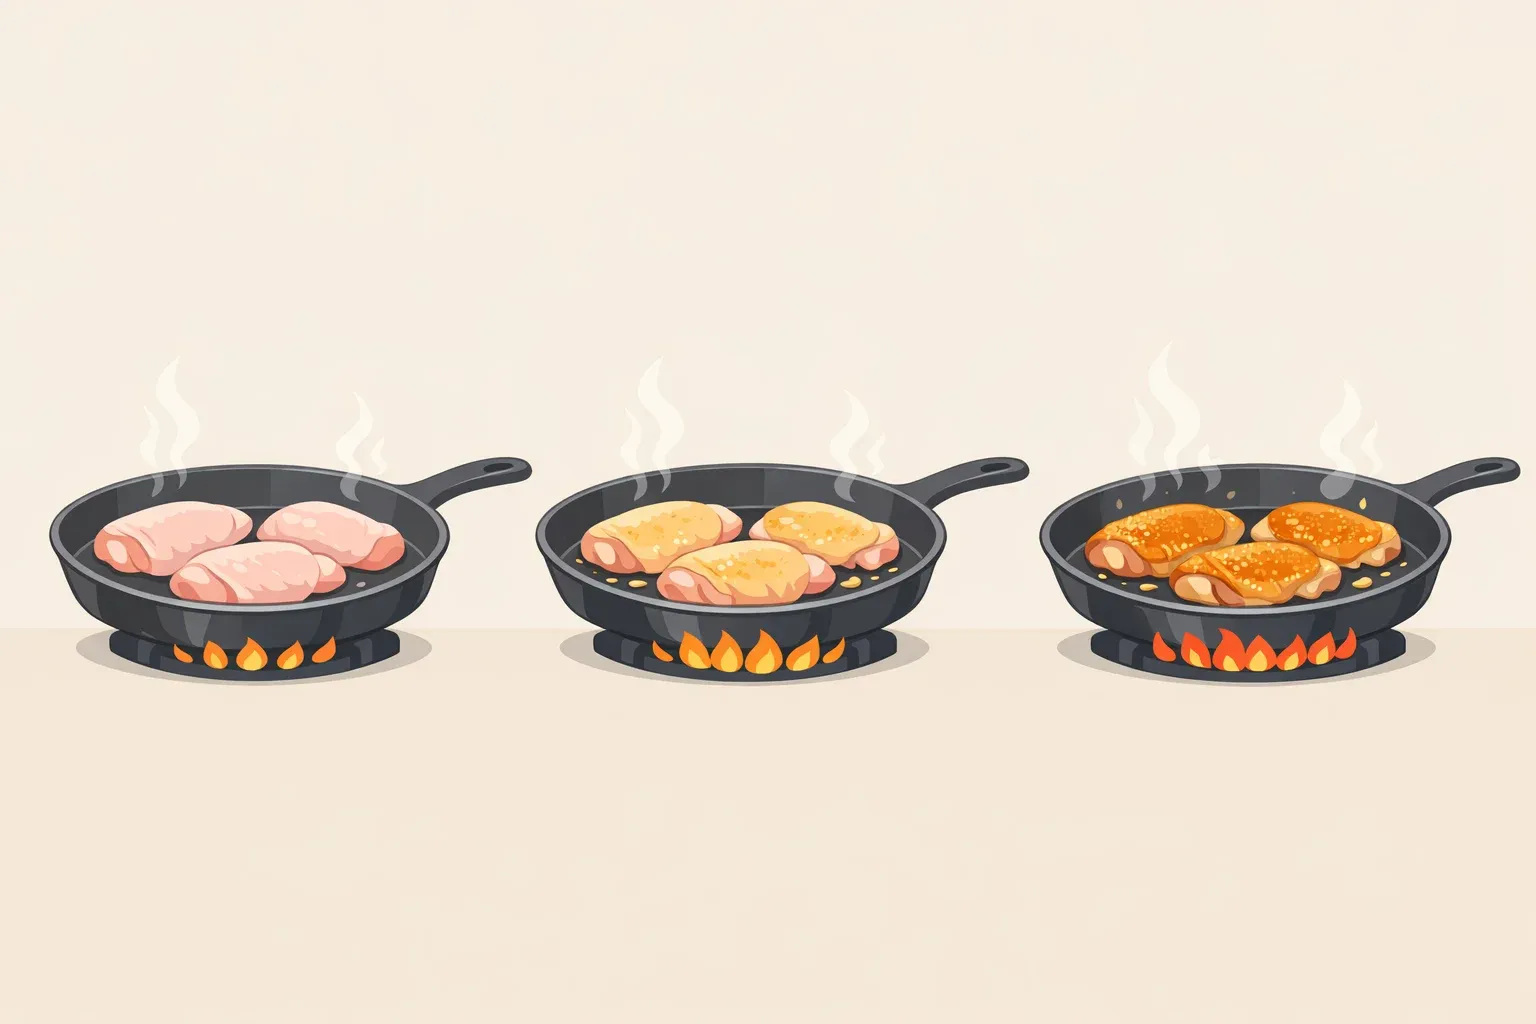
How to cook chicken thighs in a cold pan for crispy skin
Most home cooks heat the pan before the chicken goes in, then pull dark meat when the thermometer reads 165°F. Both of those habits are wrong for chicken thighs, and fixing them is the entire job of this guide.
If you want to know how to cook chicken thighs in a cold pan, the short answer is: place them skin-side down in a dry, unheated skillet and let the heat rise gradually from there. Serious Eats published this method earlier this month, and the logic is straightforward: fat beneath the skin renders slowly and evenly before the surface has a chance to seize. No oil needed for skin-on thighs. The skin generates enough fat on its own.
The second fix is the target temperature. The USDA's 165°F is the safe minimum for all poultry, but for dark meat it's the floor, not the finish line. At that point, thigh meat is safe and fully opaque but still tight and clinging to the bone. The real tender zone is at least 175°F, where connective tissue has had time to break down, per Serious Eats. Push past 210°F and the texture turns stringy regardless of how carefully everything else went.
This guide covers the cold-start stovetop method for skin-on thighs, when to switch to an oven finish instead, and one adjustment for skinless boneless thighs.
Before you start, what you need:
A heavy 12-inch skillet: cast iron or stainless steel. Nonstick pans run cooler and limit browning.
An instant-read thermometer. The temperature targets here are specific; color alone won't get you there.
Skin-on thighs, bone-in or boneless. For skinless boneless thighs, see the variation at the end.
One hard limit: skip this method with heavily marinated chicken. Sugars in most marinades will scorch on the pan surface before the interior finishes cooking.
Why starting cold produces better skin
When skin-on thighs go into a cold, dry pan, the fat in the skin has time to liquefy gradually and evenly as the heat climbs. The skin essentially confits in its own rendered fat, as Serious Eats describes it, which is why it turns deeply golden and crisp rather than pale and rubbery. A hot pan does the opposite: the skin surface seizes on contact before the fat beneath it has melted, locking in unevenness from the first second.
The color and crust you're after come from the Maillard reaction, a chemical process between amino acids and sugars that responds to temperature, time, and surface moisture, per PMC. Drier surfaces brown; wetter surfaces steam. Starting cold keeps the fat rendering gradually, which maintains the surface conditions that browning chemistry actually requires.
That's the mechanism behind the two-phase structure below: a long, untouched render on the first side, then frequent flipping to finish.
How to cook chicken thighs in a cold pan, step by step
Step 1: Dry the skin thoroughly, then season. Press paper towels firmly against all surfaces before seasoning with salt and pepper. Surface moisture competes directly with browning, and removing it lets the rendering process start cleaner and faster.
Step 2: Place thighs skin-side down in a cold, dry skillet. Do not add oil. Skin-on thighs render enough fat to prevent sticking and drive browning entirely on their own, per Serious Eats. Arrange them in a single snug layer: not stacked, not with wide gaps between pieces. More than four average-sized thighs in a 12-inch pan traps steam, and steam prevents browning. If you're cooking a larger batch, use the oven-finish variation described in the next section.
Step 3: Set heat to medium-high. Leave the pan undisturbed for 8–10 minutes. Within the first few minutes, sizzling will increase as fat begins to render. At the 8-to-10-minute mark, the skin should be light golden, not pale, not deeply brown, with visible rendered fat pooled in the pan. Two things to watch for:
Skin still pale at 10 minutes: Add 2 more minutes, then check again.
Deep brown color at 6 minutes: Your burner runs hot. Drop immediately to medium and watch closely.
Step 4: Check whether the skin is ready to flip. Slide a thin spatula under one thigh and lift gently. If it releases cleanly, flip. If it resists, leave it another minute and try again. Don't force it. Tearing the skin at this stage costs the crust you just spent 10 minutes building.
Step 5: Reduce heat to medium. Flip every 2–3 minutes. Frequent flipping regulates surface temperature so neither side accumulates enough heat to dry out or scorch, Serious Eats notes. You're building color progressively on both sides while the interior temperature climbs toward the target range.
Color to look for: rich amber-brown, roasted not blonde. If the skin is coloring faster than the interior is cooking, drop to medium-low. The surface holds its browning; the interior needs time.
Step 6: Cook, flipping every 2–3 minutes, until the thickest part reads at least 175°F. Total stovetop time is typically 22–28 minutes depending on thigh size. Start checking temperature around the 20-minute mark if thighs are on the smaller side. Reaching 165°F is not the same as done for dark meat, per Serious Eats. The at least 175°F window is where connective tissue has broken down and the texture you're after comes through. Past 210°F, the meat turns stringy regardless of everything else you did right.
Step 7: In the last 2–3 minutes, add butter and aromatics if you want them. Drop a knob of butter into the pan along with smashed garlic cloves or a few sprigs of thyme or rosemary. Tilt the pan and spoon the sizzling fat over the thighs repeatedly. This basting step adds a glossy finish and aromatic depth, per Serious Eats. Optional, but worth it when the pan has enough rendered fat to work with.
Step 8: Rest 5 minutes before cutting. Temperature rises slightly off heat and juices redistribute. Cutting early loses both.
When to use the oven finish instead
Choose stovetop when you're cooking two to four thighs and want maximum control and color. The method above gives you both.
Choose oven finish when you're cooking more thighs than fit in a single uncrowded layer, or want a more hands-off approach once the skin is set. The tradeoff: slightly less aggressive color on the underside, more uniform interior cooking, and no flipping after the oven stage.
How it works: complete Steps 1–4 above to render the skin and develop initial browning on the stovetop, approximately 8–10 minutes. Then transfer the pan to a 375°F oven, skin-side up, and finish there until the thighs reach at least 175°F, per Serious Eats. The stovetop rendering phase is not skippable even with the oven finish. Without it, the skin won't crisp properly before the oven's ambient heat takes over, and the crust you're after won't form.
Troubleshooting by scenario:
Thighs are uneven in size: The oven-finish version handles size variation better than stovetop flipping.
Skin is deeply brown but interior is only at 155°F: Move to the oven immediately rather than continuing on the stovetop. The oven will bring the interior up without further darkening the skin.
Pan is crowded: Remove thighs, wipe the pan, and work in batches. Crowded thighs steam, and steamed thighs lose the crust entirely.
Skinless boneless thighs: one adjustment, same logic
The cold-start method works for skinless boneless thighs with one necessary change: no skin means no self-generated fat. Brush the thighs with about 2 tablespoons of neutral oil before placing them in the cold pan. Oil takes the place of rendered fat, preventing sticking and enabling surface browning, per Serious Eats.
Sear both sides for about 3 minutes each on medium-high, then reduce to medium and flip every 2 minutes until the thickest part reaches at least 175°F, approximately 22 minutes total. The temperature target stays in dark-meat territory because the collagen-breakdown chemistry doesn't change just because the skin is gone.
Two mistakes to avoid: don't skip drying the meat before oiling, since moisture under the oil creates steam and kills browning. And don't crowd the pan. Without rendered fat pooling in the pan to help displace moisture, steaming is an even bigger risk here than with skin-on thighs. Work in batches if you're making more than about 1.5 pounds.
What to watch the first time you try this
Two adjustments, cold pan and higher finishing temperature, fix the two most consistent reasons skillet thighs disappoint. The stovetop version gives you full control and the most color. The oven-finish variation handles larger batches with less attention once the skin is set, Serious Eats confirms.
On the first cook, pay attention to three things: listen for the increase in sizzle around minutes two and three, which signals that the fat has started rendering. Watch for light-golden skin before the first flip, not pale, not dark. And trust the thermometer. On dark meat, 165°F looks done but isn't, per Serious Eats.
The cold-start logic carries over to chicken breasts as well, with oil from the start since breasts don't render meaningful fat, and a lower target of 150–155°F. Same principle, different numbers. Cook a batch this week and the temperatures will feel automatic by the second one.


















Comments
Be the first, drop a comment!