



How to Cut Green Onions: 3 Cuts for Cooking or Garnish
By the end of this guide, you'll know how to cut green onions three ways and, more usefully, which cut to reach for depending on what you're making. The three methods are variations on a single technique: the angle of the blade changes everything from the shape of the piece to how it behaves in a dish. Serious Eats frames all three as the same back-slice motion, with the scallion's angle as the only variable. Master the motion once and you can get any of the three.
One thing worth knowing before you pick up a knife: not every part of a green onion behaves the same way. The white and pale green base has a sharper, more pungent flavor, built for cooking. The dark green hollow tops are mild, peppery, and slightly chive-like, best used raw or added in the final seconds of heat. Food & Wine puts it plainly: use the white section to build flavor in cooked dishes, the green tops as a finishing element. That distinction shapes which cut you'll reach for and which part of the stalk you're cutting.
How to cut green onions: the right cut for cooking vs. garnish
Not sure which cut fits your dish? Start here:
Straight crosswise slices: the green onion blends in; use for soups, stir-fries, fried rice, sauces, grain bowls
Bias slices: the green onion shows up visually; use for ramen, noodle dishes, grilled fish, anything plated
Fine hairs: feathery texture, minimal mass; use for composed plates, cold noodles, tartare, delicate garnish
If the scallion should disappear into the dish, slice straight across. If it should be seen, cut on a bias. If it's doing decorative work and texture is the point, cut it into hairs.
Before you cut anything: two minutes of prep
Select scallions with firm, tight bulbs and bright green tips. Food & Wine recommends avoiding any that feel slimy or look wilted at the top; if an outer leaf is soft, pull it off. The inner stalks are usually fine.
Rinse under cold running water, separating stalks to flush grit from the base.
Pat completely dry. Wet scallions slide.
Trim the root end with one clean cut, removing only the fibrous base.
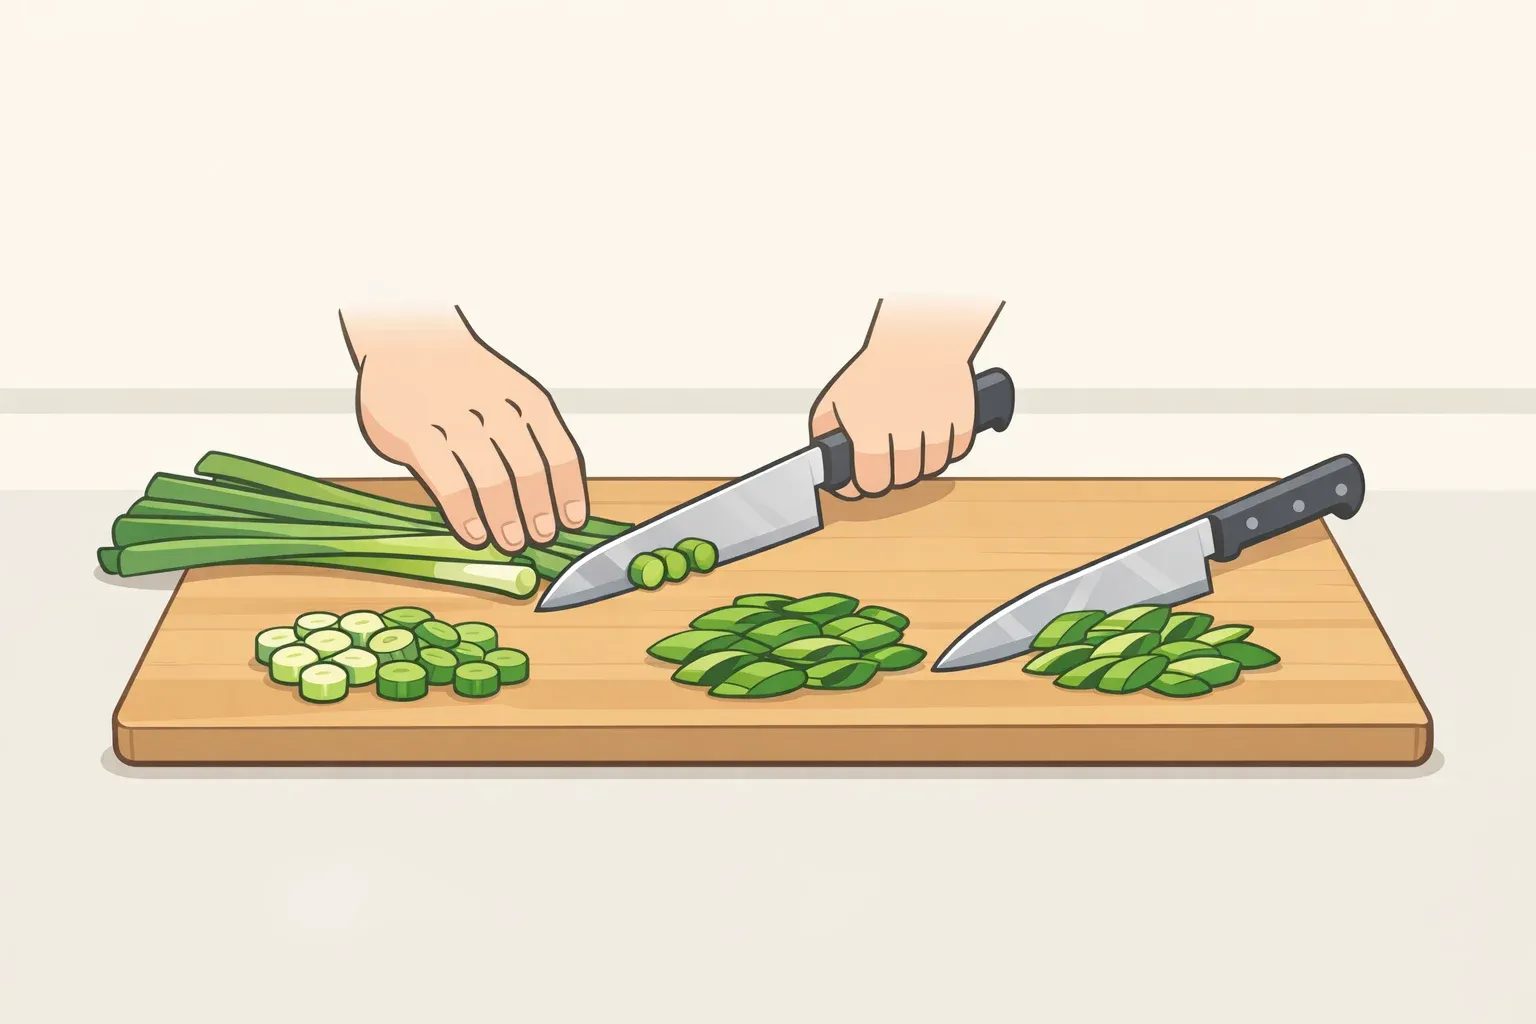
The one rule that applies to all three cuts: slice, don't chop. Serious Eats is specific about this: a straight up-and-down chopping motion crushes the hollow green stalks and bruises the cut edges. The correct technique is the back-slice: blade tip resting low against the board, knife pulled backward using the full length of the blade, with minimal downward pressure. A clean cut should be nearly silent. If it's loud, you're crushing.
Cut 1: Straight crosswise slices—the default cut for cooking and casual garnish
Straight slices are the everyday workhorse. The blade sits perpendicular to the scallion and produces small, round pieces that distribute evenly through a dish without standing out visually.
Use this cut when the green onion should blend into the dish rather than announce itself: fried rice, scrambled eggs, soups, stir-fries, dipping sauces, grain bowls where the scallion is one of several components. Better Homes & Gardens notes that for most cooked recipes, the white and pale green base is what you'll use first, with the darker greens added at the end or scattered raw. Food & Wine adds that the whites can substitute for other mild alliums, including shallots, leeks, and spring onions, in most cooked applications. Getting a clean, even slice on this section matters more than it might seem.
Steps:
Lay two to four scallions flat in a single layer, not stacked. Serious Eats recommends a single layer unless the scallions are very fresh and rigid; a loose stack shifts under the blade.
Hold the scallion at a right angle to the blade. Curl your fingers into the claw grip, resting the flat of the blade against your knuckles as a guide.
Place the blade tip on the board at a low angle. Pull backward through the scallion using the full length of the blade, no downward push.
Slide your knuckles back and repeat. Cut thinner for garnish, thicker when the scallions will cook.
What you'll see: Clean rounds from the white section; small circles or slightly oval pieces from the hollow greens. Edges should look smooth, not compressed.
Common mistake: Pressing down with the heel of the knife to power through a cluster of stalks. That's chopping, and it flattens the hollow green tops. Keep the angle low and pull.
Cut 2: Bias slices—how to slice green onions when presentation matters when presentation matters
A bias cut is the same back-slice, but with the scallion rotated at an angle to the blade. The result shifts from small rounds to longer, slender ovals with more visual surface area. These are the right choice when the scallion is meant to be seen: a finishing garnish that reads clearly on top of ramen, a noodle dish, grilled fish, or anything where a scatter of small rounds would disappear into the background.
Serious Eats makes the geometry explicit: varying the cutting angle is all it takes to move between a plain crosswise slice and a bias cut. This isn't a separate technique. It's the same motion with the stalk repositioned.
Steps:
Use the dark green tops for the clearest visual contrast; the pale green section works too if you want a mixed look.
Rotate the scallion roughly 30 to 45 degrees from perpendicular. Think of a clock hand pointing between 10 and 11.
Apply the back-slice: blade tip low, pull backward with the full edge, no downward pressure.
Adjust the angle to tune the shape. A shallower angle produces longer, more slender ovals; closer to perpendicular produces shorter, rounder pieces. Food & Wine notes the dark green tops have a mild, peppery, chive-like flavor raw, which is exactly the right profile for a finishing role.
What you'll see: Elongated ovals with clean edges. The hollow center of each green stalk is visible on the cut face, which is part of what makes the bias slice look intentional.
Gotcha: The larger exposed surface area makes bruising more visible here than on a straight slice. A dull knife or too much downward force shows up immediately. This cut rewards a sharp blade more than the others.
Cut 3: Fine hairs—a light alternative when texture matters more than volume
Fine scallion hairs are made by holding the stalk nearly parallel to the blade and applying the same back-slice along the length rather than across it. The result is ultra-thin, thread-like strips, light enough to float over a dish rather than sit on it. Serious Eats recommends these for salads, ramen, and grilled meats where a delicate texture adds something a thicker slice doesn't deliver as well.
Use this cut when the garnish should be visually distinctive but not heavy: cold noodles, tartare, composed plates, anything where feathery texture is the point.
Steps:
Use the dark green tops only. The hollow structure is what creates the thread-like result.
Hold the scallion nearly parallel to the blade, much flatter than a bias cut.
Apply the back-slice along the length of the stalk, producing thin strips rather than cross-sections.
Transfer the cut hairs to a bowl of ice water and refrigerate for at least 30 minutes. Serious Eats notes the cold soak firms the texture and curls the strips into appealing shapes; it also mildly reduces raw-onion sharpness, useful if you're serving guests who find strong allium flavor too assertive.
What you'll see after the soak: Curled, crisp threads that hold their shape and look intentional on a plate.
Optional variation, decorative brush curls: Trim a section of scallion to about 2½ inches. Align the blade parallel to the stalk and make four lengthwise cuts from one end, rotating the piece between each cut, until the end is split into eight sections. Soak in ice water for at least 30 minutes. The sections curl outward into a small brush or fan shape. Serious Eats describes this as a presentation-oriented finishing touch. Optional. Restaurant-style, not required for dinner at home.
A few words on storage
For fine hairs or bias slices you're holding for presentation, keep them submerged in ice water in the fridge. They stay crisp, and the flavor mellows slightly. For plain sliced scallions, store them cold and use them soon.
Whole uncut scallions last longer. Store them upright in a jar with about an inch of water covering the roots, a loose plastic bag over the greens, and keep them in the fridge. Food & Wine puts their useful life at around four days this way.
Which cut, which dish
Three cuts, one decision framework. Straight slices when the scallion should disappear. Bias cuts when it should register visually. Fine hairs when the garnish is doing textural work and bulk would undercut it.
The white section goes into heat first; the greens go on last, or raw. Food & Wine and Better Homes & Gardens both note that using the wrong section won't ruin anything. The guidelines reflect best results, not requirements. Once the underlying logic clicks, the rest follows on instinct.


















Comments
Be the first, drop a comment!