



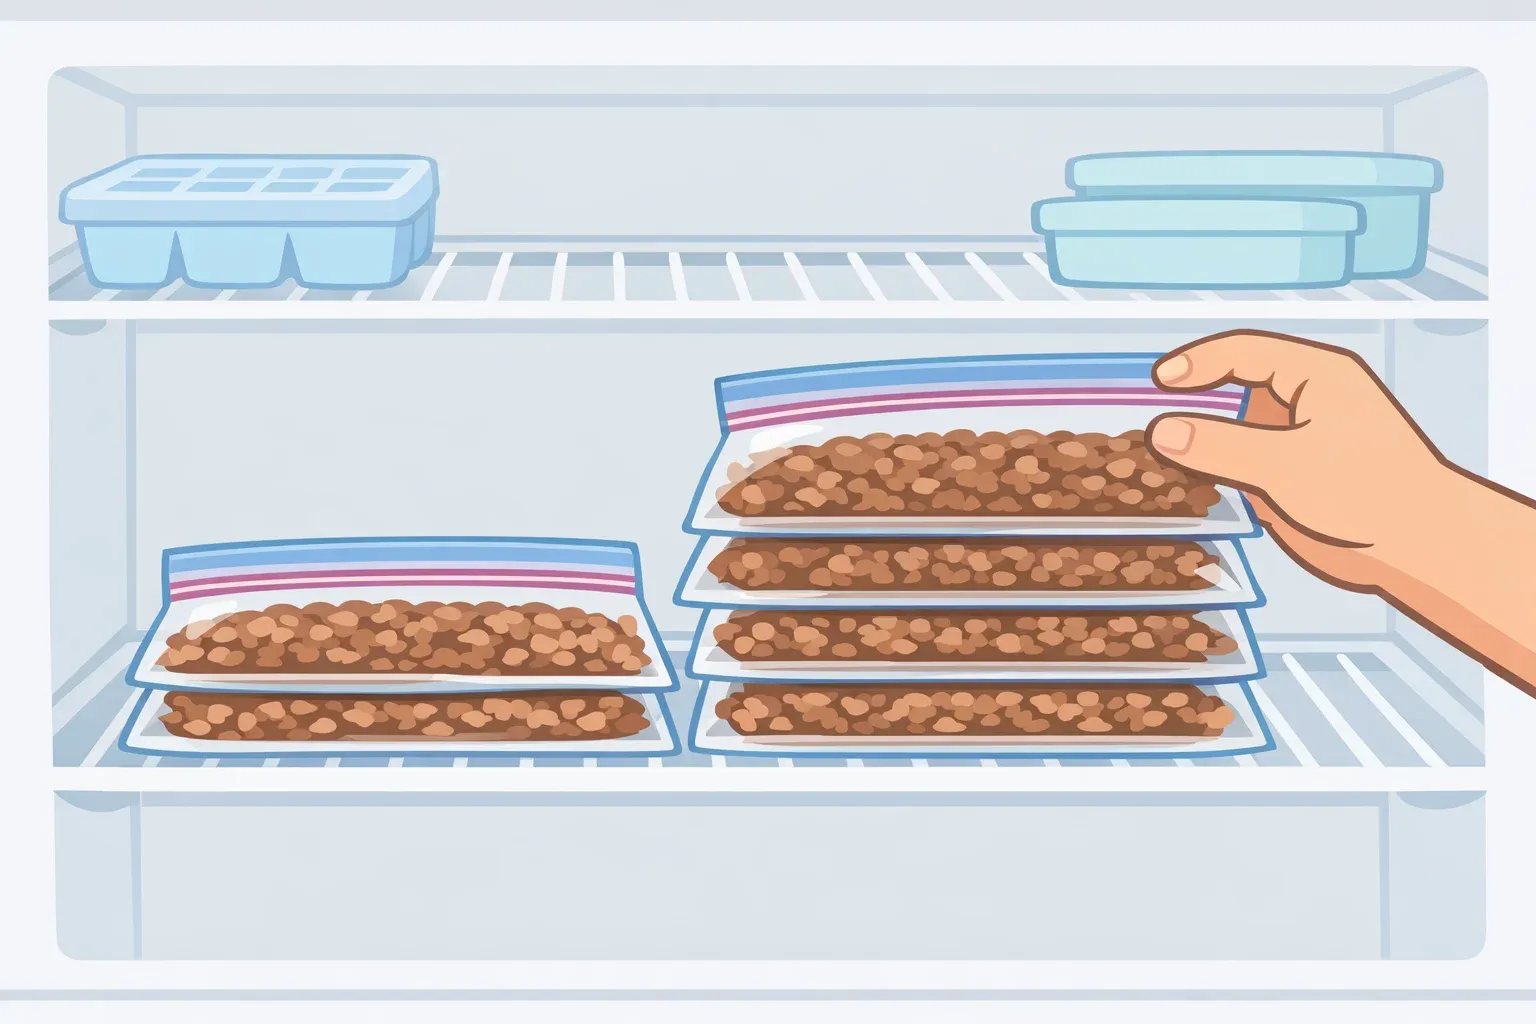
Most frozen ground beef sits in the freezer as a two-inch-thick brick. It takes forever to thaw, you end up using all of it at once, and the whole thing adds friction to a weeknight dinner that should be simple. This guide walks through how to freeze browned ground beef the right way: cook a large package once, press it flat into portioned bags, and score it into breakable segments so you can pull exactly what you need later.
Do it once, and a segment drops directly into a simmering pot of chili with no thaw step required. The full run from freezer to table takes roughly 20 minutes, which is close to drive-thru speed.
Why browning first and freezing thin creates the speed advantage
Shape determines thaw speed. Thinner packages expose more surface area to whatever is pulling cold from the meat, whether that's refrigerator air, cold water, or a microwave. Flattening before freezing speeds both the freeze and the thaw by maximizing surface-area-to-volume ratio.
Pre-cooking adds something flat-packing alone can't. Raw frozen beef, however thin, still needs to reach a safe internal temperature when reheated. Pre-cooked crumbles skip that requirement. Drop a segment into a simmering sauce, and it becomes part of the dish as it warms through — no pan step, no temperature check, just stir and continue.
Browning plain preserves flexibility. No seasoning in the freezer means the same bag becomes taco filling on Tuesday and pasta sauce on Thursday. Browning without seasoning is recommended so one batch covers tacos, pasta, casseroles, and grain bowls without any flavor conflict.
Worth naming one honest trade-off: pre-cooked frozen crumbles are a convenience ingredient, not a universal upgrade. For sauced dishes, soups, and bowls, the texture holds up well. For a recipe where the browning itself builds most of the flavor, cook fresh.
There's also a waste angle worth naming. U.S. Food Waste Pact research found that 60% of distribution-center and retail ground beef waste comes from product expiration. The dynamic at home runs the same way: expiration is what makes a family pack wasteful. Brown and freeze the bulk of it before that window closes, and a two-day ingredient stretches into a two-week one.
How to freeze browned ground beef in flat, breakable portions
What you need: A large skillet, zip-top freezer bags (quart-size for half-pound portions, gallon for one pound), a rimmed baking sheet, paper towels, and a marker.
Fat content note: Work with 80/20 ground beef and blotted rendered fat with paper towels directly in the pan, using about four towels at that fat level. Leaner blends like 85/15 or 90/10 will need fewer. Don't pour hot fat down the drain; it solidifies in pipes. Blot it or spoon it into a disposable container.
Step 1: Brown the beef over medium-high heat.
Break the meat into small, uniform crumbles as it cooks. Keep working it apart so you end up with loose, even pieces rather than clumps. Cook until no pink remains throughout. This is a ready-to-reheat ingredient, so complete cooking matters.
Step 2: Drain the fat and cool the beef.
Tilt the skillet and blot rendered fat with paper towels directly in the pan. Then spread the cooked beef on a rimmed baking sheet and let it cool fully before bagging. Don't rush this step. Sealing warm meat traps steam, which causes crumbles to fuse together in the freezer, and once they're frozen into a solid mass, the whole portion system falls apart.
Step 3: Portion into bags.
Divide the beef based on how you cook. Half-pound portions work well for tacos or grain bowls for two or three people; one-pound portions suit pasta sauce or a casserole for four. Load each bag and press the meat toward the bottom before sealing partway.
Step 4: Flatten to about one centimeter and score the grid.
Lay each bag flat on the counter. Press the beef down to roughly one centimeter thick, about the width of a finger. Seal almost completely, leaving a small gap to let air escape, then close the rest. Now press two or three firm lines across the bag using the edge of your hand or a ruler, creating distinct channels through the meat.
These channels are the grid. When the bag is frozen solid, those lines become clean break points. Snap off what you need without disturbing the rest. No knife, no partial thaw, no wasted meat.
Step 5: Label and freeze flat.
Write the date and total weight on each bag. Lay them flat on the baking sheet in the freezer until fully solid, then stand them upright like folders or stack them. The flat profile does the real work here. Serious Eats confirmed last November that one-centimeter-thick portions thaw measurably faster than standard two-inch blocks across all three USDA-approved thawing methods. Use within two to three months for the best texture and flavor.
Using frozen cooked ground beef for quick dinners
The right thaw method depends on what you're cooking, not just how fast you need to eat. Four paths, each matched to a different situation:
Direct to pot, no thaw needed
Best for chili, pasta sauce, soups, taco soup — anything where liquid surrounds and heats the beef. Snap off a grid segment and drop it directly into the simmering pot, stirring occasionally. This works because the segments are thin and already cooked. For liquid-based meals on a tight timeline, it's the fastest option available.
A quick weeknight chili looks like this: two cans of beans, a can of crushed tomatoes, a spoonful of chili powder, and a segment straight from the freezer into the pot. Dinner without a plan, and the prep was done on Sunday.
Microwave defrost
Best for tacos, rice bowls, stuffed peppers, and skillet meals where you want loose crumbles before they hit the pan. Use the defrost setting in short bursts, breaking the segment apart as it loosens. Cook immediately after, don't leave it sitting.
Microwave thawing warms parts of the meat into the temperature danger zone (40 to 140°F), where bacteria, including Salmonella, E. coli, Listeria, and others, can multiply rapidly. Serious Eats, citing USDA guidance, is clear: microwave-thawed meat goes straight to heat, no holding time. Ground beef carries a higher bacterial risk than intact cuts because, as the USDA notes, grinding distributes any surface bacteria throughout the meat. That's the specific reasoning behind the three-method rule.
For tacos on a Tuesday, defrost the segment, hit a hot skillet to finish warming, and season with cumin and chili powder. That's the move.
Cold water thaw
Best for any skillet meal when you have some time but forgot to plan ahead. Submerge the sealed bag in cold water and swap the water every 15 to 20 minutes to keep it cold. A flat one-centimeter bag thaws considerably faster than a standard block using this method. Cook immediately after thawing.
Overnight refrigerator thaw
Best for planned meals of any kind. Move the bag from freezer to fridge before bed, and it's ready by dinnertime the next day. This is the safest method because the meat never reaches danger-zone temperatures, provided the fridge stays below 40°F. Flat packs thaw faster than thick blocks here, too.
What not to do: Room-temperature thawing and warm-water submersion both push ground beef through the danger zone. Neither is USDA-approved. Skip them.
What to do this week
Buy a package in the two-to-three-pound range. Brown it plain, flatten it into labeled bags, score the grid, freeze flat. The full sequence is a roughly 30-minute setup that produces multiple future dinners from a single session.
Season at the pan, not in the bag. One neutral batch of crumbles covers tacos, pasta, and bowls across the week without any rework. The freezer stops being a holding area for things you'll eventually get around to. It becomes a place where dinner is already done.

















Comments
Be the first, drop a comment!