


How to grill steak by thickness: a temperature-first method
Pick up a thermometer. That's the whole secret, condensed to four words. Every other variable in how to grill steak cut selection, grill setup, timing is secondary to knowing what's actually happening inside the meat.
This guide walks through a single decision system: match your method to the thickness of the cut, cook to internal temperature, and pull early so carryover heat finishes the job. Follow it and you'll hit your preferred doneness consistently on gas or charcoal, with any cut from skirt to tomahawk.
Before you start, you need one tool: an instant-read digital meat thermometer. The entire method depends on it. ThermoWorks treats internal temperature as the only reliable authority on doneness, and this guide takes the same position. The hand-feel test exists as a rough fallback pressing the flesh between your index finger and thumb gives a crude proxy for doneness but it's not consistent enough to stake a good steak on. If you're committed to going thermometer-free, this isn't the guide for that.
Three facts that explain why timers fail:
- Definitions of "medium-rare" vary across charts from 126°F to 135°F, a 9-degree spread that makes any fixed-minutes-per-side method structurally unreliable, per ThermoWorks
- Once a steak leaves the grates, residual heat keeps raising the internal temperature by 5–10°F during rest, per BBQ Report
- That post-grill rise can be anywhere from 3°F to 20°F depending on the mass of the cut, per Chefstemp which is exactly why pulling at your target temperature always overshoots it
Step 1: Choose your thickness band, then choose your cut
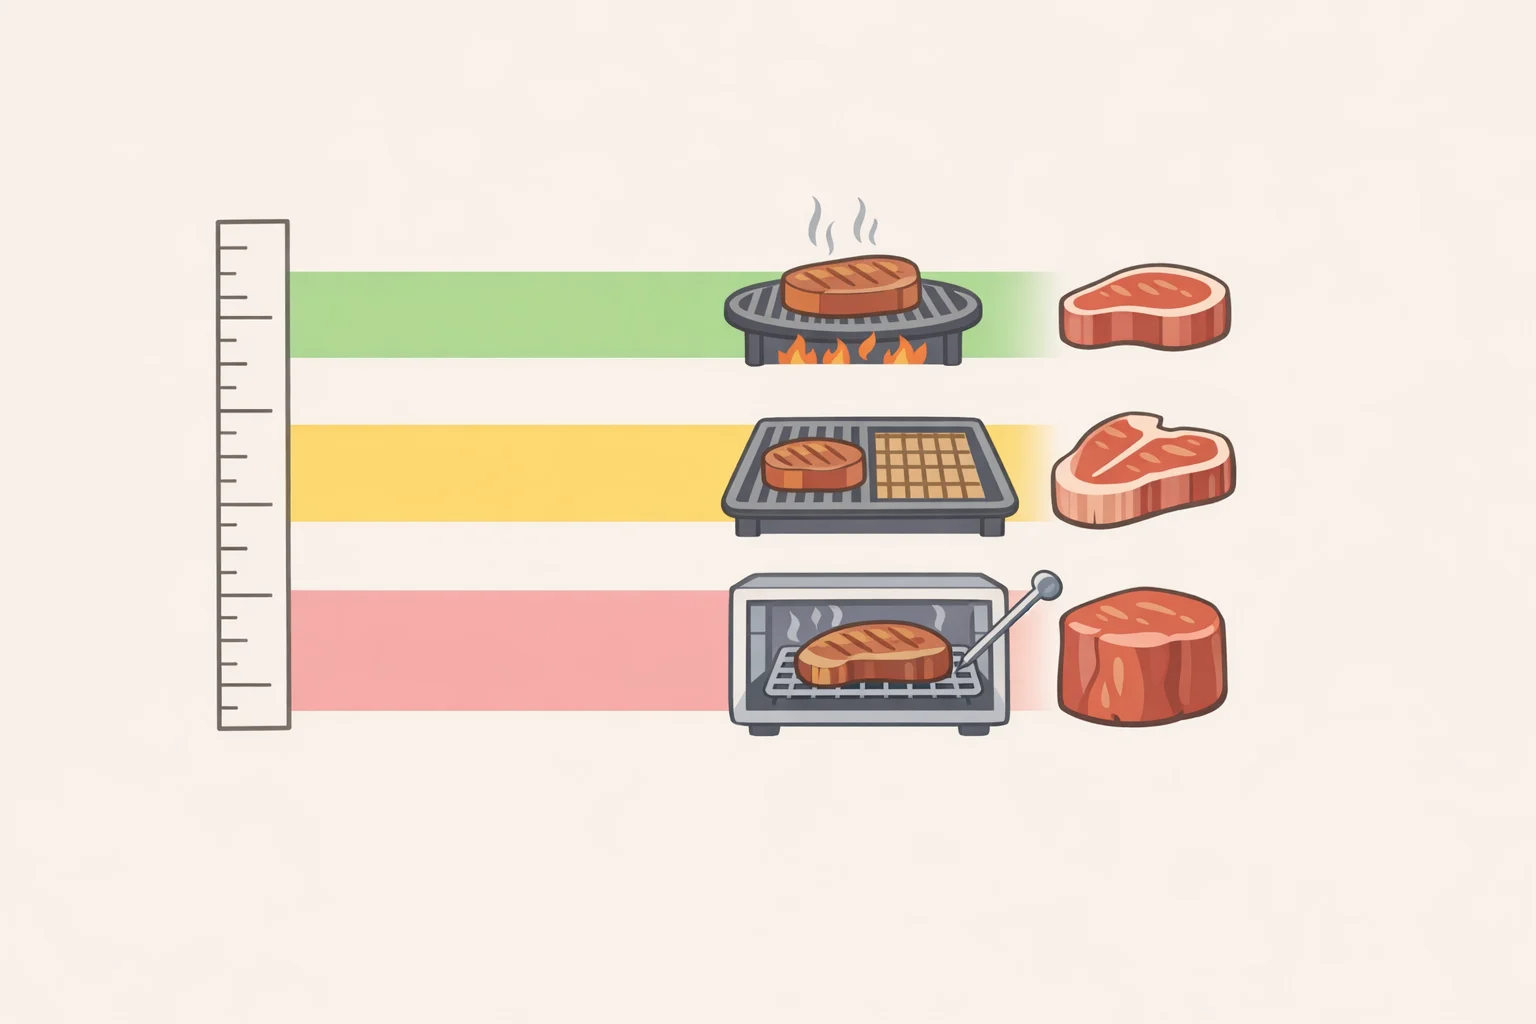
Thickness determines your method. Everything else cut selection, grill setup, cook time follows from it. Make this your first decision, not an afterthought.
| Thickness | Method | Best cuts |
|---|---|---|
| Under ¾ inch | High-heat direct only, no indirect finish | Flank, skirt |
| 1 to 1.5 inches | Two-zone: sear over direct, finish on indirect | Ribeye, NY strip, sirloin |
| Over 1.5 inches | Reverse sear: slow indirect first, finish sear last | Thick ribeye, T-bone, tomahawk |
Within each band, cut selection affects how forgiving the cook is. Fat-marbled cuts handle the wide temperature swings of grill cooking better than lean ones. Ribeye tolerates a range of doneness without drying out, per BBQ Report, which makes a boneless ribeye at 1 inch the most practical starting point for anyone learning the method. NY strip is slightly leaner, with a fat cap on one edge and less prone to flare-ups. Sirloin dries out quickly past medium-rare and has less margin for error.
Steaks under ¾ inch cook through before a proper crust can form, per BBQ Report. At the other end, anything over 1.5 inches will have a well-done exterior before the center reaches medium-rare if you try to cook it entirely over direct heat. The thickness band isn't a preference it determines which approach actually works.
On bone-in cuts: T-bone and porterhouse contain two muscles a strip loin and a tenderloin that cook at different rates, per BBQ Report. The tenderloin side reaches temperature faster. Point it toward the cooler zone when positioning on the grill.
Step 2: Prep the steak before the grill goes on
Good prep removes the variables that undermine crust and even cooking. Most of it is passive time.
1. Pull the steak from the fridge 30–45 minutes before cooking. A cold steak placed on high heat cooks unevenly the exterior burns while the center lags. BBQ Report, ThirstyBear, and Sullivan's Steakhouse all recommend this step.
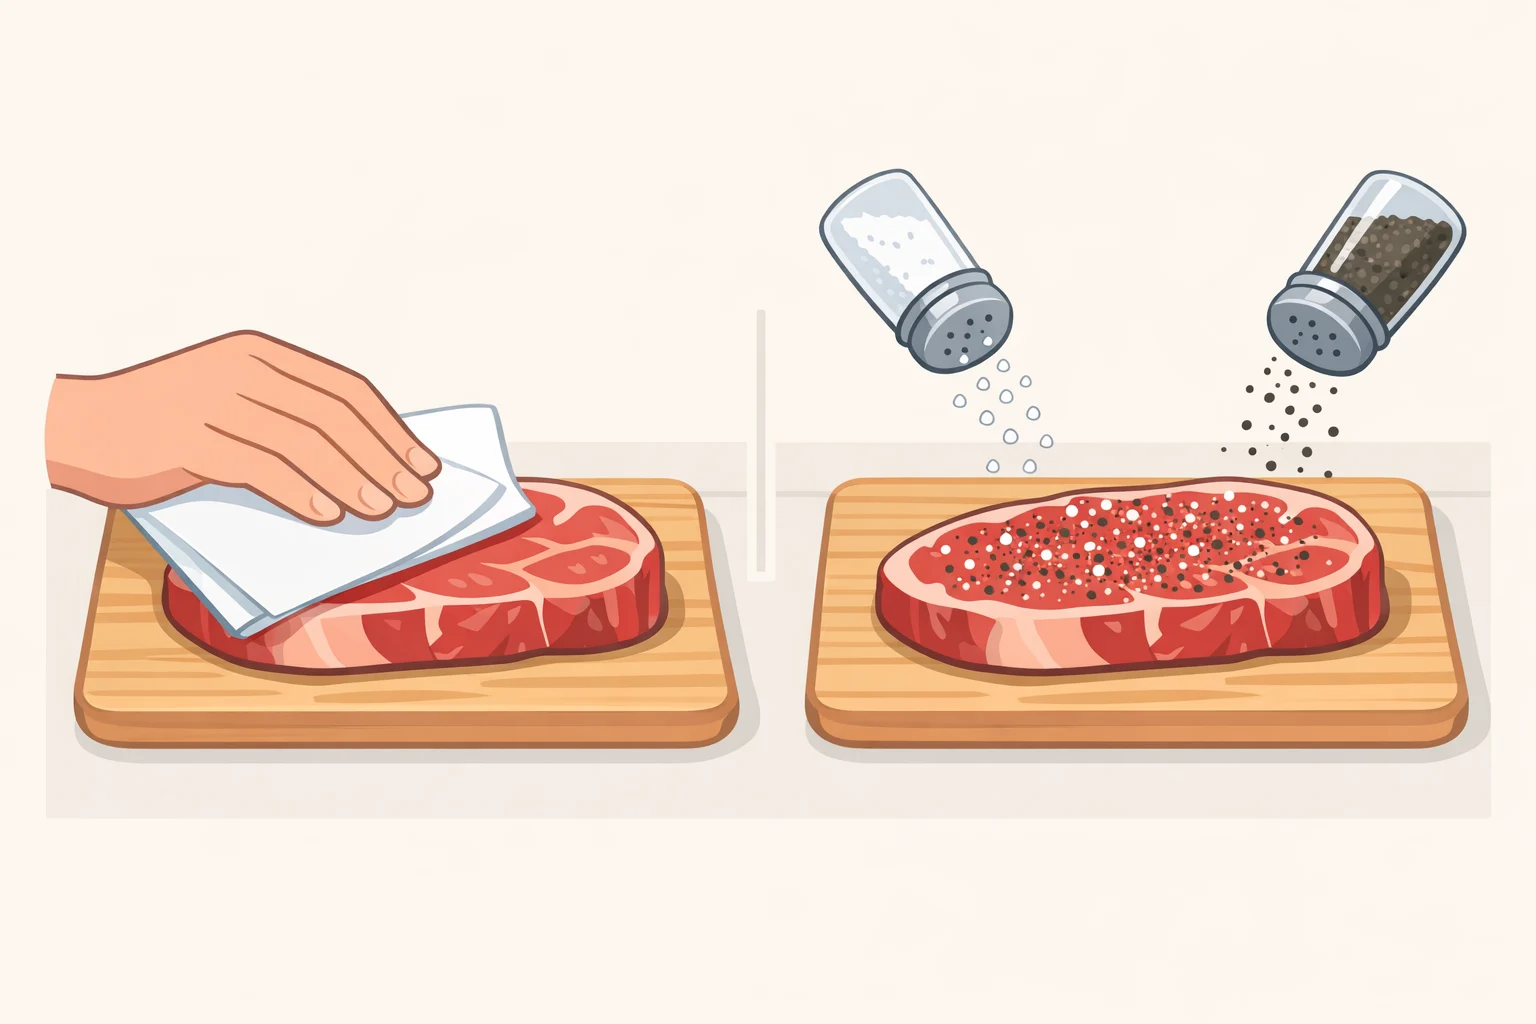
2. Pat the surface completely dry with paper towels. Moisture on the surface converts to steam when it hits the grates, and steam inhibits browning. As BBQ Report puts it: dry surfaces brown, wet surfaces grey. ThirstyBear makes the same point surface moisture creates steam instead of a crust even when the grill is otherwise at the right temperature.
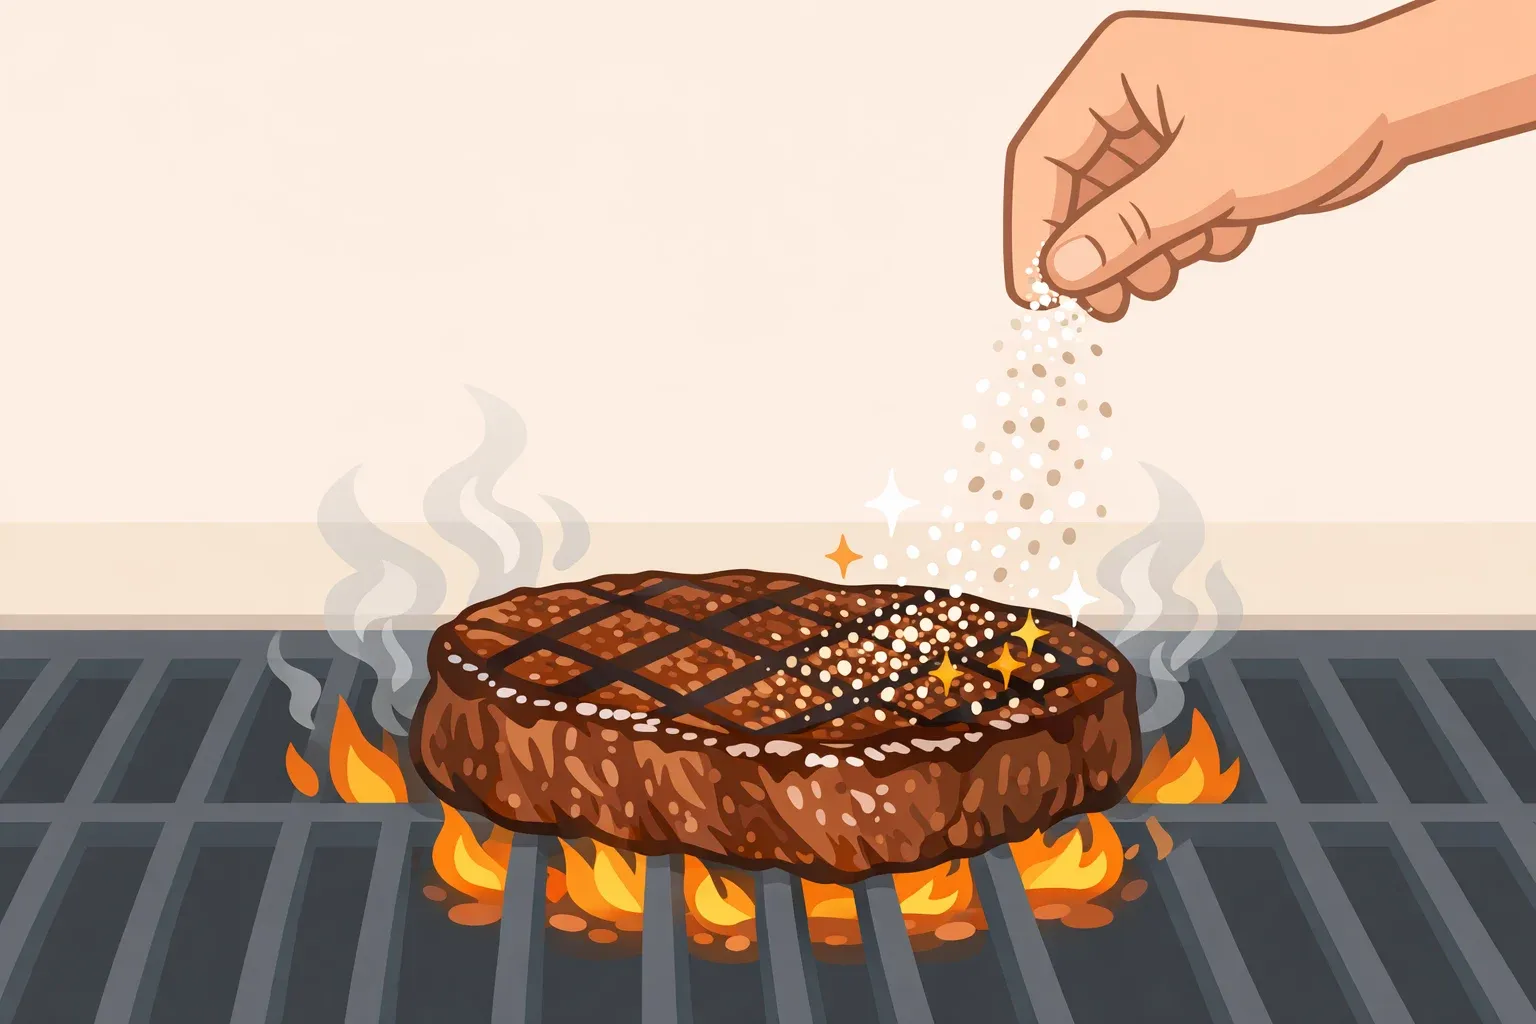
3. Season with kosher salt and cracked black pepper on all surfaces, 30–45 minutes before cooking. About one teaspoon of kosher salt per pound, pressed into both sides, is a solid benchmark, per ThirstyBear. Salt draws surface moisture out initially, then that moisture reabsorbs along with dissolved proteins, improving both flavor and texture. Season far enough ahead to get past that initial moisture release, or salt immediately before the grill. The in-between window 5 to 15 minutes before leaves a wet surface at exactly the wrong moment.
Optional dry brine: Salt the steak and leave it uncovered on a rack in the refrigerator for up to 24 hours. ThirstyBear describes the result as a noticeably crispier, more deeply flavored crust. If you have time, it's worth doing and it's the single highest-return upgrade once the core method is consistent.
Skip butter on the grill. Butter burns at roughly 350°F, per BBQ Report, well below the 450–500°F searing zone. Add it after the steak comes off, as a finish while it rests. The residual heat melts it without burning it.
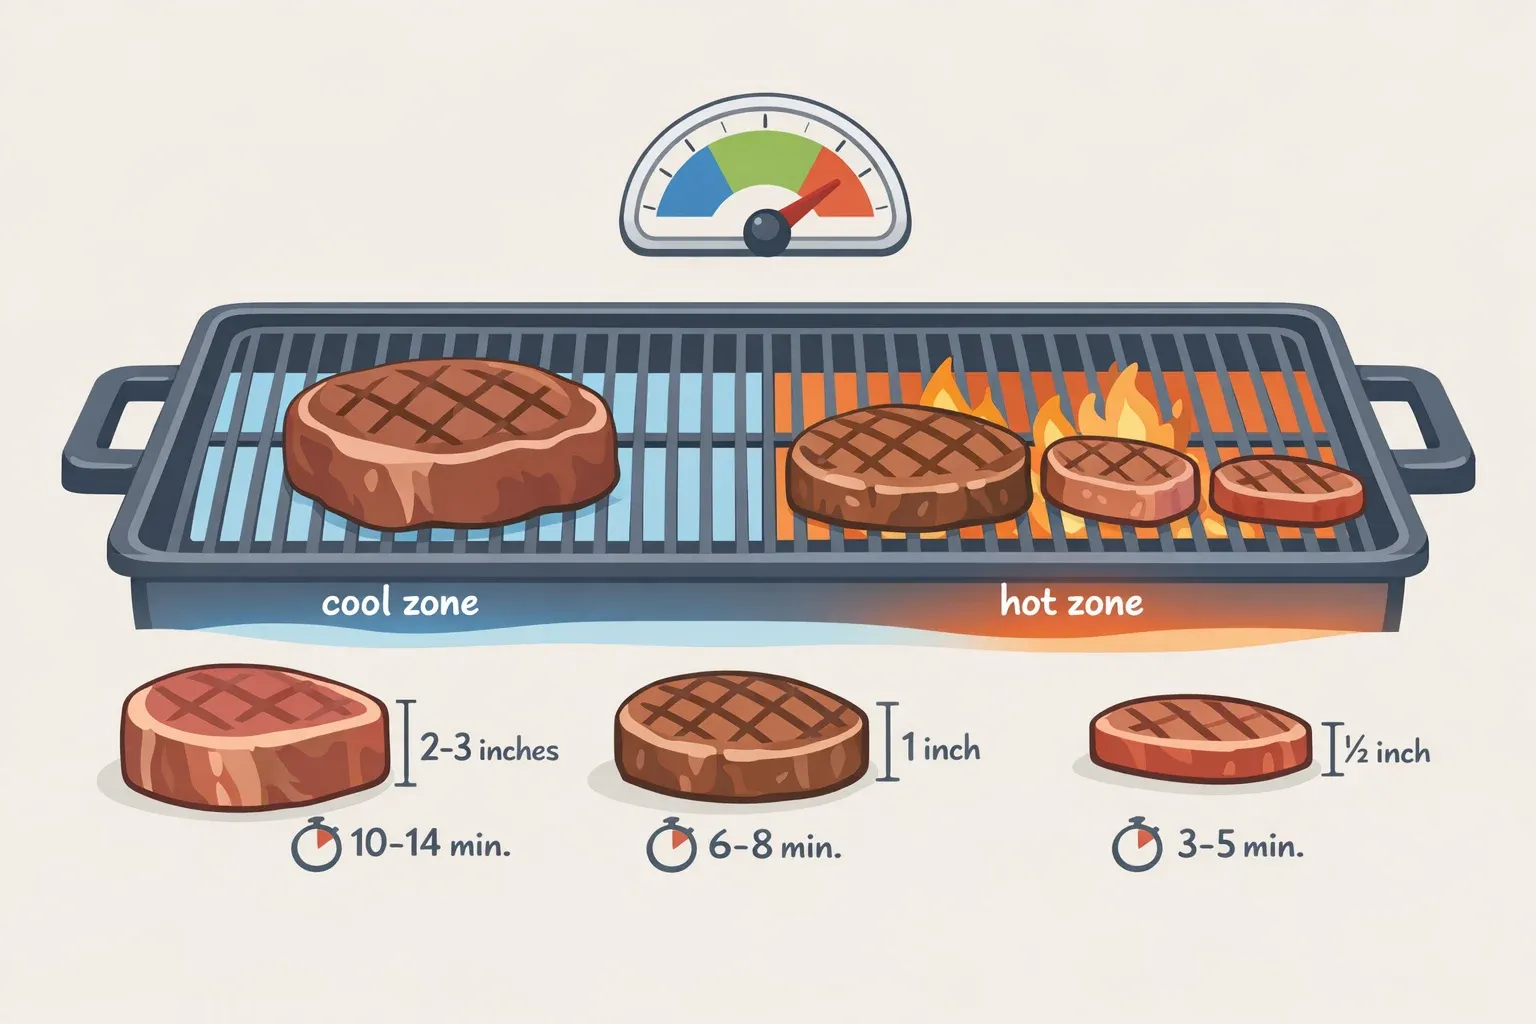
Step 3: Set up two-zone heat and know your pull temperatures
The grill setup is the same whether you're doing standard two-zone or reverse sear: one hot side, one cool side. The sequence differs by thickness; the hardware setup doesn't.
Gas: Turn one burner to high, leave the others off. Preheat with the lid closed for 10–15 minutes. A properly preheated grill reaches above 500°F at the grate surface, per ThirstyBear. Quick check: a water drop on the hot grates should bounce and evaporate immediately.
Charcoal: Fill a chimney starter with about 100 briquettes and wait until they're fully covered in grey ash roughly 15–20 minutes, per BBQ Report. Pour all coals onto one half of the grate, leaving the other side empty. Set the cooking grate, close the lid for five minutes to heat it, then open and oil the hot-side grates just before the steak goes on. Oil the grates, not the steak: fold a paper towel, dip in high-smoke-point oil, wipe with tongs.
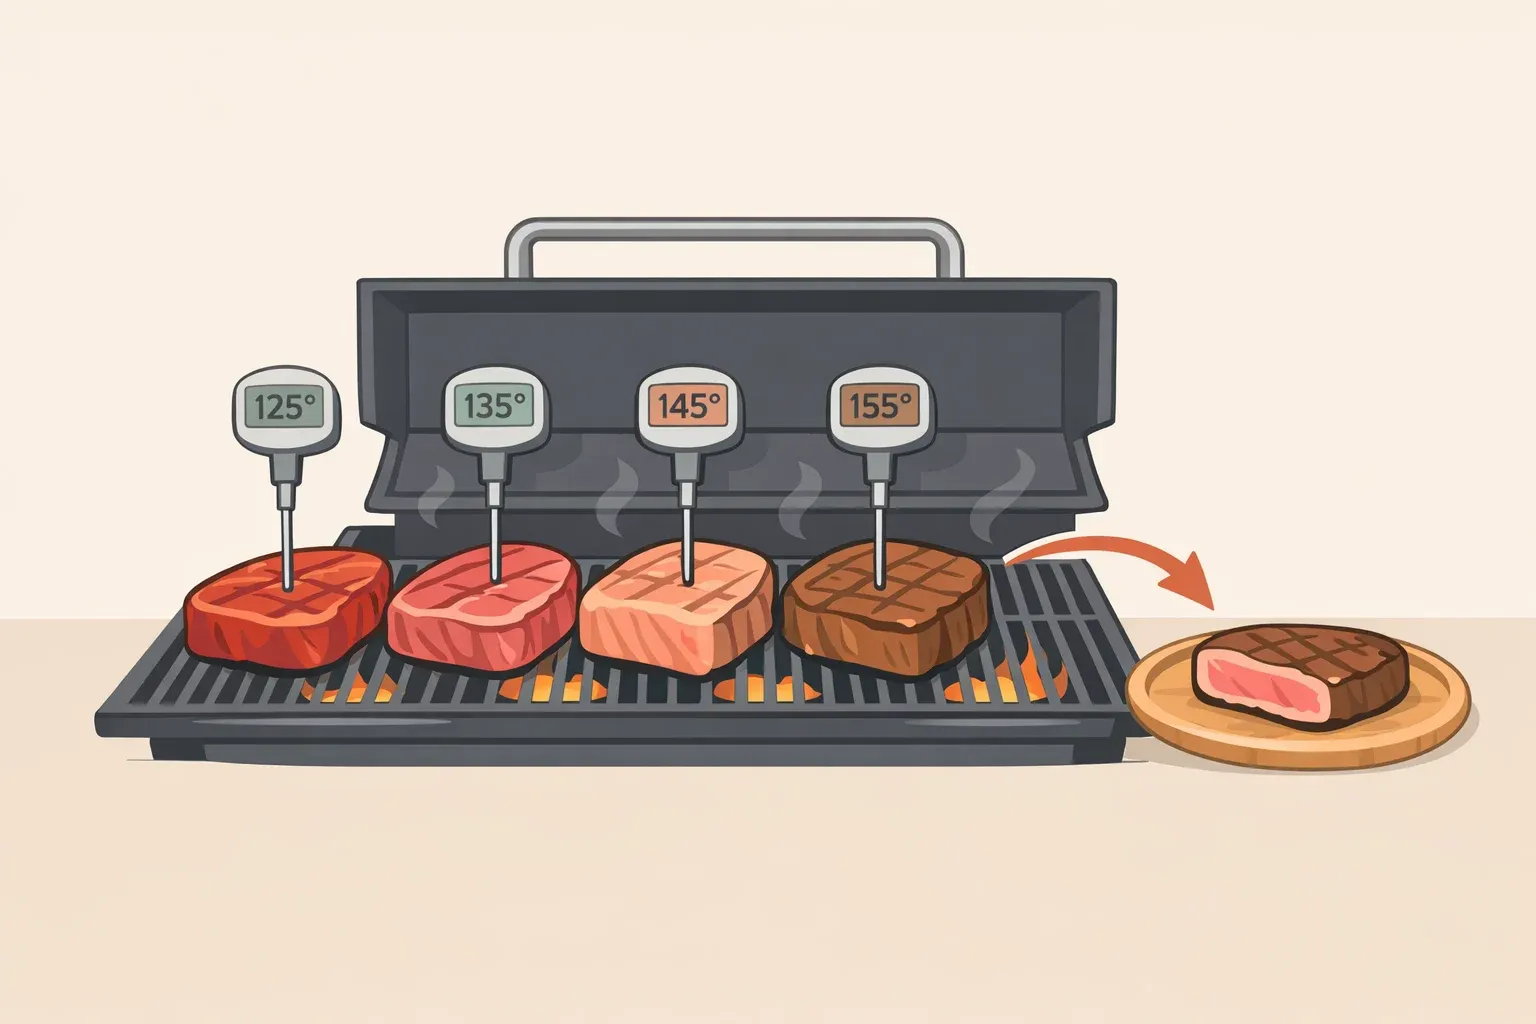
Set your pull temperatures before you light the grill. The temperature you pull at and the temperature you're aiming to serve are not the same number.
The table below uses Sullivan's Steakhouse pull ranges as the primary framework. Note that ThirstyBear recommends pulling medium-rare at 120–125°F slightly earlier than Sullivan's 125–130°F and both are valid. Source recommendations differ, carryover varies by cut and rest conditions, and the 5–10°F gap between pull temp and final temp is a guideline rather than a guarantee.
| Doneness | Pull off grill | Final after rest |
|---|---|---|
| Rare | 115–125°F | 120–130°F |
| Medium-rare | 125–130°F | 130–135°F |
| Medium | 130–140°F | 135–145°F |
| Medium-well | 140–150°F | 145–155°F |
| Well-done | 150°F+ | 155°F+ |
Sources: Sullivan's Steakhouse and ThirstyBear. Pull ranges vary by source; always account for 5–10°F of carryover during rest.
On the USDA minimum: The USDA recommends 145°F for whole beef cuts, per Sullivan's Steakhouse. That's a food safety floor, not a culinary target. Many home cooks and virtually all steakhouses serve medium-rare by request using quality cuts and proper handling. Know the distinction and make your own call.
Step 4: How to grill steak by thickness, not by time
Under ¾ inch (flank, skirt, thin cuts): direct heat only
Place the steak directly over the hot zone from the start. There's no indirect phase thin cuts cook too quickly for one. Sullivan's Steakhouse notes that cuts like flank cook through over high heat with no finishing stage needed. Flip once when the steak releases cleanly from the grates; if it sticks, wait another 30–60 seconds. Check temperature frequently. These cuts go from underdone to overdone fast.
Always slice flank and skirt against the grain. It shortens the muscle fibers and makes a significant textural difference, per BBQ Report.
The standard two-zone method (1 to 1.5 inches)
This is how to cook steak on the grill for most everyday cuts ribeye, strip, sirloin where you want a real sear without overcooking the center.
- Place the steak on the hot zone. Leave the lid open during the sear phase.
- Sear 2–3 minutes without moving it. If it sticks, wait another 30–60 seconds it releases when properly seared, per BBQ Report.
- Flip once. Sear the second side 2–3 minutes.
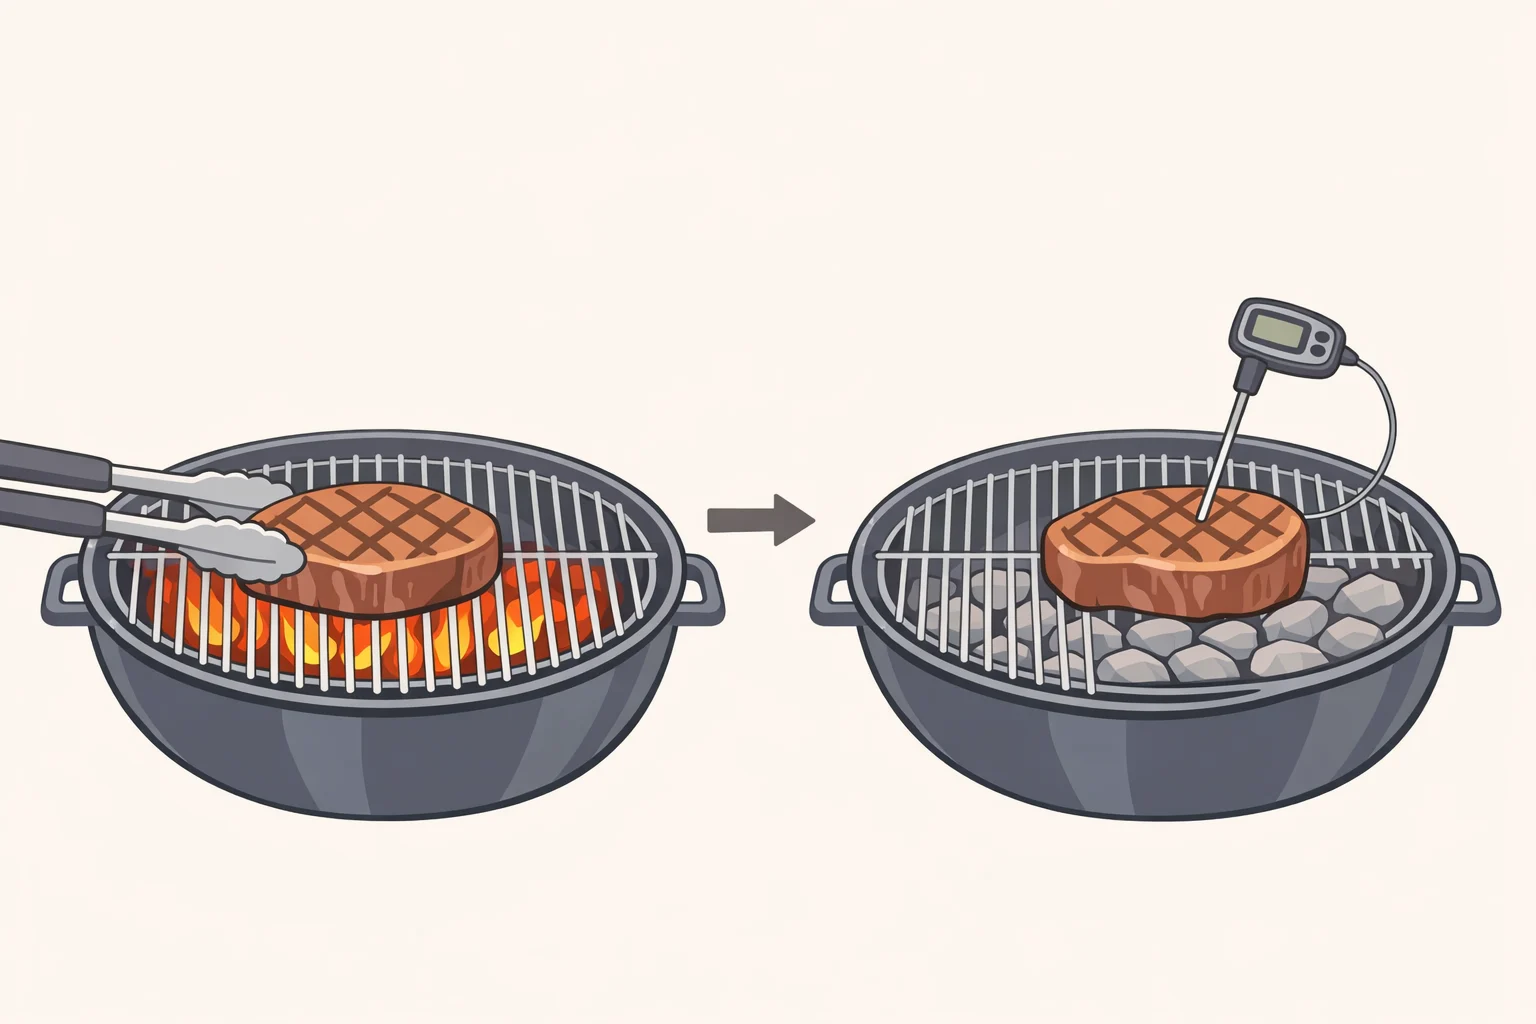
- Move to the indirect zone. Close the lid.
- Insert the thermometer into the thickest part of the steak, away from bone or fat pockets. Checking temperature doesn't release juices, per Sullivan's Steakhouse check as often as needed.
- Pull when the reading is 5°F below your target. Move immediately to a cool cutting board, not a warm plate or back onto the grill.
For a 1-inch steak aimed at medium-rare, roughly 3–4 minutes per side over direct heat and 2–3 minutes on the indirect side is a useful starting estimate, per BBQ Report. The thermometer is the finish line, not the timer.
Over 1.5 inches: reverse sear
- Place the steak on the cool side with an ambient grill temperature of 250–275°F, per BBQ Report. Close the lid.
- Cook slowly, turning occasionally, until the internal temperature reads 10–15°F below your target. A thick T-bone can take 25–40 minutes on the indirect side, per BBQ Report.
- Move to the hot zone. Sear 60–90 seconds per side. The slow phase has already dried the surface, so the crust forms fast, per BBQ Report.
- Pull and rest. Carryover is minimal after a short sear five minutes is enough.
Flare-up: Move the steak to the cool zone until the flames subside. Searing through a flare-up chars the outside before the heat reaches the interior, per ThirstyBear.
Don't press the steak down. It forces out juices without improving the sear, per ThirstyBear.
Three concrete examples
These walkthroughs apply the method above to specific cuts. Each covers setup, zone movement, pull temp, and rest time.
1-inch ribeye on gas, targeting medium-rare
Preheat with one burner on high, lid closed, 10–15 minutes. Grate surface should exceed 500°F, per ThirstyBear. Oil the hot-side grates. Sear the ribeye over direct heat, lid open, 3–4 minutes per side without moving it. Move to the indirect side, close the lid. Start checking temperature after two minutes. Pull at 125–130°F. Rest on a cutting board for 5 minutes. Target final temperature: 130–135°F, per Sullivan's Steakhouse.
1.5-inch NY strip on charcoal, targeting medium
Light a full chimney of roughly 100 briquettes, per BBQ Report. Wait for full grey ash coverage, then pile all coals on one side. Heat the grate for five minutes with the lid closed. Oil the hot-side grates. Sear the strip over direct heat, lid open, 3–4 minutes per side. Move to the indirect zone, lid closed. Check temperature after three minutes. Pull at 130–140°F. Rest 8–10 minutes. Target final temperature: 135–145°F, per Sullivan's Steakhouse.
Skirt steak, direct heat only
Skirt is thin under ¾ inch so the setup is simpler. Preheat the full grill to 450–500°F, per BBQ Report. No indirect zone needed for the cook itself, though keep one available for flare-ups. Grill directly over high heat and flip once when the steak releases cleanly, roughly 2–3 minutes per side. Pull when the center reads 5°F below your target. Rest 3–5 minutes. Slice against the grain before serving non-negotiable on skirt, per BBQ Report.
Step 5: Rest correctly, then slice
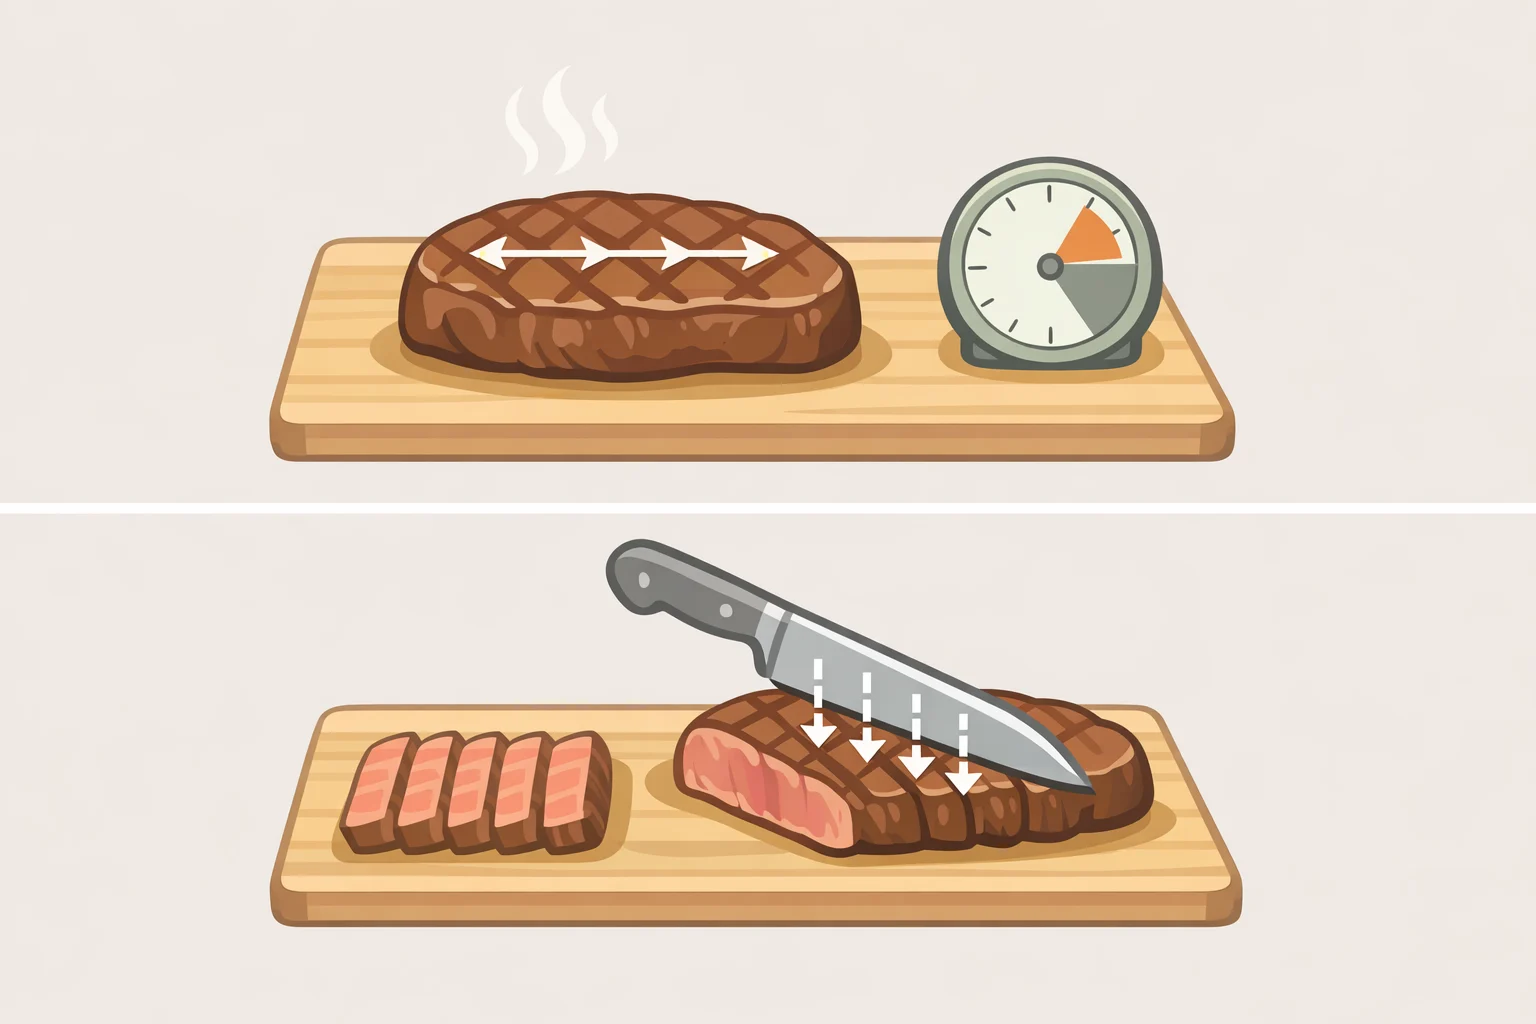
Resting isn't passive waiting it's the last active step of the cook. Cut too soon and the moisture pushed toward the center by heat drains straight onto the cutting board.
ThirstyBear cites research suggesting a 10-minute rest may increase juice retention by as much as 25% compared to cutting immediately. Rest times scale with thickness:
- Under ¾ inch: 3–5 minutes
- 1-inch steak: 5 minutes
- 1.25–1.5-inch steak: 8–10 minutes
- Reverse-seared steak: 5 minutes (the interior was already at a stable temperature before the final sear)
Move to a clean cutting board or wire rack immediately after pulling from the heat, per Chefstemp. Not a hot pan, not back on the grill grates.
On foil: a loose tent is fine. Don't wrap tight. Chefstemp notes that tight foil traps steam, softens the crust, and can keep cooking the meat past your target essentially building a small oven around the steak. Thinner cuts are better off resting uncovered entirely.
Slice against the grain on flank, skirt, and any cut with prominent grain. On ribeye and strip, direction matters less, though thinner slices on thick cuts help with texture.
The decision at a glance
Four moves: pick your thickness band, prep a dry surface, pull 5°F below your target, rest by thickness. That's the whole system.
One number worth committing to memory: for medium-rare, pull at 125–130°F and expect the steak to reach 130–135°F after resting, per Sullivan's Steakhouse. Everything else in this guide is detail layered onto that foundation.
When you're ready to go further, the dry brine from Step 2 is where the returns are highest a crisper, more deeply flavored crust without changing a single thing about the grill technique, per ThirstyBear. After that, compound butter finishes and wood chips for smoke on charcoal are worth experimenting with. The core system stays the same.


Comments
Be the first, drop a comment!