



How to make roasted garlic garlic bread from scratch
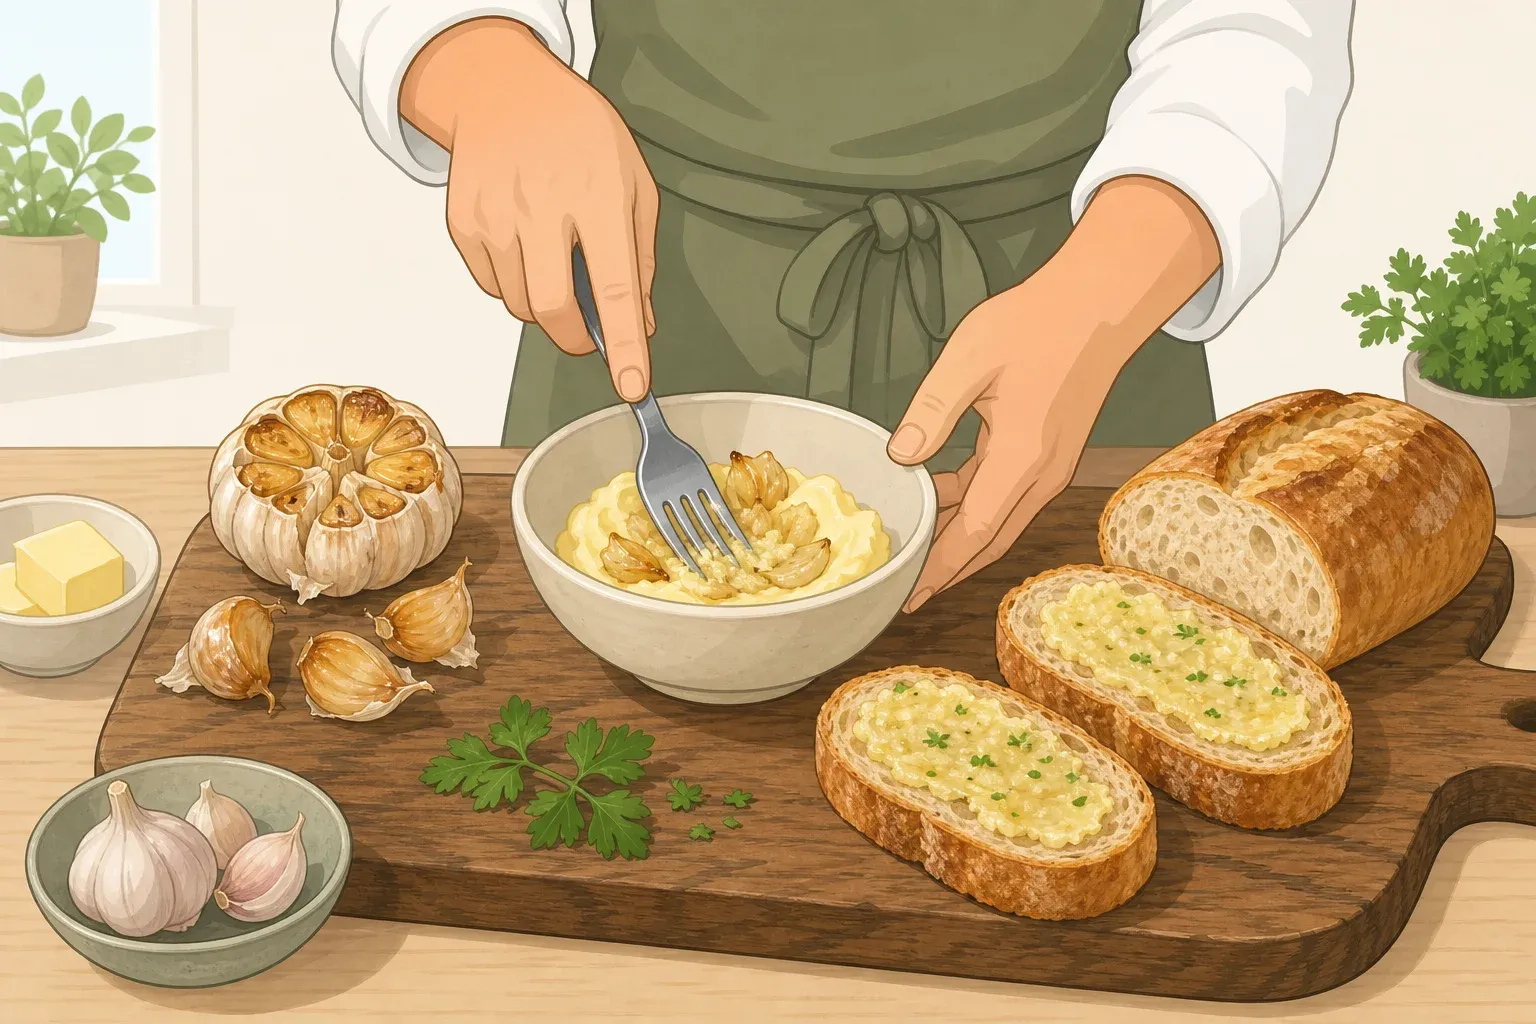
Swap the raw minced garlic in your usual garlic bread butter for a whole roasted head, and the loaf turns into something different: sweeter, deeper, less sharp. Raw garlic hits hard and fast. Once roasted, cloves turn soft enough to mash into a paste, with a caramelized sweetness raw garlic never develops. Delish Craft puts it plainly: roasting a whole head strips out the sharp bite and leaves a mellow, spreadable flavor that blends right into softened butter. That's the whole premise behind roasted garlic garlic bread: same crusty loaf, same butter-and-bake method, just a rounder, sweeter flavor running through the middle instead of a sharp one.
It's a genuine tradeoff, not an automatic upgrade. Roasting mellows the punch that makes classic garlic bread taste like classic garlic bread, so if you want that sharper edge alongside the sweetness, plan on stirring in a little raw garlic or garlic powder too. This roasted garlic bread recipe is beginner-friendly, but it isn't instant: roasting a head of garlic takes about 40 to 45 minutes hands-off, per Delish Craft, plus time to cool before you can handle it. Roast the garlic while dinner's already in the oven, or the night before, and the bread itself comes together in minutes.
What you'll need
This makes one loaf, about 8 servings.
- 1 whole head of garlic
- 1 to 2 tablespoons olive oil, plus foil and kosher salt for roasting
- 1/2 cup unsalted butter, softened to room temperature
- 2 tablespoons fresh parsley, chopped
- 1/2 teaspoon kosher salt
- 1/4 teaspoon black pepper
- Optional: 1/4 teaspoon garlic powder, if you want a sharper garlic flavor
- 1 large loaf French or Italian bread
- Optional: 1/4 cup grated Parmesan
Difficulty: easy. This is an adapted, one-head version of Delish Craft's recipe, which calls for two heads of garlic across the same 8 servings and lists a 60-minute total time. Cutting that down to one head, mashed with 3 to 4 cloves to start, gives a butter with real roasted-garlic flavor without overwhelming the loaf, and leaves you extra roasted cloves for other uses. Treat this as the article's working formula and taste before you spread: expect about an hour total, most of it hands-off.
Roasting works because heat changes garlic at a basic level. Cutting or crushing raw garlic ruptures its cells and triggers a reaction that produces the sharp-tasting compound behind its bite, according to a Serious Eats test of eight garlic-cutting methods published three weeks ago. Roasting an intact head slows that reaction and gives the natural sugars in the cloves time to caramelize, which is why roasted garlic reads sweeter and milder than anything raw, minced, or pressed.
Before you start
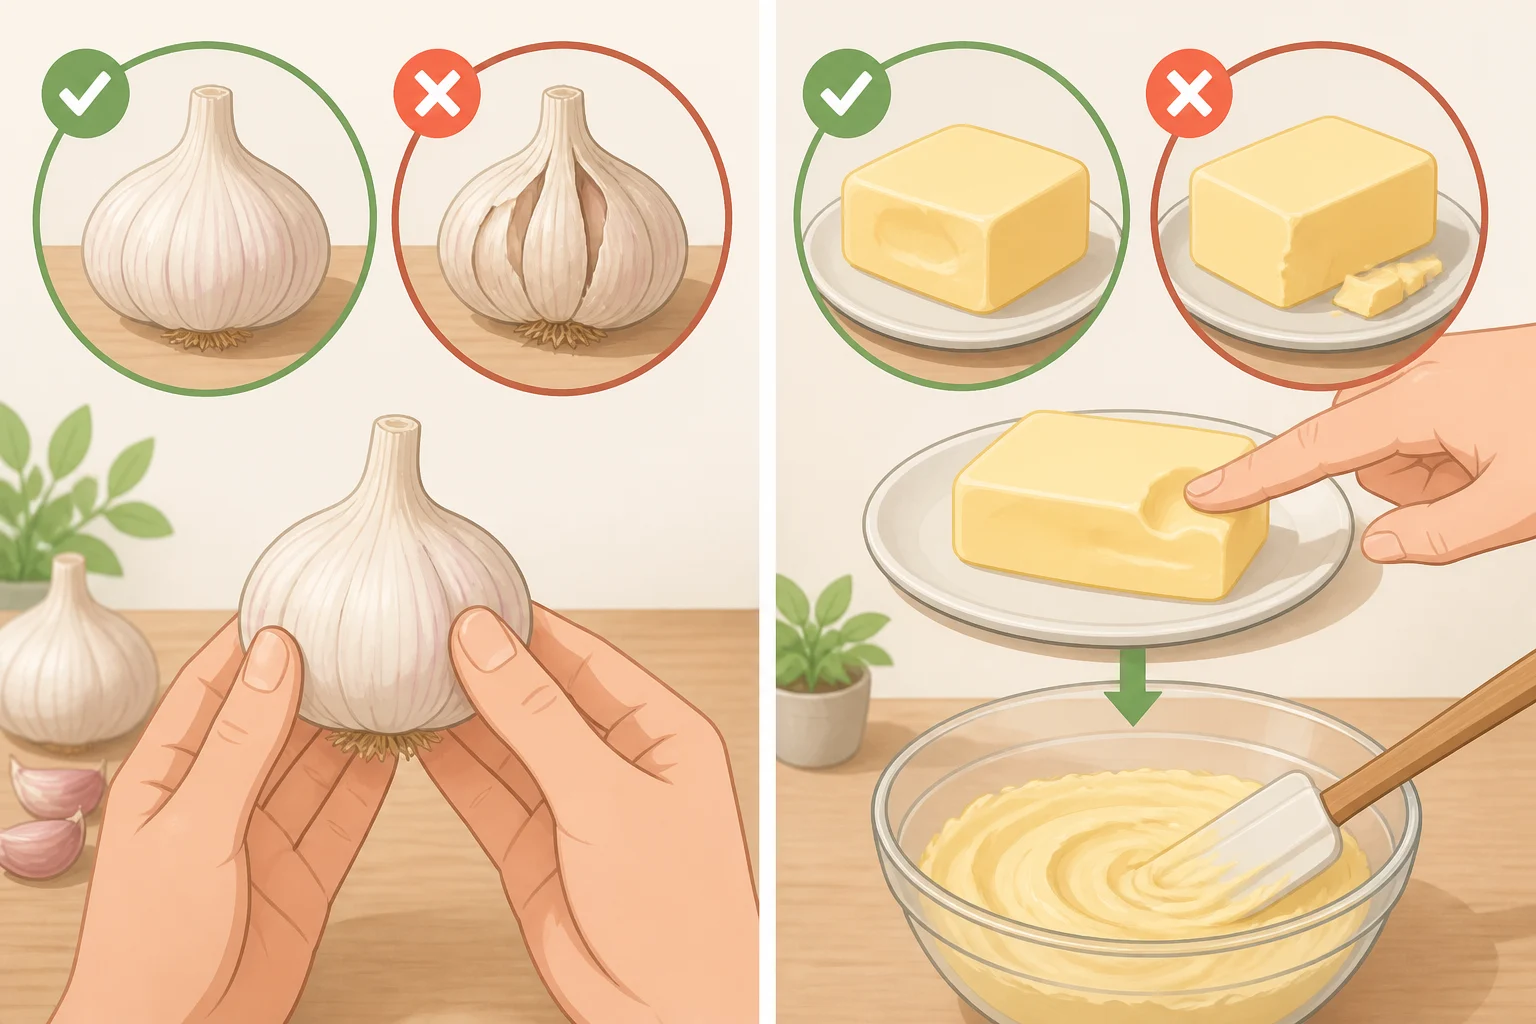
Pick a firm, fresh head of garlic. Delish Craft recommends fresh garlic over sprouted heads for the best result, so skip a head with green shoots if you have a choice.
Set your butter out well ahead of time so it's genuinely at room temperature, not just softened at the edges. Delish Craft notes the butter needs to be fully room temperature for the roasted garlic to blend in smoothly; if it still resists a light press with a spoon, give it more time before mixing.
Once garlic is roasted, it's sitting in a bit of oil, so treat any cloves you're not using right away like a homemade garlic-and-oil mixture: cool them, refrigerate promptly, and don't hang on to them indefinitely. The finished garlic butter is milder territory since it's mostly butter, but it still shouldn't sit out on the counter for hours at a stretch. Refrigerate what you're not using, and if you're not sure how long something's been sitting out, don't risk it.
Know what you're aiming for: this method bakes the bread open-faced, for crisp, golden edges rather than a soft, warmed-through crust. If a pillowy, foil-wrapped loaf is what you're picturing, wrap the buttered bread in foil and bake at 350°F until warmed through instead, then open the foil and broil briefly for a lightly crisped top.
How to make roasted garlic bread: roast the garlic
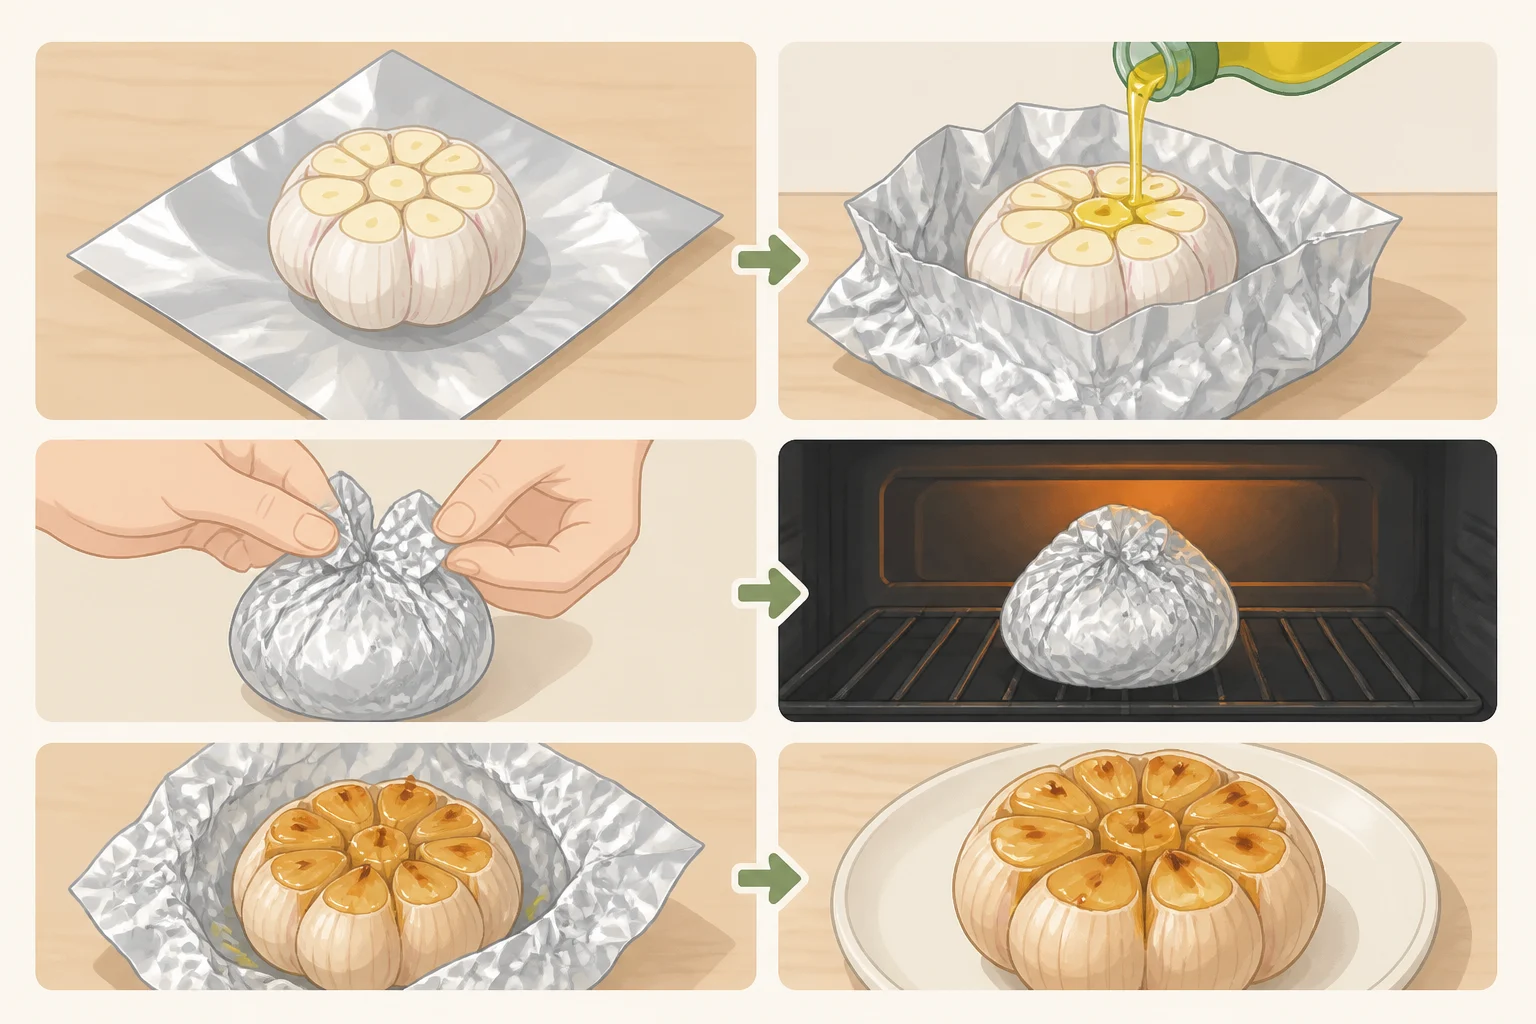
- Preheat the oven to 400°F. Trim the papery outer layers from the garlic head without separating the cloves, then slice about 1/4 inch off the top to expose them.
- Set the head cut-side up on a piece of foil, drizzle with 1 to 2 tablespoons olive oil, and season with a pinch of kosher salt. Wrap the foil tightly around the head so it seals completely.
- A tight seal matters: garlic turns bitter if it burns, and Delish Craft notes a well-sealed foil packet lets the head steam and roast at the same time instead of drying out and scorching. Check for gaps before it goes in the oven.
- Roast for 40 to 45 minutes, continuing until the cloves are fragrant and soft enough to pierce easily with a knife.
- Let the head cool on the counter until it's comfortable to handle, then squeeze the cloves out of their skins into a small bowl and mash with a fork into a paste.
Cloves are ready when they look soft and golden and slide right out of their skins with light pressure. If any still feel firm, they need more time; keep roasting and check again rather than guessing. If the cloves are soft but taste bitter instead of sweet, they scorched a little rather than steaming through, usually from a loose foil seal or a hot spot in the oven.
Make roasted garlic butter for bread
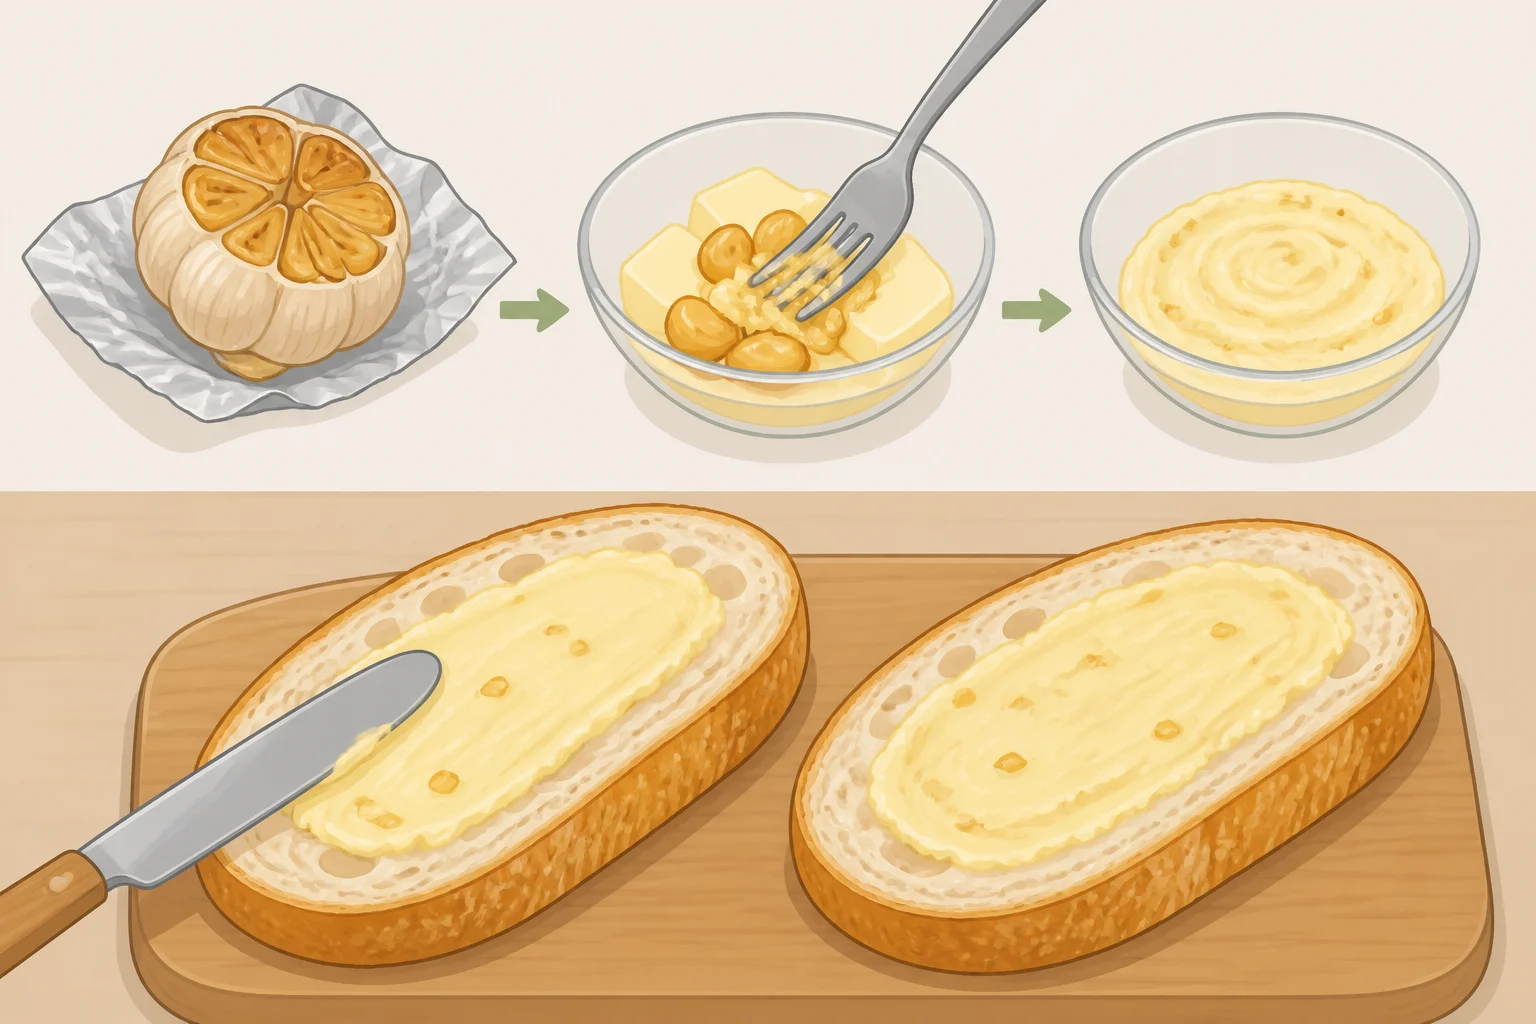
- In a medium bowl, mash 3 to 4 roasted cloves into the softened butter along with the parsley, salt, and pepper. Start with about this many cloves and taste before adding more; roasted garlic's sweetness makes it tempting to use more than you ever would raw.
- Taste the butter plain before deciding whether it needs help. If you want the sharper edge of classic garlic bread alongside the sweetness, stir in the optional garlic powder, or a little finely minced raw garlic, after you've tasted rather than before, so you're adjusting to what's actually in the bowl. The finer raw garlic is cut, the sharper it reads, because more cell damage releases more of the compound behind its bite, according to Serious Eats.
- Slice the bread in half lengthwise and set both halves cut-side up on a baking sheet.
- Spread the roasted garlic butter over both cut sides in an even layer, all the way to the edges. If your loaf is small or thin, you may have some butter left over; that's fine to save for another use rather than piling it all on one loaf. Sprinkle with Parmesan if using.
Bake the bread
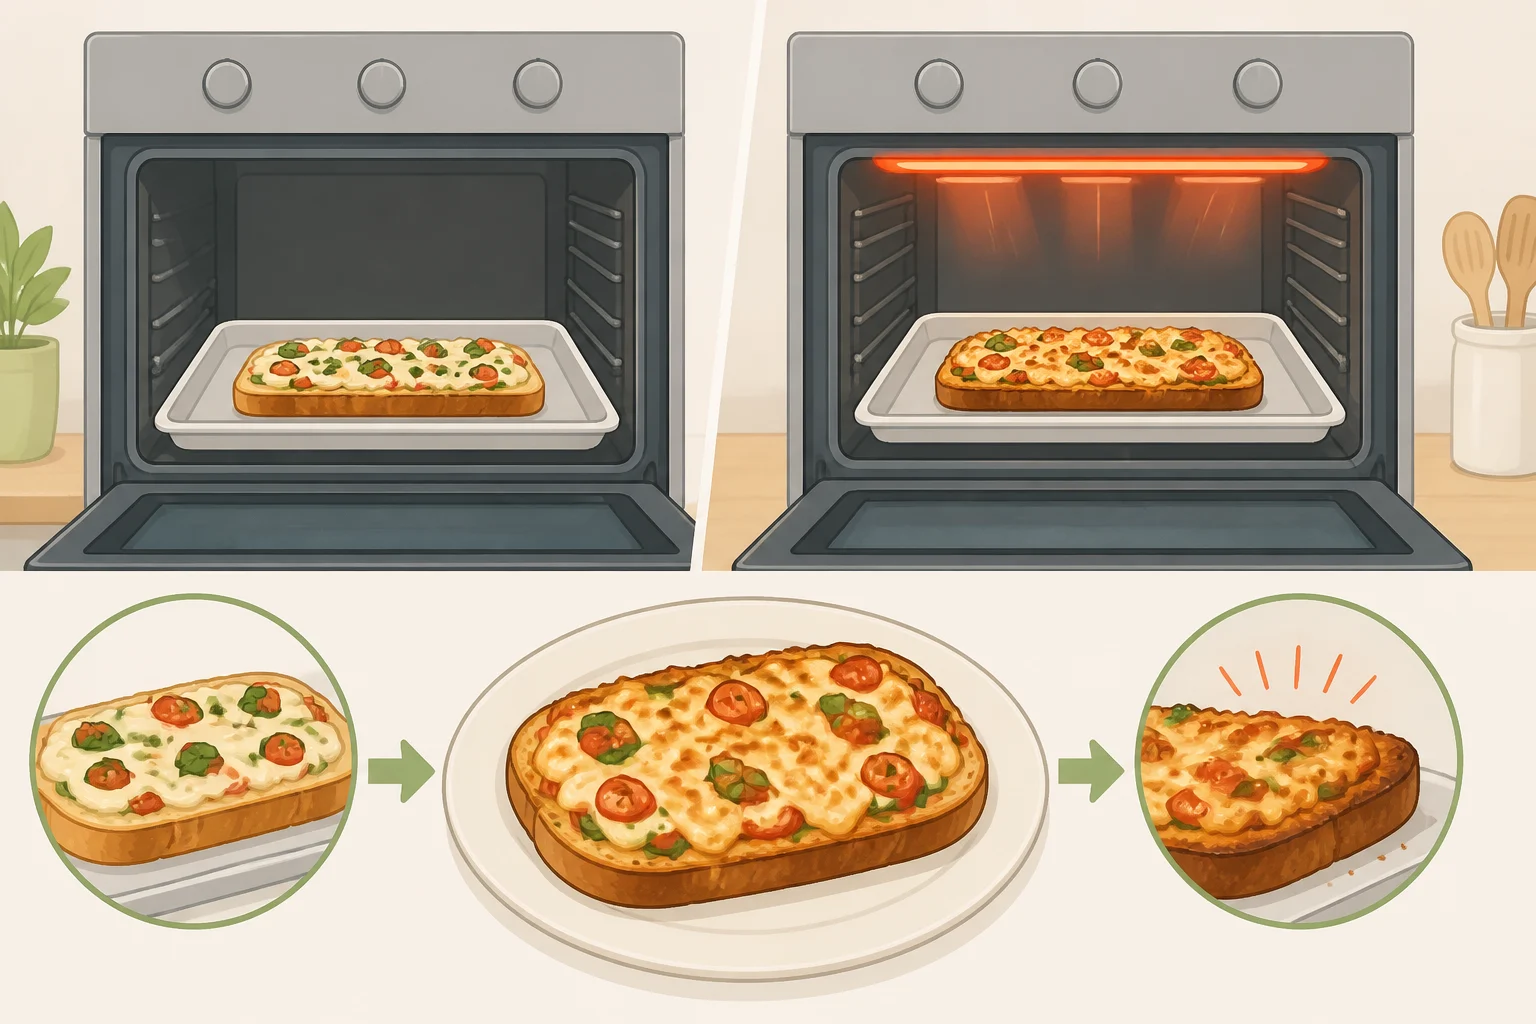
- Bake open-faced at 425°F for 8 to 10 minutes, until the edges are toasted and golden-brown. Delish Craft's version bakes at 400°F for the same 8 to 10 minutes; either temperature works, so watch the color rather than the clock.
- If the edges are browning before the center has warmed through, loosely tent that section with foil and keep baking until the butter has melted into the bread. Rack position and individual ovens vary enough that this is worth checking rather than assuming.
- For extra crispness, broil for the last 60 seconds only, per Delish Craft. Stay at the oven the whole time; broilers can turn golden bread black fast.
The bread is done when the edges are crisp and deeply golden and the butter has melted into the surface rather than sitting on top in a puddle.
Adjustments and variations
- Milder and sweeter: Skip the garlic powder and raw garlic and use roasted garlic only, for a rounded, caramelized flavor with less sharpness.
- Texture: Mash the roasted cloves completely smooth for even flavor in every bite, or leave them slightly chunky for pockets of concentrated sweetness, an option Delish Craft suggests.
- Spicier: Stir in 1/2 teaspoon red pepper flakes, an amount Delish Craft recommends for a spicier version.
- Herb swaps: Swap fresh rosemary or thyme for the parsley for a more earthy, savory result.
- Bread choice: A soft French loaf or sturdy Italian loaf both work well; Delish Craft also suggests sourdough for a tangier flavor and chewier crust.
Finish, store, and serve
Serve the bread warm, straight from the oven, when the butter is most fragrant and the crust is at its crispest.
One roasted head yields more cloves than the 3 to 4 the butter needs, and exactly how many extra depends on the size of the head. Whatever's left over refrigerates well and works nicely stirred into other dishes that could use a mellow, sweet garlic boost, rather than going to waste.
Keep leftover baked bread wrapped tightly in foil in the refrigerator for up to 3 days, then reheat it wrapped in foil at 350°F for about 10 minutes, per Delish Craft. Skip the microwave; it turns the crust chewy instead of crisp.
To freeze, assemble the buttered loaf, wrap it tightly in plastic wrap and then foil, and freeze for up to 3 months. Delish Craft recommends baking it directly from frozen, with a few extra minutes added to the bake time.
There's no single correct amount of roasted garlic for this bread. Start with 3 to 4 cloves, taste the butter before you spread it, and if it tastes mild, mash in another clove or a pinch of garlic powder before it goes anywhere near the oven.












Comments
Be the first, drop a comment!