



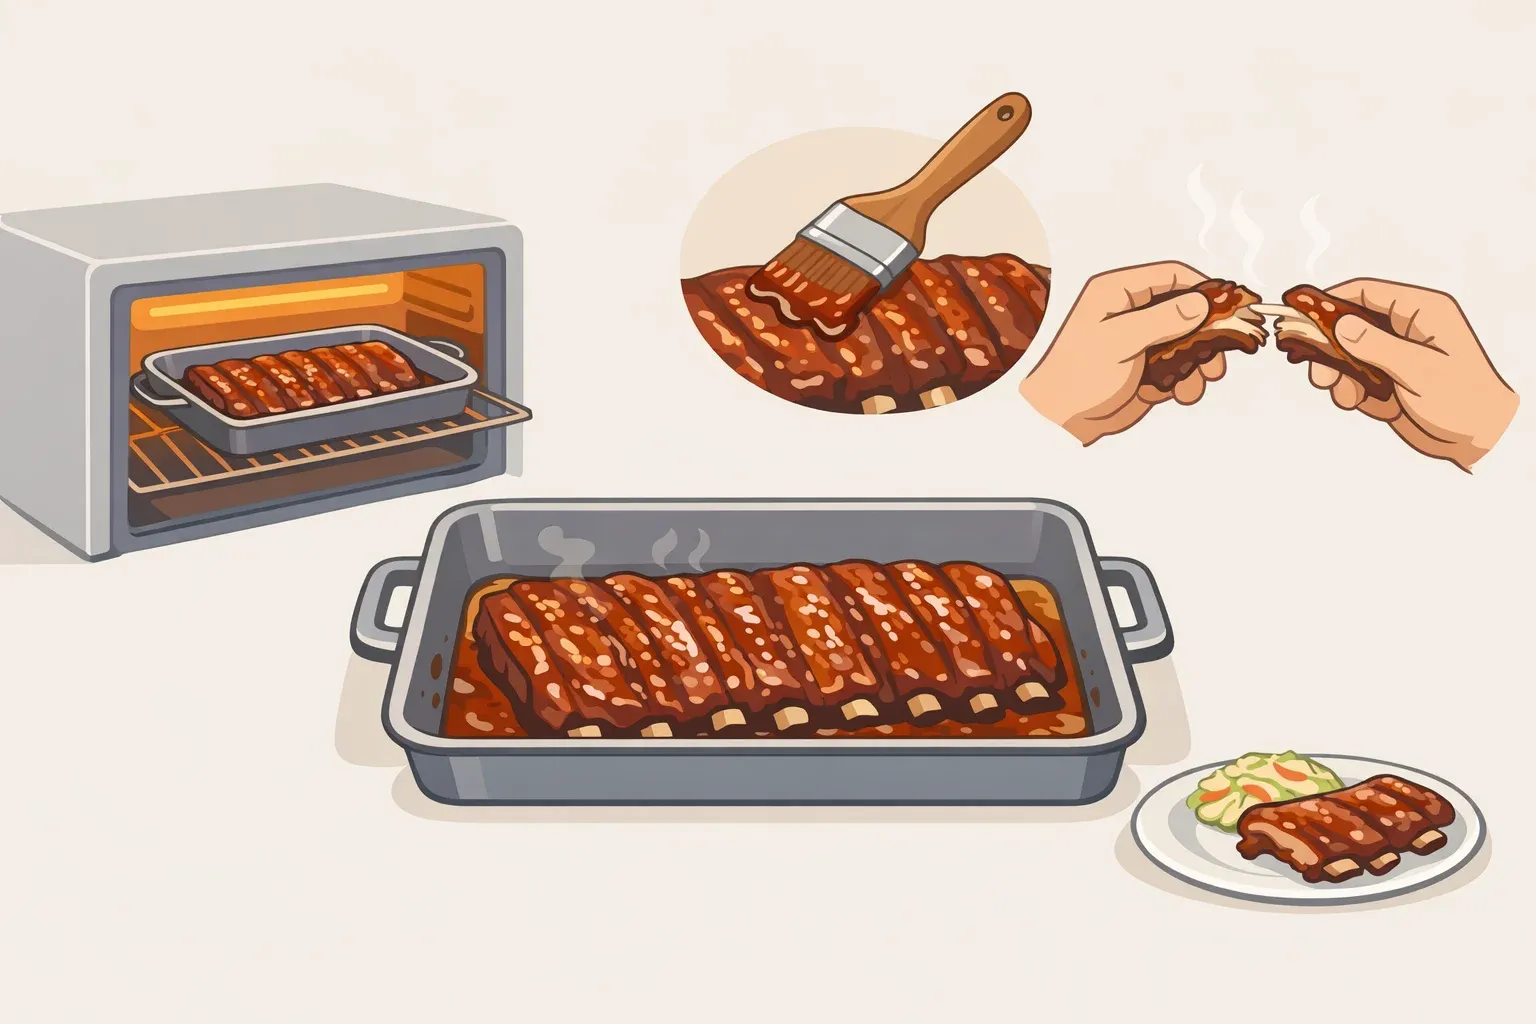
No grill, no smoker, no problem within reason. This guide walks through one tested method for making oven-baked baby back ribs that are tender enough to pull cleanly from the bone, with a caramelized, smoky exterior that closes most of the gap with backyard barbecue. Active prep runs about 20 minutes. Total time at 300°F is roughly 3 hours, per Gimme Some Oven.
The honest frame: this method doesn't produce true smoked BBQ. That requires live fire. As a grilling expert told The Takeout earlier this month, without a smoker you won't have true barbecue, but with the right seasonings you can get "really close." That's the ceiling, and it's worth knowing upfront.
A recipe developer at The Kitchn put it plainly last week: the oven is actually the ideal environment for ribs because it lets you cook them slow and steady, giving tough connective tissue time to break down without the unpredictable heat of an open flame. Controlled heat isn't a consolation prize. For anyone without outdoor access, it's a genuinely useful tool.
The target here is ribs where the meat visibly pulls back from the bone ends and lifts cleanly with a tug. Not mush, not competition bark, just well-rendered, cleanly separating pork with real smoky flavor. Every step below is built to that outcome.
What you need before you start
Equipment:
Rimmed baking sheet (one per rack, or one large enough to hold two)
Aluminum foil, enough to fully seal each rack; use more than you think you need
A toothpick
Skip the meat thermometer. Because connective tissue breaks down as a product of both time and temperature combined, a properly done rack can read anywhere from 180°F to 200°F, depending on how slowly it cooked. Temperature alone isn't a reliable finish line, as Serious Eats explains in a recipe updated last fall.
Ingredients:
Baby back ribs, one or two racks
Dijon mustard — a thin coat works as a binder and becomes undetectable after cooking
Dry rub built around smoked paprika, brown sugar, kosher salt, and garlic powder
Barbecue sauce for the finish
Liquid smoke is optional, concentrated, worth understanding before you use it (covered in the next section)
Rub timing: Apply the dry rub anywhere from two to eight hours before cooking. Serious Eats tested both ends of that window and found no meaningful difference in moisture or flavor. Pork ribs are thin enough that salt penetrates quickly. Season the night before or the morning of; either works.
Serving note: Gimme Some Oven gets roughly 8 servings from two racks, totaling 4 to 5 pounds. Plan accordingly before you shop.
The temperature decision:
300°F if you have about three hours. Gimme Some Oven uses this temperature with a 2½-to-3-hour bake, with 20 minutes of active prep and 2 hours and 40 minutes of cook time.
250°F if you have closer to four hours. Serious Eats favors this lower temperature for breaking down connective tissue more evenly and giving slightly more control over final texture.
Both produce good ribs. The steps below default to 300°F, with 250°F timing noted where it differs.
Building smoky flavor without a grill
The smoke question is worth settling before you start, because what you decide here affects what you do in step 3.
Quality liquid smoke is not an artificial flavoring. Brands like Wright's and Colgin are made by channeling real hardwood smoke through condensers and collecting what condenses as actual smoke flavor, just highly concentrated. A writer at The Kitchn called it a "cheat code" for cooks without grill access, and that matches the role it plays in tested oven-rib recipes. There's one important caveat.
Because it's so concentrated, the margin between enough and too much is narrow. Serious Eats uses 1 teaspoon across two full racks; half a teaspoon per rack is the working amount for baby backs. Tasting Table warns that using teaspoons rather than drops produces bitter, acrid meat. That's one of the easier ways to ruin an otherwise solid cook.
If you overshoot it: acidity cuts excess smokiness. A splash of cider vinegar, lemon juice, or bourbon in the glaze can bring the flavor back toward balance. If it's really overpowering, rinse the surface, re-season with mustard, brown sugar, and glaze, then finish under the broiler.
Prefer to skip liquid smoke entirely? Smoked paprika or smoked salt in the dry rub both contribute real smoky character with considerably less dosing risk. A grilling expert quoted by The Takeout favors one or the other as his go-to indoor approximation. The flavor sits a notch below liquid smoke, but is far more forgiving. Using smoked paprika in the rub alongside a restrained amount of liquid smoke builds depth from both directions without letting either one dominate.
How to cook baby back ribs in the oven
1. Preheat the oven. Set it to 300°F (or 250°F for the slower method) and position the rack in the middle. Line a rimmed baking sheet with foil.
2. Remove the membrane from the bone side of each rack. Slide a butter knife under the thin, silver-white membrane along the back of the ribs. Grip it with a paper towel for traction and pull it away in one piece. If it tears, start again from another corner. Leaving the membrane on creates a rubbery barrier that low-and-slow heat won't fix.
3. Apply the binder, rub, and liquid smoke. Brush a thin coat of Dijon mustard over both sides of each rack. Press the dry rub firmly into both sides, work it in, don't dust it on. If using liquid smoke, use about ½ teaspoon per rack: sprinkle it evenly over the meat side and rub it in with your hands, per Serious Eats. The rub and liquid smoke go on together, not in separate stages.
One rack fits on a standard rimmed baking sheet. Two racks need either two sheets or one large sheet pan. The racks shouldn't overlap, which would trap steam unevenly and affect how they cook.
4. Seal tightly in foil and bake. Place the rack meat-side up on the prepared baking sheet. Cover with a second sheet of foil and crimp the edges firmly on all sides. The foil traps steam, which is what tenderizes the meat, as Gimme Some Oven notes. A loose crimp lets steam escape, which means drier ribs. At 300°F, bake for 2½ to 3 hours. At 250°F, plan for 3½ to 4 hours.
5. Check for doneness, use both cues. At the 2½-hour mark (300°F) or the 3½-hour mark (250°F), carefully peel back one corner of the foil. Look for two things: the meat should have visibly pulled back from the bone ends, as Gimme Some Oven describes, and a toothpick pressed into the thickest part between two bones should slide in with almost no resistance, per Serious Eats. Rack sizes vary, so don't treat the first check as a pass/fail; it's a starting point. If either cue isn't there, reseal the foil and check every 20 minutes.
6. Sauce and broil. Discard the top sheet of foil. Brush the meat side generously with barbecue sauce enough to coat the surface thoroughly, not just a thin film. Switch the oven to broil on high, or crank it to 500°F if your broiler runs weak, per Serious Eats. Return the uncovered ribs for 3 to 5 minutes, watching the whole time. The sauce should bubble, tighten, and show darkened edges at the raised points. That caramelized surface is what separates these from plain baked pork. For a thicker glaze, brush on a second coat and broil 1 to 2 more minutes, per Gimme Some Oven. Don't walk away during this step.
7. Rest, then slice. Let the racks sit uncovered for 5 to 10 minutes before cutting. Slice between the bones and serve with extra sauce on the side.
What success looks like at each stage
After membrane removal: Bone side is clean, no silvery film remaining
After sealing: Foil edges are crimped tight on all sides, no visible gaps
At the doneness check: Meat has pulled back from bone ends; toothpick meets little resistance
After broiling: Sauce is bubbling and darkened at edges, not pale or wet
At rest: Ribs hold their shape when lifted; meat stays on the bone until you cut it
Troubleshooting:
Ribs still feel tough at the check: Reseal the foil and return to the oven. Check every 20 minutes. Time is doing the work; don't rush it.
Ribs taste dry: Almost certainly a foil seal issue. Steam escaped during baking. Next time, double-crimp the edges on all sides before putting them in, and add a tablespoon of water inside the foil packet before sealing.
Broiler isn't producing color: Raise the rack closer to the heating element, or extend the broil time by 2 minutes and watch constantly.
Where to take it from here
The base method is reliable: smoky rub, sealed foil at low heat, broiler finish. That structure holds as-is.
Once the method is second nature, the rub is the easiest thing to develop. Swapping standard paprika for smoked, adjusting the brown sugar ratio, or adding cayenne will shift the flavor profile without changing a single step. The technique stays the same; the results start to feel like yours.


















Comments
Be the first, drop a comment!