



This guide walks you through building a complete poppy seed chicken casserole: creamy filling, crunchy topping, 8 to 10 servings, in under an hour. By the end, you'll have a single reliable method plus two specific decisions that let you adapt the dish to your pantry and your crowd.
Prerequisites: A 9×13-inch baking dish, a working oven, and pre-cooked chicken. Both sources recommend a rotisserie bird; it eliminates the biggest time cost. Everything else is pantry standard.
Rotisserie chicken poppy seed casserole: the default build, then your two choices
Start here. This is the version to make the first time, or any time you're feeding a crowd.
Default ingredient list:
About 4 cups shredded rotisserie chicken, skin removed
Two 10.5-oz cans cream of chicken soup + 2 cups full-fat sour cream + ¼ tsp kosher salt + ¼ tsp black pepper
1 tablespoon poppy seeds, stirred into the filling
Topping: 6 oz ridged potato chips, lightly crushed, tossed in a resealable bag with 4 tablespoons melted salted butter and 1 teaspoon poppy seeds
Bake: 350°F, covered 25 minutes; topping added; uncovered 12 to 15 minutes; rested 10 minutes before serving
Decision 1: Which sauce?
The default two-can sauce is the most forgiving formula. More volume means more margin for uneven chicken distribution or a slightly dry bird.
The alternative uses one can of cream of chicken soup, 1 cup of full-fat sour cream, 4 oz of softened cream cheese, ½ cup of chicken broth, 1 tablespoon of lemon juice, and 1 teaspoon of lemon zest. The cream cheese adds density; the lemon cuts through the richness. It's a more layered flavor profile, less straightforward comfort food. It also requires one extra step of softening the cream cheese before mixing.
Decision 2: Which topping?
Using 6 oz of ridged potato chips tossed with melted salted butter and 1 teaspoon of poppy seeds results in a crunchier, less uniform, and saltier topping.
Crushed Ritz-style crackers combined with melted unsalted butter and 1½ tablespoons of poppy seeds can also work. Use the 2-cup figure here as the working standard for full 9×13 coverage. The cracker topping bakes into a fine-crumbed golden crust that integrates slightly with the filling at the edges.
The sodium consideration. Some recipes use approximately 640mg of sodium per serving using the cracker version with unsalted butter. The chip build with salted butter runs higher. If chips and salted butter are going in, keep the filling seasoning minimal.
Quick decision guide:
First-time cook or feeding a crowd: volume-forward sauce + chips
Want brighter, more layered flavor: cream cheese/lemon sauce + either topping
Want a neat, fine-crumbed crust: cracker topping
Want maximum crunch and saltiness: chip topping
High-sodium concern: cracker topping + unsalted butter + reduced-sodium soup, season the filling yourself
How to make poppy seed chicken casserole: step by step
Step 1: Preheat the oven to 350°F and butter the baking dish. Buttering the dish prevents the filling from sticking to the edges, where it concentrates and thickens during baking.
Step 2: Shred the rotisserie chicken. Pull the meat while the bird is still warm if possible; warm chicken separates more cleanly than cold. Make 3-4 cups. More chicken produces a denser, meatier result; less produces a creamier filling ratio.
Step 3: Build the sauce in a large bowl. Combine your chosen sauce ingredients and whisk until smooth. Add 1 tablespoon of poppy seeds and stir to distribute evenly. This amount is present but balanced; increase to 1½ tablespoons in the filling if you want a stronger poppy seed presence throughout. Season with salt and pepper now. Once the chicken goes in and the dish hits the oven, that window is gone.
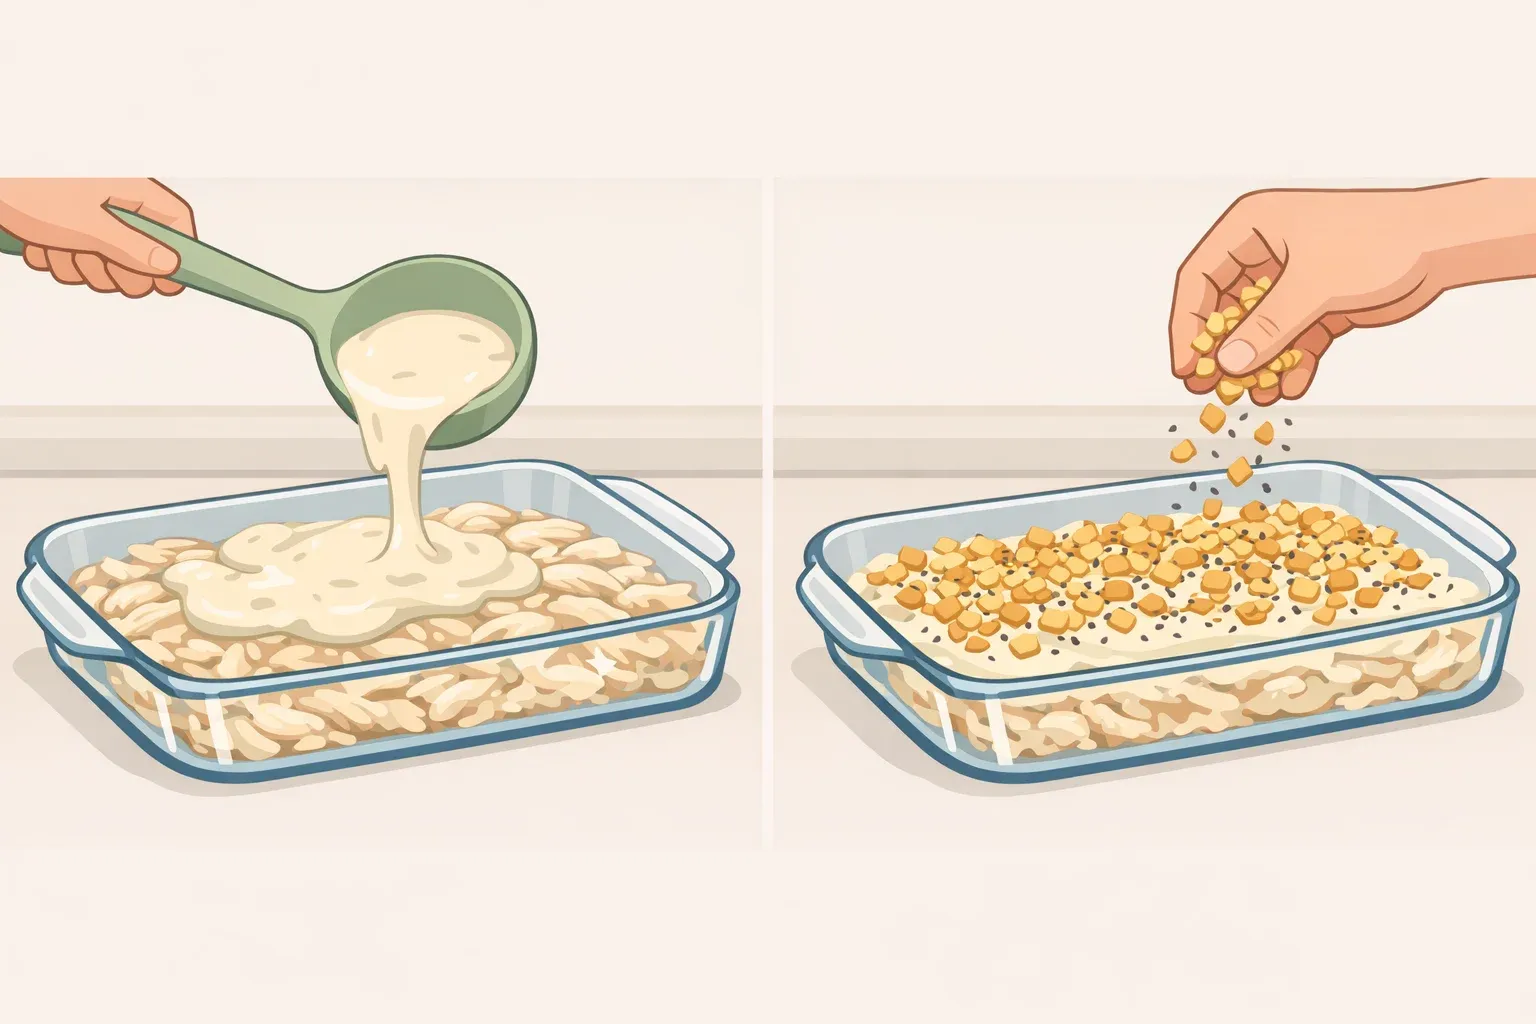
Step 4: Fold in the chicken and spread it into the baking dish. Coat the chicken thoroughly in the sauce, transfer to the buttered dish, and spread evenly to the edges. Thin spots in the corners will dry out before the center finishes; push the filling all the way to the walls.
Step 5: Cover tightly with foil and bake for 25 minutes. The covered phase heats the filling through without any crust exposure. Hold the topping until step 7; a cracker or chip topping added now will steam into the filling rather than bake crisp.
Step 6: Prepare the topping while the casserole bakes. For crackers: crush roughly 2 cups of Ritz-style crackers (see the quantity note above) and combine with melted unsalted butter and 1½ tablespoons of poppy seeds. For chips: lightly crush 6 oz of ridged chips in a resealable bag, add 4 tablespoons of melted salted butter and 1 teaspoon of poppy seeds, and shake to coat.
Step 7: Remove foil, add topping, bake uncovered 12 to 15 more minutes. Before adding the topping, check that the filling is bubbling at the edges; that confirms it has heated through. Distribute the topping evenly across the surface, then return to the oven. Pull the casserole when the topping is deep golden brown, and the edges are bubbling actively up the sides of the dish. Total bake time lands around 37 to 40 minutes.
Step 8: Rest for 8 to 10 minutes before serving. Served immediately, the filling runs. Rested, it sets into cleaner scoops.
What's flexible, what's fixed, and how to store it
The non-negotiables. Use full-fat dairy throughout: full-fat sour cream and, if going with a different version, full-fat cream cheese. Either way, it should be full-fat. The topping goes on after the covered bake phase, every time.
The flexible elements. Chicken quantity can range between 3 and 4 cups without materially changing the result. Poppy seed quantity in both filling and topping is adjustable upward to taste. Lemon juice, lemon zest, and cream cheese are flavor additions that change the profile, not the structure. Crackers or chips work in the same bake sequence either way.
Make-ahead (up to 24 hours). Complete through Step 4, cover tightly, and refrigerate. When ready to bake, let the dish sit at room temperature for 20 minutes, add the topping immediately before baking, and extend the covered phase by 5 to 10 minutes to account for the cold start. Do not add the topping before refrigerating.
Freezer. Freeze the assembled filling only, no topping. This can last for 2-3 months. Thaw overnight in the refrigerator, and add the topping immediately before baking. Leftovers keep refrigerated up to 4 days and reheat at 325°F covered for 20 to 25 minutes, or in 90-second microwave intervals per portion.
Nutrition, make-ahead value, and where to take it next
This recipe has approximately 390 calories per serving, with 26g of protein, 24g of fat, and roughly 640mg of sodium across 8 portions. These figures are approximate and vary by brand.
Make it once with the default build: double-soup sauce, chip topping, the covered-then-uncovered bake. Get a feel for the filling-to-crunch ratio and the saltiness level. The variable most worth revisiting on a second run is the sauce. The cream cheese and lemon version produces a noticeably different result: denser, brighter, less one-note. Whether that's an upgrade depends on who you're feeding, but it's a meaningful shift.


















Comments
Be the first, drop a comment!