



This guide walks you through making smash burger tacos from scratch and explains the single technique that separates a deeply crusted, fat-crisped result from a flat, forgettable one. By the end, you'll be able to execute this easy smash burger tacos recipe confidently on whatever cooking surface you already own.
The physics are simple. Pressing a beef ball onto a ripping-hot surface forces browning across roughly 90% of the patty's face, which is what defines the smash burger technique. The tortilla isn't passive, either. It sits directly under the beef as it sears, absorbing rendered fat and turning golden and crunchy. Total cook time runs 20–25 minutes, eight ingredients, one pan, roughly $2.75 per serving.
Think of it as a smash burger first and a taco second.
Smash tacos: the 3 rules that matter
Three non-negotiables determine the result. The equipment guide that follows is short and worth reading before you start.
The three rules:
80/20 beef, no leaner. At smash-burger thickness, a leaner grind produces a dry, chalky patty. The fat in 80/20 ground chuck renders during cooking and crisps the tortilla from below. A 90/10 grind yields a disappointingly dry result at this thickness.
Flour tortillas, not corn. Corn tortillas are thinner and more fragile. Corn tortilla is prone to falling apart after slightly too long on the surface; flour holds up and crisps cleanly. Use fajita-size, 5–6 inches.
The pan must be genuinely hot before the beef goes in. A surface that's merely warm produces steamed, gray beef. For an electric griddle, target 400°F; for a Ninja appliance, around 450°F. For a cast-iron skillet, you want it "very hot" before anything goes in. More on reading the heat without a thermometer in Step 3.
Equipment: what works and what's ideal
Cast-iron skillet: The most reliable stovetop option. Holds heat well when cold beef hits it. Add a tablespoon of neutral oil if it's not well-seasoned.
Electric griddle: The most consistent option for home cooks. Set to 400°F and let it fully preheat. A temperature-controlled griddle made a "huge difference" in repeatability.
Outdoor flat-top griddle (Blackstone, etc.): Ideal for batches. The wide, flat surface means four or more tacos at once and maximizes beef contact.
Stainless or non-stick stovetop pan: Works, but non-stick loses heat faster than cast iron. Add oil regardless of coating. Not recommended for more than two tacos at a time.
Batch strategy: Cooking more than two at once on a single skillet? Place finished tacos (un-topped) on a wire rack in a 200°F oven to hold while the rest cook. Do not stack them since steam kills the crunch.
You do not need a burger press. The bottom of a small saucepan or a heavy spatula works fine. What matters is applying firm, even pressure for long enough.
Ingredients and make-ahead prep
Everything you need, plus a simple workflow for getting ahead on a weeknight.
Ingredients (makes 4–6 tacos):
1 lb 80/20 ground beef, divided into 2.5–4 oz balls
4–6 small flour tortillas, fajita size (5–6 inches)
Salt and pepper
Sliced American cheese (or sharp cheddar)
Burger sauce: ½ cup mayo, 2 tbsp ketchup, 1 tbsp sweet pickle relish, 1 tsp paprika, ¼ tsp salt
Toppings: shredded iceberg lettuce, diced white onion, dill pickle chips
Prep is where time adds up, so front-load it.
Make-ahead workflow:
Night before or morning of: Make the burger sauce (keeps 5 days refrigerated), chop the onion, portion the beef into balls, and refrigerate loosely covered.
Right before cooking: Shred the lettuce, set out the tortillas, have cheese sliced, and a lid or metal bowl within reach. This cooks fast, and reaching for things mid-cook costs you crust.
One key tortilla tip: Keep the tortillas wrapped in a towel until the moment you press the beef on. Cold or dried-out tortillas crack when folded after cooking.
How to make smash burger tacos: step-by-step
Step 1: Make the sauce.
Stir together the mayo, ketchup, relish, paprika, and salt. Refrigerate. If you prepped this yesterday, skip ahead.
Step 2: Portion and press the beef onto tortillas.
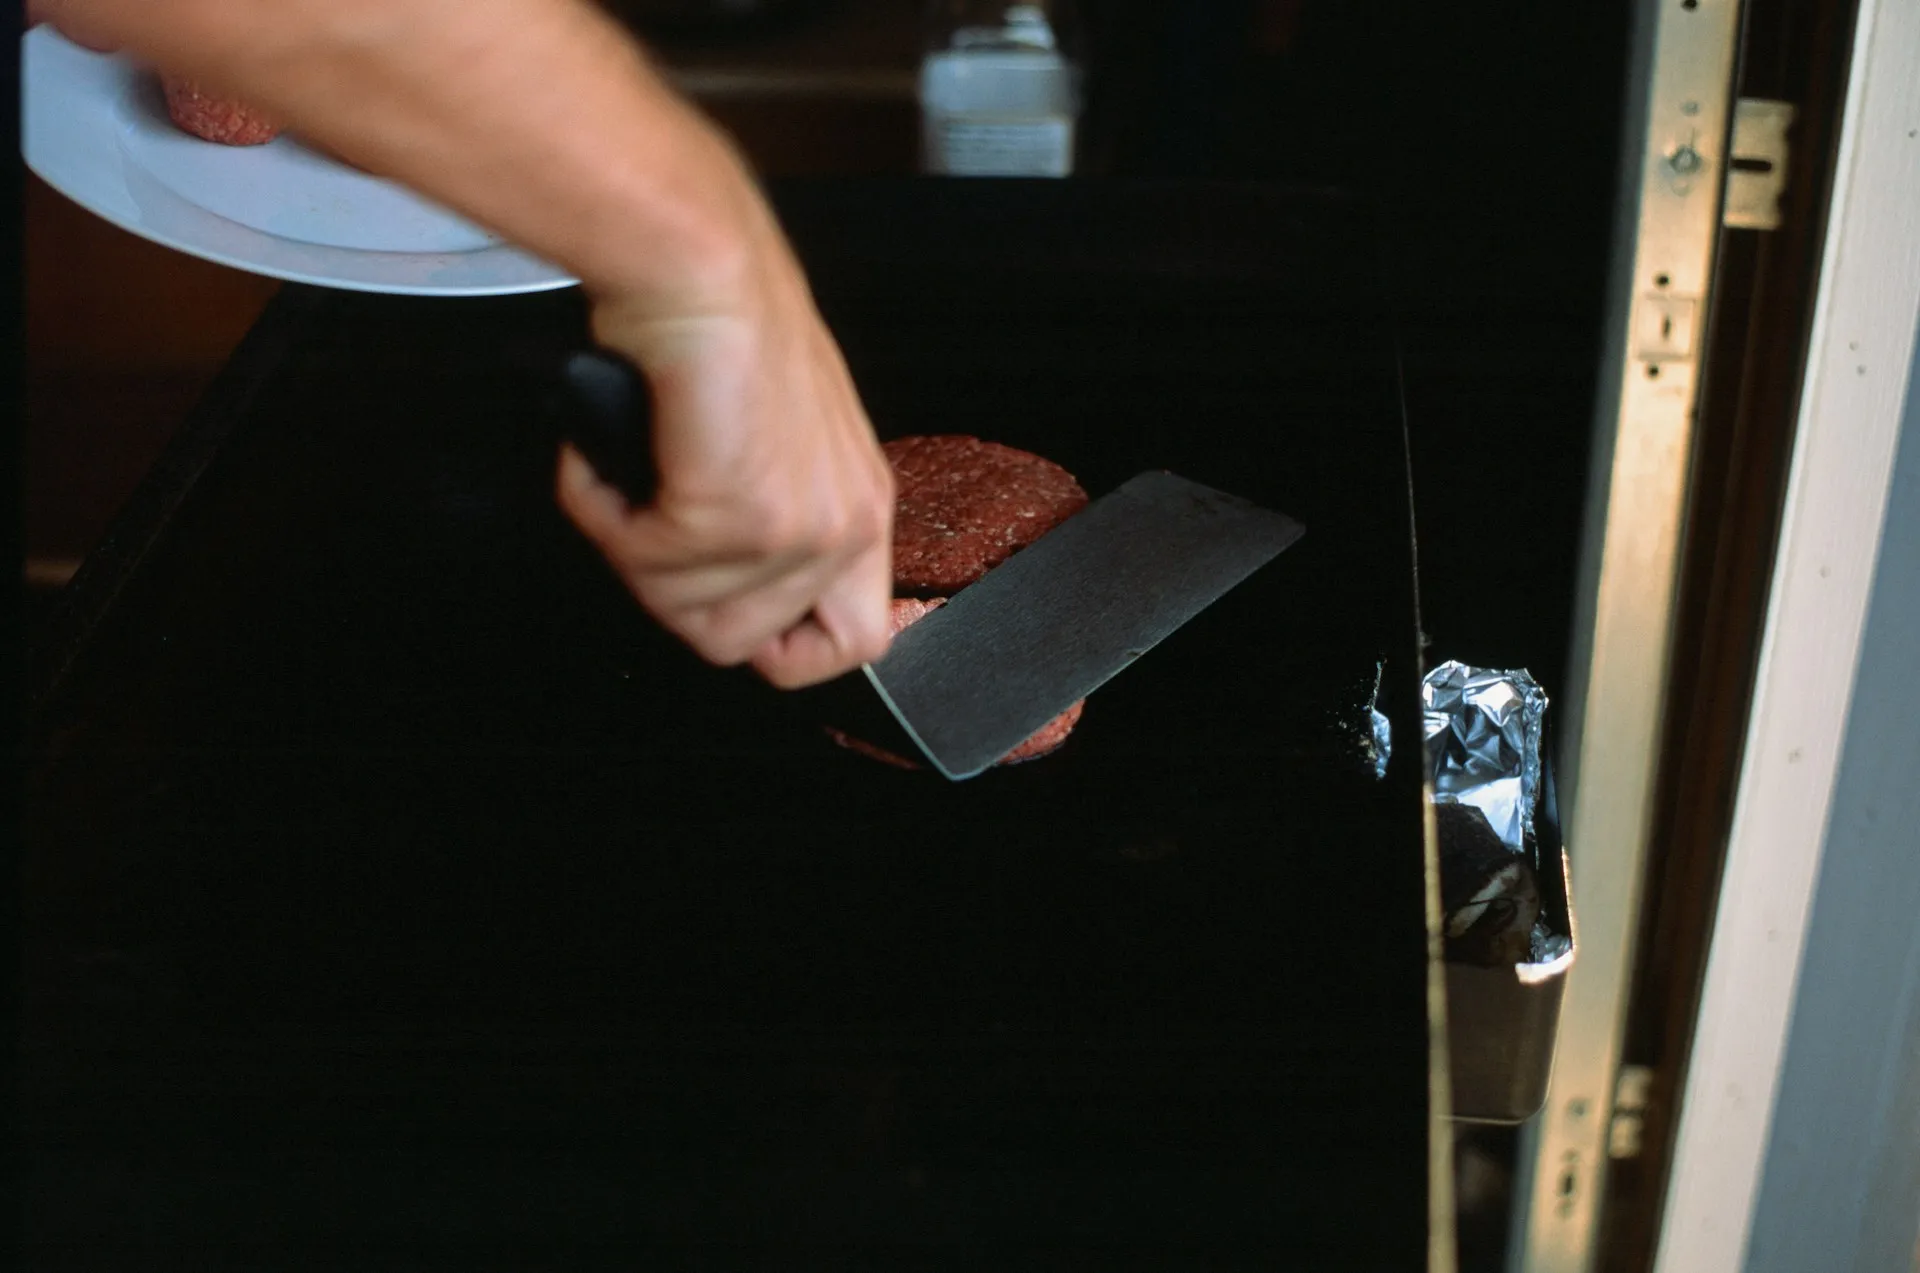
Divide the beef into equal balls: 2.5 oz works for 5–6 inch tortillas, 4 oz if you want a meatier result. Place each ball on one side of a tortilla and press it out into a thin, even layer that reaches close to the edges. Season with salt and pepper. The patty will shrink slightly as it cooks, so pressing just past the tortilla edge is fine. Don't leave a thick border of bare tortilla.
Step 3: Preheat the cooking surface until it is genuinely hot.
Set a cast-iron skillet over medium-high heat and leave it until the surface looks visibly dry and produces a faint shimmer; that's your signal. For an electric griddle, set it to 400°F and wait for the indicator to confirm it's there.
No thermometer? These are practical heuristics, not sourced measurements, but they work: hold your hand 3–4 inches above the surface. If you can hold it there comfortably for 3 seconds, it's not hot enough. You should only manage 1–2 seconds before pulling back. Alternatively, flick a few drops of water onto the surface, and they should skitter and evaporate almost instantly, not just sizzle.
Step 4: Smash and sear, beef side down.
Lay the tortilla beef-side down onto the hot surface. Immediately press firmly with your spatula or saucepan bottom and hold for 5–10 seconds. Sustained pressure is what creates browning across the patty's full face. Then leave it alone. Cook undisturbed for 2–3 minutes until the edges are visibly browned and lacy.
If the taco sticks when you try to lift it, the crust isn't set yet. It will release cleanly when it's ready. Don't force it you'll tear the crust and pull the patty apart.
Step 5: Flip, cheese, cover.
Flip the taco so the tortilla side is now on the pan. Immediately lay a slice of cheese over the beef. Cover with a lid or metal bowl for 60–90 seconds. The trapped steam melts the cheese while the tortilla crisps and turns golden. Watch it closely. At this heat, the window between golden and burnt is narrow. Check at 60 seconds, not 90, if the tortilla is browning too fast, pull the lid and let the residual heat finish the cheese.
Step 6: Top and serve immediately.
Transfer to a plate, add sauce, lettuce, onion, and pickles, fold, and eat. The tortilla softens quickly once toppings go on. Don't assemble ahead.
What goes wrong and how to fix it
A few specific mistakes account for most bad batches.
The beef is dry. The grind was too lean, or the patty cooked past its window. At this thickness, 80/20 is not optional. A 90/10 grind dries out fast. Two to three minutes on the first side is usually enough.
The tortilla burns before the cheese melts. The heat is too high, or the lid stayed on too long. After flipping, the tortilla crisps faster than you expect. Lift the lid at 60 seconds.
The taco turns soggy. Toppings went on too early. Lettuce and sauce release moisture quickly once they hit the warm tortilla. Build and eat, don't build and wait.
Leftovers and storage
Assembled tacos don't keep well since the tortilla loses its texture within minutes of being topped. The components last better when stored separately.
Cooked beef and tortilla (no toppings): Store in an airtight container in the fridge for up to 3 days. Reheat in a dry skillet over medium-high heat for about 3 minutes per side until the tortilla re-crisps and the beef reaches 165°F.
Burger sauce: Keeps up to 5 days refrigerated in a sealed container.
Freezing: Cooked beef and tortilla components (no toppings, no sauce) freeze for up to 2 months in freezer bags with the air pressed out. Thaw in the fridge overnight and re-crisp in a skillet.
Going further: one variation worth trying
Once the classic version is working and you know what the crust should look, smell, and sound like, one variation is worth the extra effort.
Street corn version. Press and sear the beef patty exactly as above. Skip the burger sauce, lettuce, and pickles. Instead, top with charred corn tossed in mayo, cotija cheese, lime juice, chili powder, and jalapeño, plus a creamy jalapeño-cilantro ranch drizzled over everything. The technique is identical; only the toppings change. Plan on 45 minutes total because the street corn and sauce require extra prep. Both can be made a day ahead and refrigerated for up to 4 days, which collapses cook night back to 20 minutes.
Two other quick variations: pepper jack cheese, sour cream, sliced avocado, and pickled jalapeños for a spicier profile or a Big Mac-style sauce built from mayo, yellow mustard, sweet relish, and garlic powder. Both work with the same technique and cook time.
Before your first batch
Watch for three things in sequence: lacy, browned edges before you flip; a clean release from the pan; a golden tortilla after the lid comes off. Those three signals mean it worked.
Make the burger sauce the night before and portion the beef in advance. That front-loading is what makes the actual cooking feel effortless. You're just pressing and flipping, not managing prep and heat at the same time. The street corn version is the natural next step from there: same technique, more ambitious toppings, and a make-ahead component that fits the same workflow.


















Comments
Be the first, drop a comment!