



Reviewed by: Y. Garcia
Most home cooks rely on guesswork when preparing expensive cuts of meat, checking the clock and hoping for the best. But here's what separates confident cooks from anxious ones—they use a reliable meat thermometer and know exactly how to get perfect results every time.
The difference between a perfectly pink prime rib and an overcooked disappointment often comes down to just 5 degrees. After testing dozens of thermometers in real kitchens, I've discovered which models consistently deliver restaurant-quality results and the simple techniques that eliminate cooking anxiety forever.
What Actually Matters When Choosing Your Thermometer
Here's what most people get wrong about thermometer shopping—they focus on fancy features instead of the three fundamentals that actually determine success in your kitchen.
Speed saves your cooking. Every second you spend taking readings means heat escaping from your oven or grill. The fastest thermometers consistently deliver the most precise readings, while slower models often drift or give inconsistent results. Professional-grade models deliver readings in 1-2 seconds compared to basic versions that take 15-20 seconds to stabilize.
Accuracy determines everything. Most top brands claim their sensors are within plus or minus 0.5°F accuracy when compared to dedicated thermocouples. However, real-world testing reveals significant differences—some models maintain precision across wide temperature ranges while others drift by several degrees at different heat levels.
Reliability builds confidence. The best thermometers work consistently whether you're checking a delicate fish fillet or monitoring a 16-hour brisket smoke. Digital thermometers have become essential kitchen tools because they deliver repeatable results regardless of your experience level.
Why this matters for your cooking: When you understand these priorities, thermometer shopping becomes simple. Focus on models with 3-second or faster response times, proven accuracy within 1°F, and solid construction that handles daily kitchen use.
Steps to Master Perfect Temperature Control
1. Choose Your Thermometer Type Based on Cooking Style
Your cooking habits determine which thermometer style serves you best. For quick temperature checks during grilling or roasting, choose an instant-read model that prioritizes speed and portability. These excel when you need fast verification without keeping your oven door open.
For monitoring large roasts or long smoking sessions, oven-going meat thermometers stay in the meat while cooking. These continuous-monitoring systems work perfectly for prime rib, whole turkeys, and other cuts requiring hours of cooking time.
Pro technique: Start with an instant-read model if you're choosing just one thermometer. They handle 90% of home cooking situations and teach you proper insertion technique without the complexity of wireless systems.
2. Test Accuracy Before Your First Cook
This simple step prevents expensive cooking failures. Calibrating your meat thermometer every six months ensures proper functionality, but you should test new thermometers immediately.
Fill a glass with ice cubes and cold water, stirring until temperature stabilizes. Insert the probe without touching container sides—it should read exactly 32°F (0°C). For the boiling test, bring water to a rolling boil and verify 212°F (100°C) readings.
Critical insight: Perform both tests because some thermometers maintain accuracy at one extreme but drift at others. A thermometer reading correctly at freezing might be several degrees off at boiling temperatures, which spells disaster for your expensive roasts.
3. Master the Professional Insertion Technique
Insert the probe tip into the thickest middle part of food, avoiding bones and fat. Here's the technique that changed everything for me: Insert the probe almost completely through your meat, then slowly pull back while watching the temperature display.
When the reading starts climbing again, you've found the center—push back to locate the coolest temperature point. This method ensures you're measuring the slowest-cooking part, which determines safe doneness throughout your cut.
For different cuts: Target the breast meat in whole poultry, avoiding internal bones. For leg of lamb, probe the thickest muscle section rather than thinner areas that cook faster.
4. Time Your Temperature Checks Strategically
Don't wait until your timer beeps to check temperature—start monitoring 15-20 minutes before expected doneness. This prevents the common mistake of discovering overcooked meat when it's too late to correct.
Account for carryover cooking in your timing. Meat continues cooking and increases temperature for several minutes after removal from heat. During resting, temperature can rise 5-10°F naturally, so pull meat 5 degrees before your target temperature.
Smart strategy: If targeting poultry at 165°F, stopping the cook at 160°F ensures perfect final temperature after resting.
The ThermoWorks Thermapen ONE: Why It's Worth Every Penny
After testing thermometers across multiple price points and cooking scenarios, one model consistently outperforms everything else. The ThermoWorks Thermapen ONE delivers readings in just 1 second while maintaining accuracy within ±0.5°F across its entire temperature range.
Each unit comes with its own Certificate of Calibration, proving your specific thermometer has been individually tested for precision. This isn't marketing—it's verification that your investment delivers professional-level accuracy from day one.
The build quality justifies the premium price. It's waterproof to 39 inches for 30 minutes, features an auto-rotating display that adjusts to any reading angle, and includes both sleep mode and instant wake-up when you open the probe.
Real-world advantages: The 1-second response time means virtually no heat loss during temperature checks. The probe automatically powers on when opened and shuts off when folded, eliminating battery drain from forgotten power switches. The bright display remains readable in any lighting condition, from bright outdoor grilling to dimly lit kitchens.
Why it matters: When you're cooking expensive cuts like prime rib or dry-aged steaks, accuracy and speed aren't luxury features—they're insurance against costly mistakes.
Smart Budget Options That Don't Compromise Quality
Not everyone needs a $100+ thermometer, but accuracy remains non-negotiable at any price point. The ThermoWorks ThermoPop 2 offers excellent performance with 3-second response times and accuracy within 1°F. It features auto-rotating display and waterproof construction similar to its premium sibling.
For continuous monitoring needs, focus on proven reliability over flashy features. Basic leave-in thermometers with wired probes often outperform expensive wireless models that suffer from connection drops or app complexity.
Budget reality check: Quality instant-read thermometers under $30 can deliver professional accuracy if you prioritize response time and build quality over advanced features. The Alpha Grillers Instant Read Thermometer provides accuracy within 0.2-2.5°F for under $20, making it accessible for occasional home use.
The key insight: Expensive thermometers typically offer speed, advanced features, and premium construction—but budget models can still provide accurate readings with proper technique and patience.
Perfect Prime Rib: Where Your Investment Pays Off
This is where precision thermometry transforms from convenience to necessity. Prime rib demands exact temperature control, with the critical doneness temperature for medium-rare at 125°F (52°C). The margin for error is tiny—5 degrees too high means disappointment, 10 degrees too high ruins expensive beef.
Start with quality ingredients: Prime grade is best but Choice grade works well, and plan for half a pound per guest for adequate portions. Season generously with salt and pepper, then chill the seasoned roast until surface temperature reaches 30°F (-1°C) for optimal searing.
The technique: Cook at 225°F (107°C) until internal temperature reaches 125°F for medium-rare. Remove and rest for 30 minutes—temperature will rise to between 130-134°F (55-57°C) for perfect doneness throughout.
Where your thermometer shines: Fast, accurate readings let you monitor multiple spots without significant heat loss. You can verify the temperature gradient from center to ends, ensuring even doneness throughout your roast.
For Leave-In Monitoring: The ThermoWorks RFX System
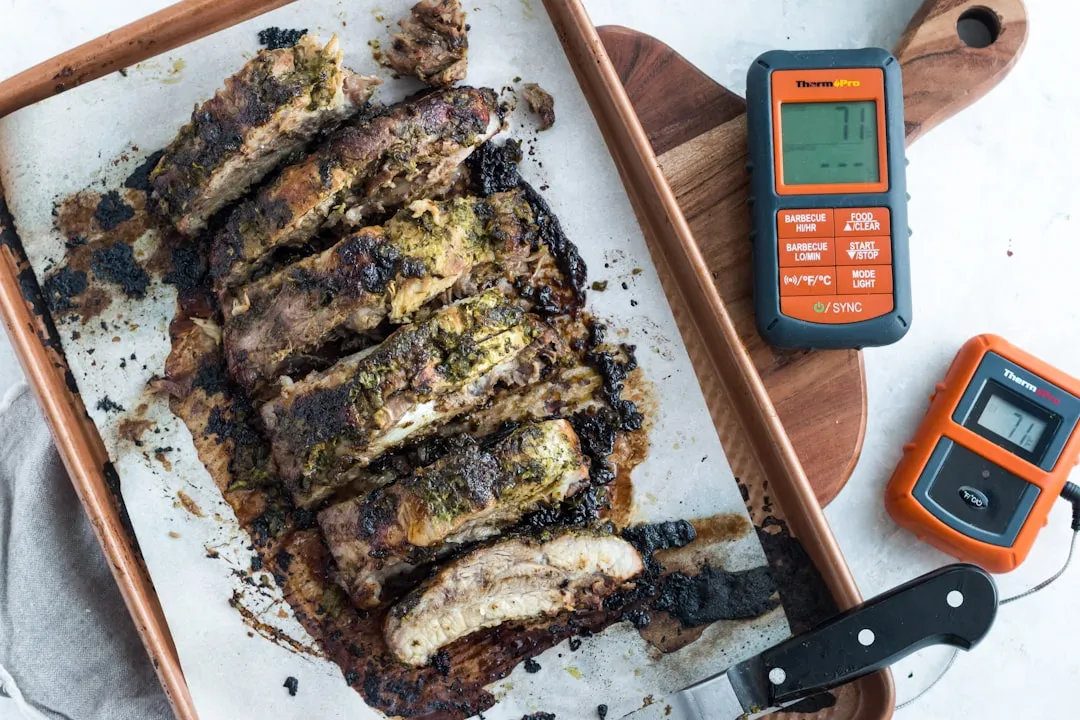
When cooking requires hours of monitoring, wireless systems become essential. The ThermoWorks RFX system provides exceptional range and accuracy with signal maintained over 1,500 feet in line-of-sight testing.
The ambient temperature sensor averages only 1.33°F higher than control measurements, while four internal sensors averaged just 0.02°F lower than control temperatures. This precision makes it ideal for competition-level barbecue or perfectionist home cooking.
The starter kit includes two probes; the RFX Gateway supports 50+ probes (50–70 probes depending on transmission rate). The WiFi and RF connectivity ensures reliable monitoring regardless of distance from your cooking equipment.
Cleanup & Maintenance
Clean probes immediately after use with warm, soapy water to maintain accuracy and prevent bacterial contamination
Store instant-read models with probes folded or covered to prevent damage to sensitive sensor tips
Test calibration every six months using ice water (32°F) and boiling water (212°F); check calibration before important cooks
Replace batteries promptly when low-battery indicators appear to ensure consistent performance and to avoid unexpected shutdowns or data loss
Troubleshooting
Problem: Readings seem inconsistent or inaccurate → Fix: Calibrate using ice water and boiling water tests; clean probe thoroughly to remove any residue affecting sensor function
Problem: Display difficult to read in different lighting → Fix: Check battery level and activate backlight feature; consider models with auto-rotating displays for easier reading angles
Problem: Slow response time affecting cooking workflow → Fix: Ensure full probe insertion into thickest meat section; upgrade to faster thermocouple-based model for improved response times
Why Professional Results Start With Professional Tools
Using color and texture as doneness indicators leads to overcooking because safe temperatures vary significantly between different types of meat. Visual cues fail when precision matters most.
Think about the math: A meat thermometer can save hundreds of dollars in medical expenses by preventing foodborne illness, making even premium models immediately cost-effective. Add the value of perfectly cooked expensive cuts, and the investment pays for itself in just a few meals.
The confidence factor: Professional chefs rely on thermometers not because they lack experience, but because precision trumps intuition when consistency matters. The best restaurants never leave expensive proteins to guesswork, and neither should your home kitchen.
Your cooking deserves the certainty that only accurate temperature measurement provides. Whether you're preparing weeknight chicken breasts or holiday prime rib, a quality thermometer transforms every meal from anxiety-inducing guesswork into confident, repeatable success.

















Comments
Be the first, drop a comment!